If you're not familiar with Shari's fantastic Online Quilt Shop you should certainly check it out.
*
Shari has an amazing selection of fabric, Aurifil thread, panels, kits, blocks of the month selections, and she's always sharing free patterns and inspirational blog posts & tutorials.
Shari is one of the most gracious and giving folks I know.
In true form -- she wanted me to give the "kit" to another lucky winner....
*
So... we drew again.
Mr. Random.Org Choose
And the winner is:
Congratulations Linda !!
You're the winner of the fabric and thread kit!
*
I'll send you an email so we can get your shipments in the mail to you!
*
Thanks again to those who took the time to comment and share.
I LOVE when we can come together to improve our skills.
*
Many thanks again to
and
for always sharing inspiration and fabulous products!
Before I go...
Sister Michele and I take an Eagle Spotting Road Trip
Annually every 3rd of March
Her Birthday!!
This year we broke records observing more than 35 eagles on our day-long trip.
Here are 2 neat shots that she snapped:
P41 in his new nest by the River (Deposit, NY) Image Courtesy Michele Morningstar
Mature Bald Eagle near Cannonsville Reservoir, Deposit NY - Image courtesy Michele Morningstar
I'm booking Lectures, Trunk Shows and Workshops for 2018 & 2019
If your Shop, Group or Guild is looking for programs or workshops I would love to hear from you.
Free Motion Quilting on Home Machines
Basics ~ A Quilters Doodles ~ McTavishing
A Full Day of Feathers
Ruler & Template Work
*
Wool & Needle turn Applique
Technique or Project Oriented Workshops available.
Send email inquiries to karen at redbirdquiltco dot com
or redbirdquiltco at gmail dot com
Note: The FTC requires that I tell you.... I occasionally use affiliate links on my blog and website. I may be compensated for purchases made using the links. Rest assured I will only share sales and promotions for products I know and love myself. Many thanks for your support of my very small business.
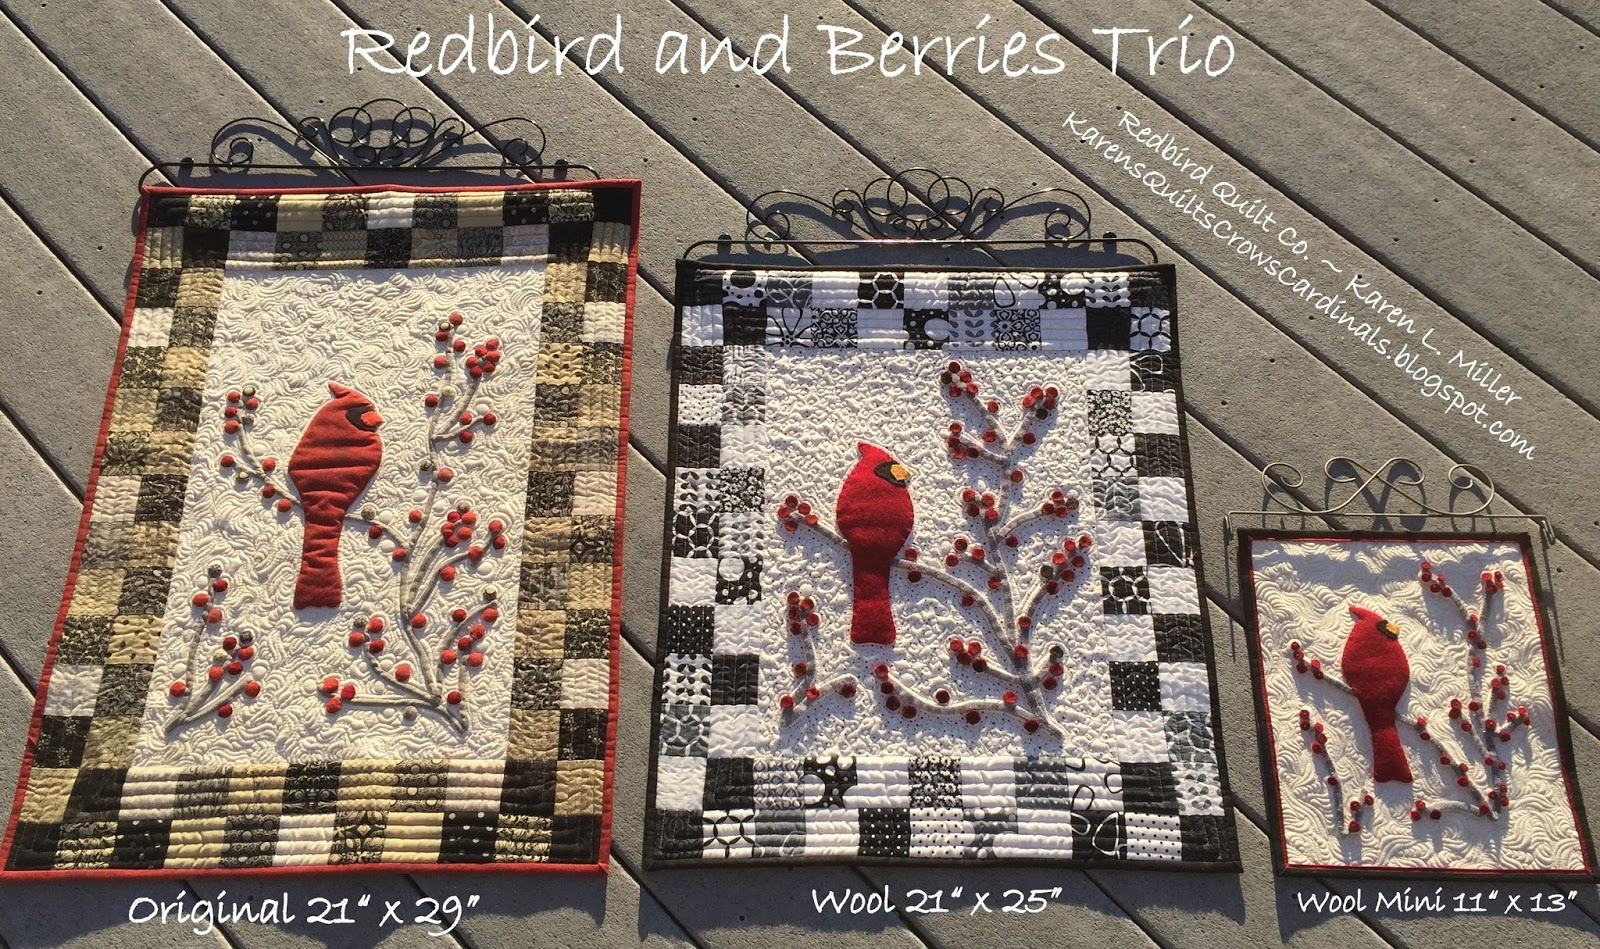
Mr. Redbird and Berries has gone mini!
Really Mini
A wee 11" x 13"
Isn't he sweet?
He was created for the O Tannenbaum fundraising event at our local Historical Society...
with a little Moda Muslin for the background and backing fabric...
using Aurifil 12Wt cotton thread to hand stitch the wool applique...
AND a bit of Aurifil 50Wt thread for fun free motion quilting
on a domestic machine...
It was the perfect opportunity to re-use the
flanged and mitered machine binding technique
(See the tutorial here)
using this beautiful fabric by Primitive Gatherings for Moda -- LOVE!
And yes, on that binding I used yummy Aurifil 12Wt thread for finishing with a machine. Oh! I love that little extra touch :)
I was sure to use 2 layers of Quilter's Dream 100% Wool batting -- it provides lovely texture!
Last I checked the silent bid was up to $75 - not a bad price for a mini quilt
Bidding is open for another week though -- you never know what it will go for.
More fun than a barrel of monkeys - that is how the saying goes...
You see I've been preparing for an upcoming Needle Turn Applique Workshop (more on that later) and wanted to stitch-up a sample for the shop display.
Now what to stitch ?
I looked through my needle turn UFO's and was inspired by a Cone Flower (Echinacea) that was part of a larger block in Blackbird Designs "Quilting the Garden" book.
You remember ? This one...
You can see more images of my "Quilting the Garden" blocks by clicking here.
After scouring the internet (and peeking in my own back yard) I proceeded to draw a "new to me" version of the cone flower. I added a couple of leaves that would enable me to teach inner and outer points (basically -- I made them up!!) and....
Viola! Meet my new mini - perfect for teaching basic Needle Turn Applique techniques.
Here's where the barrel of monkeys come into play... This little guy so much fun to prepare.
1. Needle Turn Applique - Oh it felt so good to be back in the groove.
I chose fabrics from my stash of Blackbird Designs Chelsea Boutique for Moda. It's always hard to part with these precious fabric swatches... The Chelsea Boutique line is, by far, one of my favorite...
Also, I had loads of fun choosing just the right Aurifil 50Wt Mako Cotton thread for my needle turn hand work. Aurifil 50Wt is very similar in thickness to a Mettler 60Wt thread and works perfectly for Needle Turn applique. Here is an image from my Instagram feed that shows the fabric and thread selection in-process - sew much fun!!
A photo posted by Karen L Miller (@redbirdquiltco) on
You can learn more about my Needle Turn technique by checking out my free blog tutorial "Teardrops of Love - a Needle Turn Applique Tutorial". I share my favorite tools along with detailed and illustrated steps outlining my technique for creating beautiful applique. Read and see for yourself at this link. Teardrops of Love Tutorial I would LOVE to get your feedback.
As indicated in the tutorial, I use a plastic or freezer paper template to cut out and mark the needle turn line on the right side of the fabric. If possible, I'll use a soapstone pencil to mark the design -- otherwise SewLine Leads work very well. I also use my Clover Hera Marker to score the turn line so it folds under easier. (More details in the Teardrops of Love Tutorial).
next I thread or pin baste my pieces onto the background and use Aurifil 50Wt Mako Cotton thread and Jeana Kimball's Foxglove Cottage Size 10 or 11 Straw Needles to stitch them down.
Here is an image from my Instagram account that shows the front and back of the needle turn. It's been a few months since I've stitched -- so the stitches are a little inconsistent.
But just like Free Motion Quilting, the more you practice, the better you get.
A photo posted by Karen L Miller (@redbirdquiltco) on
Once the applique is stitched, I used the Hera Marker to "score" or crease the fabric at 1" on-point lines across the quilt background. These are used a reference marks for the continuous curve or Orange Peel quilting (coming up in a few steps).
The next fun monkey in this barrel was....
2. Free Motion Quilting Feathers - I Love, Love, Love to quilt feathers
Oh my goodness feathers are fun!! I wasn't quite sure how to quilt this mini but I decided to stitch some feathers and I'm so happy I did!! Whenever I free motion quilt feathers on my domestic machine, I mark the feather spine with a blue water/air soluble pen -- you can also use a Hera Marker (by Clover) or Sew Line leads to mark the feather spine. This is what it looks like after I've marked the spine.
Now that all my marking is complete, I layer the quilt top, batting and backing and pin baste the mini. Because I really wanted the quilting to show, I used two layers of Quilter's Dream - Dream Wool batting. I love how wool quilts... If you've not tried it you should give it a go!
Before I get started stitching I gather all my 50Wt Aurifil thread to determine which color will work best. I try to use a color that will complement the background fabric. Always unwind the thread from the spool to test it against the background fabric. On the first go-round I misjudged the color match and needed to rip out a bit of feather. I recovered nicely and switched to Aurifil color #2314 for a perfect match.
To stitch the feathers, I start at the bottom of the spine stitching bump back feathers up the right side of the spine and adding a top pearl. Next, I travel (stitch) down the spine and begin again, stitching bump back feathers up the left side of the spine. It's so rewarding to create feathers. Even if they are not perfect they are pretty. In this case I also echo stitched the cone flower and stem/leaves...
Here are a couple progress shots:
Oops - sorry for the image color changes. Some images were taken using my machine lighting and some were taken using full spectrum lighting. Rest assured this background fabric is beautiful no matter how you light it.
3. Free Motion Quilting an Orange Peel Design - a simple motif that provides so much texture
Moving on to the remainder of the quilting.... I had already marked the background fabric with 1" on-point grid lines (See image above). I continued using Aurifil 50Wt #2314 to stitch continuous curves on the background fabric, crossing over at the grid intersections. I stitched one direction and then back in the opposite direction, moved to the next line in the border and repeated.
Once I had enough lines stitched on one axis, I stitched a few on the other axis. It came together wonderfully.
I've recorded a couple of video's for stitching the continuous curve (Orange Peel Grid design) on a domestic machine.
The one difference is that on the Cone Flower Mini I only marked the grid design, I did not stitch it.
4. A New to Me Flanged/Piped Machine Binding - wow - fast, simple and really pretty.
And last but not least in the barrel of monkeys was this neat new Flanged/Piped MACHINE binding.
I watched a couple of different tutorials for this binding and then tweaked things to meet my requirements. Initially I was going to add some actual rope piping, but I decided to take baby steps instead.
Here are the steps and measurements that worked for me. If you're interested in a real tutorial with images, please leave me a message in the comments and I'll pop that out to My Tutorials page.
1. Choose a primary binding color (rose) - and an accent/piping/flange color (teal).
2. Cut the primary color (rose) 1 & 7/16" wide (by WOF for number of strips necessary)
3. Cut the accent/piping/flange color 1 & 3/4" wide (by WOF for number of strips necessary)
4. Piece the WOF strips of each color into the correct length with mitered (or diagonal) joints to help cut down on bulk.
5. With the single length of the primary (rose) and the same length of the accent (teal), sew them together with a 1/4" seam allowance (long edges). I'll refer to this is the binding.
6. Now fold the binding in half, wrong sides together (TIP: Press wrong sides together with a steam iron, avoiding pressing the actual fold (I didn't want to flatten the fold of the accent color). Pressing will help keep the binding raw edges aligned.
7. Next, align the binding raw edges - PRIMARY COLOR DOWN with the edge of the trimmed quilt ON THE BACK SIDE and stitch in place with a 1/4" seam allowance. NOTE: This is being attached to the back, not the front of the quilt. Follow the standard process for attaching a binding to a quilt sandwich, folding for mitered corners as you go.
8. NOTE: When I get a 1/4" from the corner, I always stop and stitch a 45 degree line to the corner of the quilt before turning and continuing to stitch from the top. This helps give a really neat finished mitered corner.
9. NOTE: A few months ago I learned how to Miter finish binding and I just love it. If you aren't sure how to do this, check out this Lisa Bongean/Fat Quarter shop video -- remember though, this is just how I miter finish the binding (good stuff around the 2:00 minute mark).
10. Next, finger press the finished binding to the front of the quilt, smoothing the seam that you just stitched. I avoid pressing at this point because I don't like to press my wool batting. So finger press the batting from the back to the front and be sure the wrap is firm against the raw edge.
11. Use Clover Wonder Clips to secure the wrapped binding in place on the front of the quilt - being careful to fold and secure crisp mitered corners.
12. Now to stitch the binding to the front of the quilt....
12a. Use a 90/14 needle with a complementary color Aurifil 12Wt thread on top and 50wt in the bobbin.
12b. If you have one, use a walking or even feed foot on your machine.
12c. Start stitching with a small stitch length (to lock your stitches) and increase the stitch length to 3.0 or a good "top stitch" length for your machine.
12d. Stitch just outside of the primary/accent color ditch with the Aurifil 12Wt thread all the way around the perimeter of the top of the binding. It came out wonderfully -- I really LOVE how it looks, front and back!!
A photo posted by Karen L Miller (@redbirdquiltco) on
Here's a full shot of the front:
And a full shot of the back with folded hanging sleeve corners included.
And no new quilt is complete unless we've taken a picture on the dock:
Many thanks to Aurifil Thread, Moda/United Notions Fabrics and Quilter's Dream batting for their awesome products. I just love it when a plan comes together -- and it really was more fun than a barrel of monkeys.
I would love to hear your feedback - would you like a step by step image tutorial of the binding or any other part of the project ?
Oh - one last thing: I'll be using this mini in my latest workshop, Needle Turn Applique - a Techniques Workshop. I'll be teaching it for the first time in Arcade, NY at Creekside Fabrics, Quilts and Yarns on October 3rd.
To learn more about my upcoming events - visit my Facebook Events page. No Signon Required.
And while you're there -- be sure to look for the Original Hearts Content Decorative Pillow
The 2nd Heart's Content Decorative Pillow
It will also be located in the Moda/United Notions booth...
The pillow shown above is the 2nd Heart's Content Decorative pillow - made from Jelly roll strips leftover from the original Jelly Roll -- I love that you can make two pillows with one Jelly Roll.
Both "quilts" are sporting shiny new labels -- attached just prior to being packaged for shipping...
Both quilts were
designed and shared as tutorials (aka recipes) on the Moda Bake Shop!
made with the lovely Heart's Content fabric by Edyta Sitar/Laundry Basket Quilts for Moda
made using Aurifil thread and Quilters Dream Wool batting
quilted on my home sewing machine (Janome Horizon 7700)
I'm just so honored to have them there - and very thankful to Moda/United Notions and the Moda Bake Shop for providing many the opportunity to design with their awesome fabric... It's so much fun!!
If you happen to see either quilt - I would LOVE to see pictures -- just email to redbirdquiltco at gmail dot com... post on my Facebook page (RedbirdQuiltCo) or on Instagram tagging @redbirdquiltco -- Thank you so much!!
Have a fantastic time at Paducah! Tell the crew at the Moda booth "Hello" and "Thank You" from me....
Maybe next year I'll meet you there...
Hugs,
Karen





.JPG)
.JPG)
.JPG)
.JPG)
