Showing posts with label Bunny Hill Designs. Show all posts

Monday, December 8, 2014

Wool Flower Tutorial and Giveaway -- A Winner!

Many thanks to everyone that played along in the Little Wool Flower Tutorial and Giveaway.
It was sew much fun to read about the projects that you have underway.  I'm sending quilty blessings to those that have Christmas deadlines -- may your stitches be straight and finish be great (and on-time). 

Also special thanks to the Redbird Quilt Co Facebook fans -- the tutorial was shared wide and far and it's always exciting to see new faces and excitement on Facebook -- thank you!

Now... on with the winner:  I have these 5 pieces of beautiful Bunny Hill Pastel Wools to share...

Between the blog and Facebook participants there were a total of 88 entries for the giveaway.   

I engaged Mr. Random Generator to choose a  winner - drum roll please!
Entry number 51 is :
Congratulations aus_chick!  I've sent you an email !  Woohoo -- I know you're going to LOVE this wool.

More Giveaways: 

For those of you that would like to get in on some other awesome Giveaways this week -- please jump over to Sew Mama Sew's Giveaway Day posts (below).  There are hundreds of talented bloggers giving away fantastic prizes (I saw many great Aurifil giveaways!!)


Sew Mama Sew Giveaway Post for Handmade Goods

My friend Jan at Sew and Sow Farm blog is giving away two different collections of Aurifil thread!!  Really -- what an awesome giveaway.   You can see her post and get in on this great giveaway by clicking here.  Tell her Karen says HI!!

Thanks again for the fun all - have a blessed week.

Karen

Wednesday, December 3, 2014

Little Wool Flower Tutorial with Giveaway

Call me delinquent on the wool flower tutorial and serve me up 50 lashes with a wet noodle!! 

Life (and grandkids, and work, and holidays, and shopping) definitely jumped in front of me the last 10 days and stole my time.   I am though, up for air, and happy to be back!  

Many thanks for all the kind comments
and feedback on the 
Moda Bake Shop Heart's Content Pillow.  
I loved putting that sweet pillow together
and sharing it with everyone!
I hope you find 100 different ways to use the pattern AND the tutorial.  If you missed it, you can read the introduction on my blog here and follow links or go to the Moda Bake shop recipe directly by clicking here.

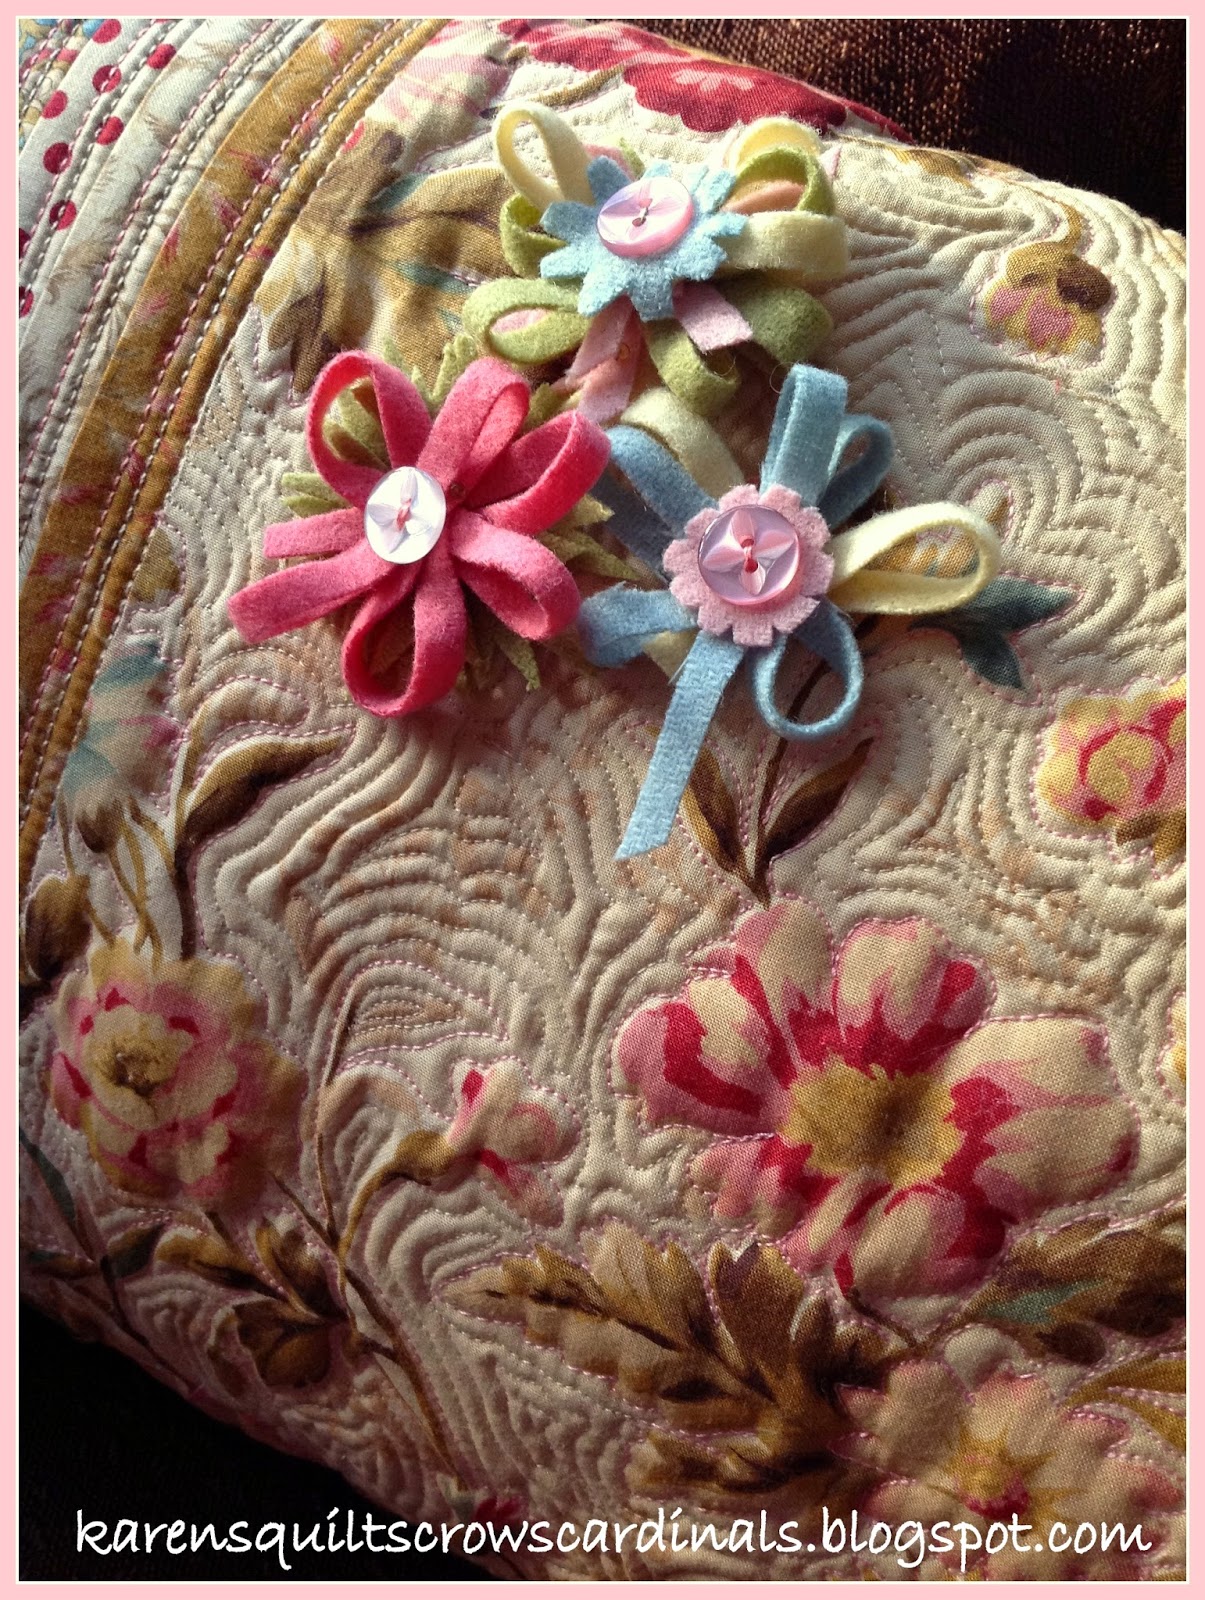
Now to share a quick (well as quick as I can be ;) tutorial for the little wool flowers that adorned the Heart's Content pillow.
The flowers are really very basic and will probably work best if you use your own style - but I'll share with you how I put them together. 
Supplies:
  • Start with some quality wool.  I used Bunny Hill Designs Pastel Wools and sliced them into 1/4" by 8" strips (longer is ok too).
  • You'll also need some scraps of the pastel wools for flower accents.
  • A few buttons, nothing fancy (although fancy flower buttons would look sweet!)
  • Some good quality thread - I used Aurifil Mako Cotton 12 Wt thread - it never lets me down.  You could also use Aurifil Lana Wool or Aurifil Floss.
  • You'll need a scrap of freezer paper to prepare some small wool accents
  • You'll also need a good needle - I use Bohin Crewel/Embroidery Needles in Size 5 (my fav)
  • It's always helpful if you have a pair of serrated edge scissors (Elan are my fav but I hear that Karen K. Buckley's Perfect Scissors are fantastic too)
Start by cutting one or two strips of each of the pastel wool colors.

I used a rotary cutter and ruler to cut mine about 1/4" wide by whatever length wool you have.
If you need more wool than a single strip provides, just cut more!

Lets make the pink flower for the tutorial sample:

Supplies for the pink flower:
Lets start by making the looped section of the flower.  Thread and knot a 12" length of thread.

Aurifil Mako 12Wt in color #2375 matched the Bunny Hill Bright Pink wool perfectly.  

Now fold over one edge of the wool, making about a 1" loop.  Stitch up through the double layer and back down again.
Make another loop, it doesn't matter if it twists.  Stitch up through all layers and back down again. 
If you want to secure it in a certain position, take another stay stitch to hold the loop at the desired location.
Keep looping and stitching until you're happy with the placement and fullness of the flower.   When you're satisfied, take a couple of short stitches on the bottom side of the flower to secure / knot.
Now, lets prepare some "greens" to be stitched behind the pink loops.
My looped section worked out to be appx 2" in diameter.  So I targeted the same size for the greens.
I marked a 2" square on freezer paper and drew a circle within it.
I cut out around the circle leaving at least a 1/4" extra outside of the pencil line.
 Place the rough cut freezer paper onto the wool (shiny side down) and press using a medium heat, dry iron. 
Hold the iron still for 5-8 seconds or until the freezer paper sticks to the wool. 
NOTE: Use care to NOT burn the wool (an iron that is too hot could burn the wool fibers).
Using serrated edge scissors (they work best because they don't push the wool), cut on the drawn circle.  Leave the freezer paper attached for now.
Once the circle is cut out, trim some V's into the circle all the way around.  You can see I marked mine with a pencil before beginning.  This is not required, but OK if it makes you more comfortable.
Here is an image with the larger V's cut out.
Next cut out some more V's all the way around.  Again it really doesn't matter exactly where or how deep you cut.  It will be beautiful!
Once you've finished the 2nd round of V's, you can remove the freezer paper and you have created one background green.  I used two on my pink flower - just to make it more full.   Prepare a 2nd green if you so desire.
(The color is really off on the picture below - my apologies).  
OK, now stitch the green background to the bottom of your looped flower.  Just take two stitches through all layers to secure.  Add a 2nd green background if you like.
Once you've stitched your 2nd green, flip the flower, add a button and secure it in place with a few stitches.  Knot the thread on the back side of the flower and leave thread attached so you can use it to secure the flower to the pillow.
Now that you've made the pink flower, the others are pretty much the same, except I choose to use a variety of colors and add top accents rather than greens.   

On the multicolored flower below,  I snipped (on an angle) the pale pink loops when I was done stitching.  That gave it a neat look.
On the blue and yellow flower I left a long tail and used a pink accent on top.
It's so cute.
Make more flowers if you like -- be creative and have fun!
Attach the flowers to the pillow with the excess thread.
Speaking of having fun -- how about a giveaway?
*
I have several strips of Bunny Hill Wool remnants leftover for one lucky reader.
*
These strips are about 4" wide and roughly 8" to 12" in length.  They would work perfectly for making wool flowers.

To enter the giveaway, leave a comment below letting me know what quilting project you are currently working on.   Are you a no-reply blogger?  If so, please leave an email address too!

For an extra (optional) entry, hop over to the Redbird Quilt Co Facebook page and share the Redbird Quilt Co wool flower tutorial announcement with your Facebook friends.  Be sure to 'Like' and leave a comment on the Facebook post letting me know you shared. 

The giveaway is open until 11pm EST Sunday, December 7th and a a winner will be announced Monday, December 8th.

I leave you with a beautiful picture that my very talented sister Michele took just this morning at her country home in Pennsylvania, USA. 

A Northern Cardinal, our favorite bird and a reminder that Mom is always watching over us.

Enjoy!
Image Courtesy Michele Morningstar aka my very talented sister!
Thanks for stopping by.
Hugs,
Karen

PS - don't forget, you can follow me on Pinterest and Instragram and Twitter too!

Sunday, November 23, 2014

Heart's Content Pillow on the Moda Bake Shop

Hi fellow quilters!
I'm excited to share a new pillow tutorial with you today at the Moda Bake Shop!  
** Link updated to PDF download -- Original Recipe missing from the Bake Shop **
It's made with the fabulous new fabric line, Heart's Content, by Laundry Basket Quilts for Moda.

 I fell in love with the soft colors and delicate prints of this line created by Edyta Sitar. 
*
This cute home deco pillow will add a touch of class to a couch, loveseat or bench.
 What's neat is with a single Jelly Roll and a bit a yardage you can make two of these beautiful pillows -- one for you, one for a Christmas gift ;)

You know me -- no project would be complete without looking though my stash of Aurifil threads dreaming of ways stitch with these sweet threads.
I was thrilled with the outcome!
 To top-stitch I choose Aurifil 12Wt Mako Cotton in two different colors.
It added such interest to the pillow flange.
For the free motion quilting I used Aurifil 28Wt and 50Wt threads.
The 28Wt served to outline the beautiful prints on the First Kiss fabric and the 50Wt thread was perfect to echo stitch the background.

Beautiful threads combined with Quilter's Dream Wool batting equals instant texture!
Love, love, love!
*
 I had planned to include wool applique on the center panel of the pillow, but once I started working with the fabric I realized it didn't need applique -- it was beautiful as printed.   

Now what to do with all the beautiful wools I had purchased from Bunny Hill Designs?

Who can turn away from a cute flower accent made from wool?
Such Fun!  

Be sure to stop back and I'll show you how easy they are to whip up. 
*
I may even need to share some of my leftover wool ;)

Now be sure to hop on over to the Moda Bake Shop and checkout the tutorial.
I would love to hear what you think.
*
As always I would also LOVE to see anything you create from the tutorial.
Wouldn't this pillow be sweet with 
Christmas fabric ? 
*
Thanks for stopping by today
and have a blessed day!
Karen

PS - A big shout-out to those of you that have been following and encouraging me on Instagram.
Sharing the sneaky peeks is fun!  Thanks so much for your support.

Tuesday, October 28, 2014

A Winner - Sneak Peeks and Must Have Quilty Links!

Hi everyone -- I apologize for the late announcement of the winner of the Benartex 
Bohemian Rhapsody Fat Quarter Bundle
Sometimes it's not good to be late...
Ha ha ha !   Thanks for understanding.

Without further ado ...  Mr Random Number Generator was used to pick a winner from the 76 people that left comments on the Giveaway Post.  
 And the lucky 51st comment was:
Congratulations Karen!!   I'll be sending you an email so I can get this great Fat Quarter Bundle in the mail to you.  
I know you'll love it.   
Woohoo!!

Thanks to everyone else for playing along.
I'm compiling your Christmas List of wants and will be sure to share more FMQ, Wool Applique, and Redbird Quilt Co designs in the future.   
Ya'll are too sweet!   
Stay tuned for more fun and 
thanks for your support.

Speaking of fun...  
Before we go I want to share a couple of things I've been working on.

You've already seen some sneak peeks of this quilt here, and here.   
Well here is another sneaky peek of the lovely "Garden Lattice" pattern by 
Wendy Sheppard  
**
Karen's Style!!
The pattern is one of several beautiful quilts and projects in her new book, 
"Recreating Antique Quilts".  
Be on the lookout Monday, November 3rd for a full reveal, review and a Giveaway!  
It will be fun.

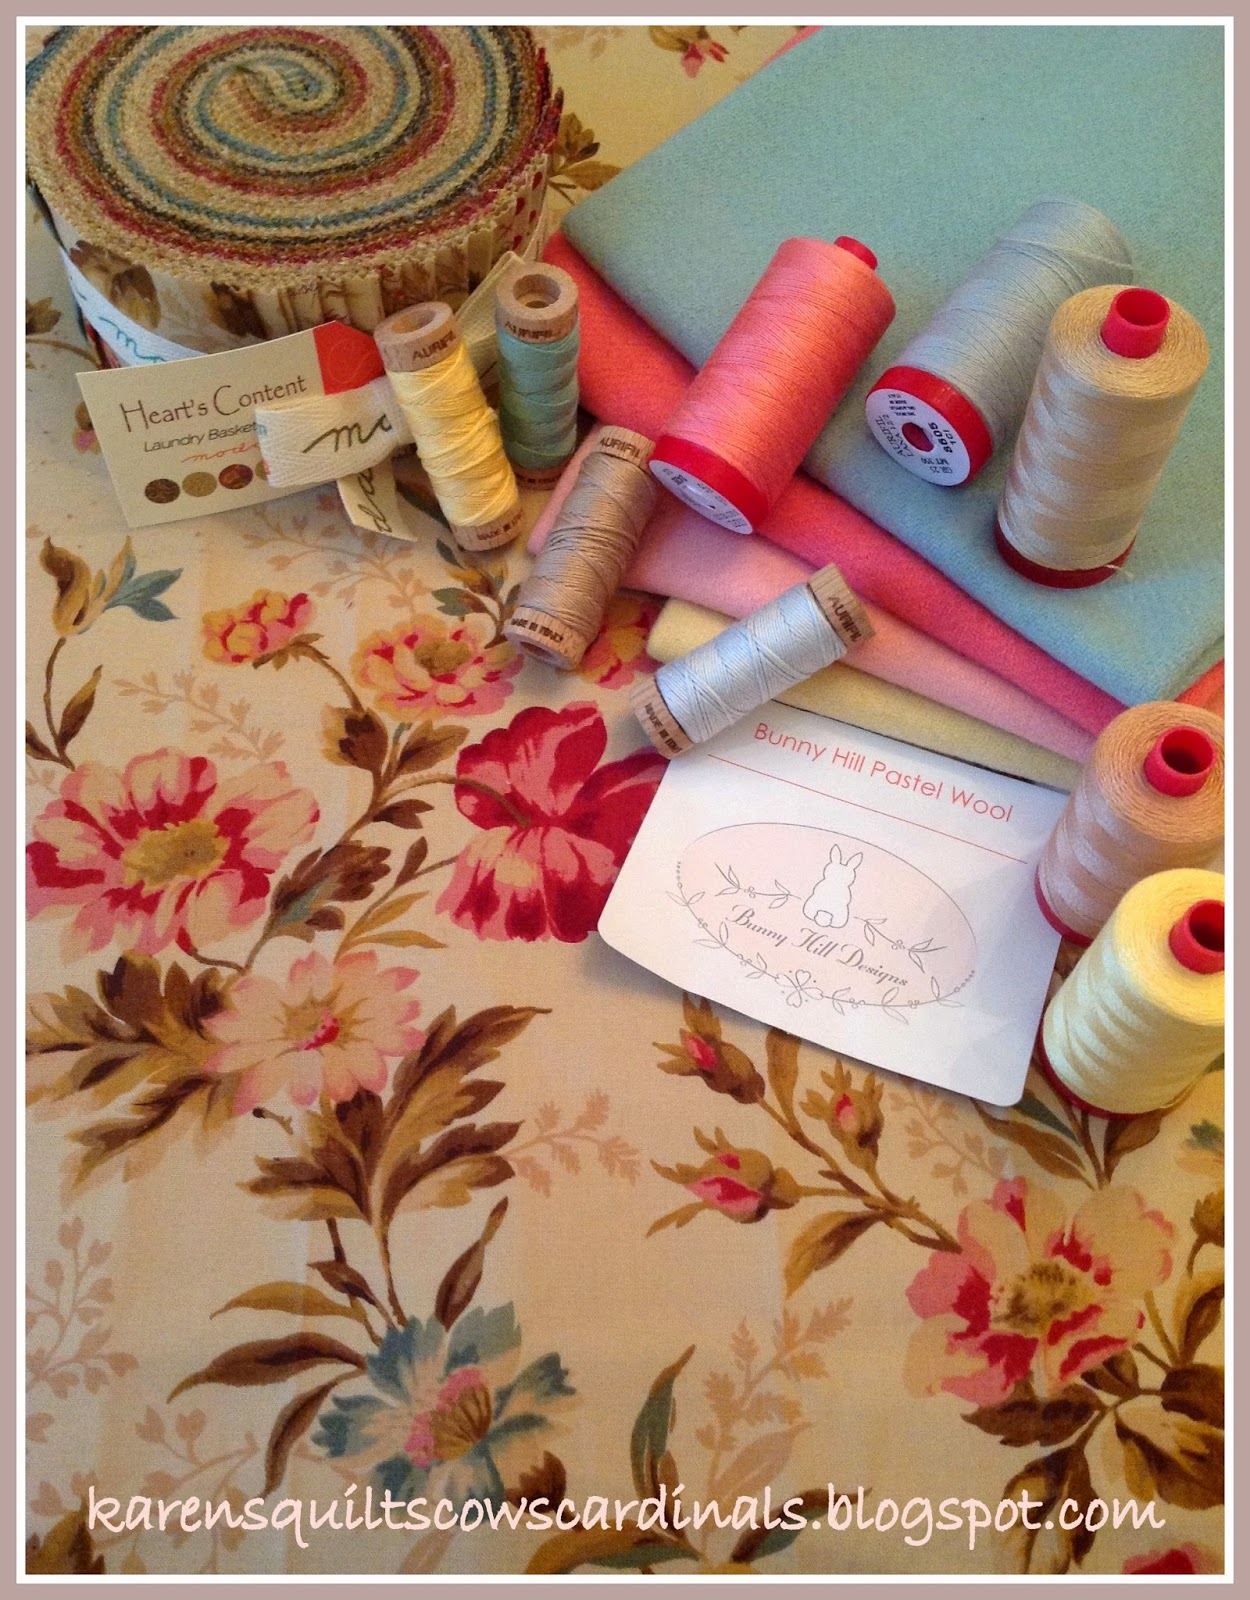
Also -- on the cutting table is this sweet collection of fabric, woolens and threads:
This lovely line "Heart's Content" by Edyta Sitar of Laundry Basket Quilts (for Moda) will be paired with some beautiful Bunny Hill Designs woolens and luscious Aurifil threads to become a home decor pillow.

Aren't they beautiful together ?   

This new tutorial will be hosted by the Moda Bake Shop next month -- stay tuned for that too!

Don't go yet !!!  
Do you LOVE Giveaways ?  
Well then I suggest that once a week you hop on over to Missouri Mel's Giveaway Roundup to see a list of current giveaways and be sure to leave Mel a message thanking her for hosting the Giveaway Roundup.
Click below and check it out!   

Missouri Mel

One last thing...
Since there is soooo much interest in Free Motion Quilting motifs, tips, tricks, designs, and fun I decided to start a new Facebook group that supports open discussion, sharing of images, tutorials, tips, tricks, videos and links. 

You can hook up to this new group by clicking the image above or searching for  Free Motion Quilting Frenzy on Facebook.  

If you're interested in FMQ - AND - you use Facebook, come on over and share with the group.  We're tiny now but I'm certain we'll grow with leaps and bounds and with an abundance of inspiration! 

Thanks everyone and have a blessed week!
Hugs,
Karen