Showing posts with label Redbird. Show all posts

Saturday, January 10, 2015

Top 14 of 2014 and Do You EQ?

Greetings fellow quilters!!

There's been so much happening in the first few weeks of 2015 I've not taken any time to blog.  I do hope you've been keeping up with my goings on at Facebook or Instagram.  Happy New Year!

I have a couple of fun things to share today.  

This is my first attempt at a quilt design using the Electric Quilt 7 software.  I purchased this software months ago and never found the time to open it.   Finally -- with an upcoming Moda Bake Shop design looming, I decided to break down, install the software, and give it a try.    Here's a sneak peek of the starter design:
I had a bit of a learning curve getting started, but I was happy to get something drafted.

I'm using Laundry Basket Quilts "Heart's Content" fabric for this quilt (grab a Layer Cake) -- and was able to download the fabric swatch images from Moda's site.  It's so cool -- you can fill in the EQ7 quilt blocks with the exact fabric you're going to use - I love that!!

Here's a picture of the design before I installed EQ7.... Pencil and paper... the old fashioned way:
Stay tuned in February when I share this new tutorial and quilt design on the Moda Bake Shop....

Speaking of which -- On January 1st, 2015 the Moda Bake Shop published their Top 14 viewed Recipes of 2014 and I'm thrilled to say that Redbird and Berries was the #1 recipe for the year!!   Oh My Goodness I was really blown away -- so honored.
Thank you all again for your continued support and encouragement and many thanks (again) to the Moda Bake Shop -- what a great way for aspiring designers to get their work online!!

You can see the complete list of the Top 14 in 2014 by clicking here.   There are some really great recipes there - do check it out.   You can see the Redbird and Berries recipe by clicking here.

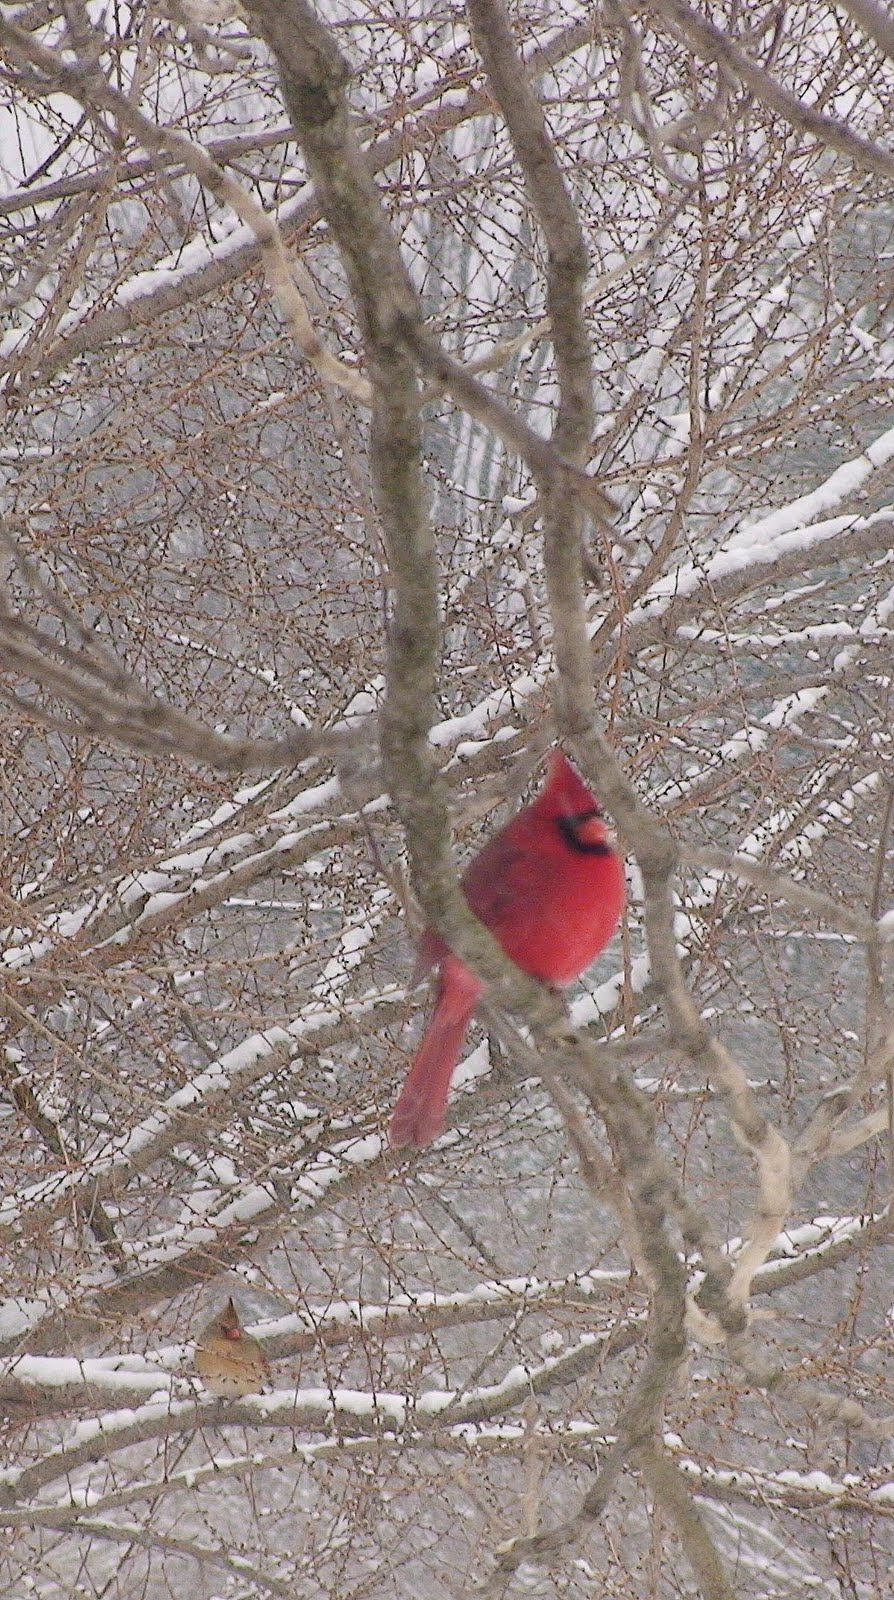
Before I go -- I wanted to share this image of a female Northern Cardinal hanging around the bird feeders at our home.  
It's really unusual to see a female cardinal that is as brilliant as the red male cardinal -- this little girl takes the cake.  Every time I see her at the feeders I grab the camera and run (sneak) to the window to take a shot.  So beautiful.
If you're interested  you can see more songbird images at our feeders by clicking here.

Thanks for stopping by today - I'll be back soon!

Hugs,
Karen

Thursday, July 24, 2014

Throwback Thursday Featured Tutorial: Family Tree and Redbird Christmas Quilted Envelope Pillow

Greetings fellow quilters -- I hope you're enjoying some summer fun or sewing time. 

We're fortunate to have spent the last week with family at the lake.  A few more days before they all head for home, so we'll squeeze as much fun as possible out of our family time together. 

Thanks for your patience with my lack of sewing and blogging -- family fun is the best!

Oh, and those reviews and giveaways I mentioned here -- they're yet to come -- stay tuned.

This week I would like to feature a two pillow designs that share techniques but use unique applique templates. 

Both tutorials include a little bit of piecing, a little wool applique, the fantastic #Aurifil Mako Cotton 50wt Thread for beautiful Free Motion Quilting, and are just fun to make!!

First up is the Family Tree Quilted Envelope Pillow.
This was my first Moda Bake Shop recipe and was the result of my winning some "Family Tree" fabric scraps from the very talented Moda Designer, Deb Strain. 
One thing led to another, I submitted a design to the Moda Bake Shop, and they accepted!! 

Woot Woot!  That started the grand adventure that I am on today.  

I had at least one Quilt Angel providing guidance -- so if you ever have any questions about submitting a design to the Moda Bake Shop, please feel free to contact me so I too can give a helping hand.

You can see the original Moda Bake Shop Recipe for Family Tree by clicking here

You can see the Family Tree announcement on my blog by clicking here.  

As always -- thanks for your continued feedback on my tutorials -- I love to hear constructive feedback from you.

Next up is Redbird Christmas -- Redbird Christmas uses the same design and sewing tutorial as the Family Tree Pillow but features a different season and applique template. 
You can download the Redbird Christmas tree and bird template by clicking here. 

You can read my original blog announcement for Redbird Christmas by clicking here.

You can download the original Moda Bake Shop recipe by clicking here.

I hope you enjoy the featured Throwback Thursday Tutorials this week -- I would love to hear what you think.

I leave you with a picture of our family (missing only 3) that were with us at the lake this week... Lovely bunch of coconuts!!
Enjoy !
Karen


Tuesday, May 20, 2014

Bloggers Quilt Festival - Original Design - Redbird and Berries

Hello everyone!  I'm excited to present my entry into the "Original Design" category of the Spring 2014 Bloggers Quilt Festival hosted by Amy's Creative Side
Meet Redbird and Berries - an original design and tutorial created earlier this year for the Moda Bake Shop.  

Download the free Redbird and Berries PDF from the Moda Bake Shop or from my Craftsy pattern store.

Redbird and Berries was inspired by my love of Songbirds -- especially the Northern Cardinal.
You see, my mom passed 10 years ago and since then I've felt a special connection to the beautiful Northern Cardinals that continually cross my path. 

I feel my interactions with them sometimes include small, yet meaningful, messages from my mom.

Even the name of my blog reflects my love of this precious little songbird.
If I'm driving a little too fast and a Cardinal flies in front of me, I *slow down*.
If I'm having a bad day and I hear the sound of the Male cardinal singing to his mate,
I *smile*.
Cardinals frequent our many bird feeders during the winter months and act as a daily reminder that my mothers love and guidance is always near.
To continue my obsession with the Northern Cardinal, in the fall of 2013 I participated in the "Wool Lovers Blog Hop" and created this darling little wool felt "Redbird" as my entry -- later I created a tutorial so you can make your own felted Redbird.  You can see the tutorial by clicking here.
So when I first laid eyes on the beautiful grunge fabric on the Moda / United Notions web site -- I knew I had to make something with it.  That red colored Grunge was perfect for a Redbird. 


I'm also big fan of anything Mackenzie Childs, so the rest of my inspiration came from the Mackenzie Childs "Courtly Check" pattern (Courtly Check is a registered trademark of MacKenzie-Childs) --  one of her very popular lines.

Here are two of my favorite Courtly Check pieces by Mackenzie-Childs.   Isn't that ring dish sweet?  I keep waiting for it drop in my lap... I'm afraid $185 is a bit out of my price range!
Image from MacKenzie-Childs.com
To mock that beautiful Checkerboard border I found the sweet line "Little Black Dress 2" by BasicGrey for Moda. 

The rest is history - I sent a proposal to the lovely team at the Moda Bake Shop and they graciously accepted.

The fabric (once available) magically shows up on the doorstep and, after a few weeks of  pulling my hair out fussing, the result is "Redbird and Berries - Mini Quilt" recipe on the Moda Bake Shop (click here to see it).
If you've decided to download and make Redbird and Berries -- be sure to check out the special Redbird Mask and Beak tutorial by clicking here.

Redbird and Berries Mini Quilt
An Original Design by Karen L. Miller 
for the Moda Bake Shop
Size:  22" x 30"
Hand Appliqued & Machine Pieced 
Machine Quilted on my Domestic Machine 
Awesome Aurifil Mako 50wt Thread
for applique, piecing and quilting!

I hope you get a chance to hop over to Amy's and view all of the fantastic quilts on display.  

Voting begins May 23rd.  You'll find "Redbird and Berries" in the "Original Design Quilts" category.  

There is also "Viewers Choice" voting -- be sure to nominate your favorite "Viewers Choice" quilt here by May 23rd.

As always -- thanks for your continued support and encouragement!

Hugs,
Karen

Sunday, April 27, 2014

Week 5: Celebrate Bouquet Memories Wall Hanging and a Giveaway!

Greetings dear readers and welcome to Week 5 in a "Month of Monday Giveaways"!

I'm really excited about this week's celebration and giveaway sponsored by Bear Creek Quilting Company.   The celebration includes a free wall hanging tutorial AND a fantastic fabric kit & thread bundle giveaway all courtesy of...
Before we get into the celebration details, let me share a bit about Bear Creek Quilting Company.

A fantastic online quilt shop, Bear Creek Quilting Company is located in Vancouver, Washington.

You will be amazed at the variety of fabric (yardage and pre-cuts), notions, gifts, books, patterns, kits, and embroidery supplies that are available in the online shop.   Jump over and check it out...

Bear Creek Quilting Company has 25% off all books and is currently throwing a great Clearance Blow-Out Sale!
If you combine the clearance blowout sale with the fantastic shipping policy at Bear Creek Quilting Company you can really save some $$.
On top of the fantastic prices, Bear Creek Quilting Company has fantastic customer service.

Speedy shipping, pretty packaging, and service with a smile make working with the team at Bear Creek Quilting Company a JOY!!

See for yourself, check out the Testimonials web page -- reading through them makes me smile!

OK -- enough about the shop -- lets talk celebration!!

Introducing "Bouquet Memories" wall hanging.  This pretty little wall hanging measures 17" x 23", features 3D flowers, straight line quilting, and a sweet little blue bird to boot!

I had the honor of working with Shari and scouring the wonderful fabrics in the online shop before designing this charming wall hanging for ya'll to enjoy!

You can see the tutorial on the Bear Creek Quilting Company blog by clicking here.
"Bouquet Memories" was appropriately named as it uses the Wild Rose colorway of the beautiful "Bouquet Memories" fabric line by Hoffman of California -- swoon!

I fell in love with the diverse grouping of prints in this line and really enjoyed creating with them.

There are however, two additional colorways available in this line -- and Bear Creek Quilting Company has them packaged up and ready to ship from their online store.  Click here to see the fabric bundles in the online shop.
I was able to crash my thread stash and use a variety of Aurifil Mako Cotton 50Wt threads for the Bouquet Memories wall hanging.

As always, the Aurifil worked beautifully for machine piecing, hand sewing, and straight line quilting the sample.  Lovin' those #Aurifil threads!

Oh, and also on this project, I was able to try the Aurifil Lana Wool 12Wt thread -- it stitched like a dream!
Again - you can find the "Bouquet Memories" wall hanging tutorial on the Bear Creek Quilt Company Blog by clicking here.

There is one little portion of the wall hanging that will be presented on my blog later today -- the Little Blue Bird.

Stay tuned for the Little Blue Bird template and some wool applique stitching basics that will help you duplicate the sweet Little Blue Bird on your wall hanging.
Woohoo!  Now on to the really fantastic giveaway sponsored by Shari at the Bear Creek Quilt Company!!

How would YOU like to win a "Bouquet Memories" wall hanging kit ?

The kit comes complete with the beautiful Hoffman of California Bouquet Memories fabrics AND 3 large spools of Aurifil Mako Cotton 50wt threads in colors that are perfect for the piecing, hand sewing and quilting of the wall hanging.  (Sorry -- my little Redbird and Elan scissors are NOT included ;)
This is the most awesome giveaway to date in the "Month of Monday Giveaways" and here's how to gain your chances.

Chances to Win:

This "Winner Takes All" giveaway is open to all participants -- domestic and internationally!!  That is just so exciting!

Gain one chance to win by signing up for the Bear Creek Quilting Company Newsletter -- not only does that make you eligible for the Week 5 giveaway -- it also makes you eligible for the monthly Bear Creek Quilting Company $25 Gift Certificate.  Click here to sign up and then come back and let me know you did!

Gain one chance to win if you "Like" Bear Creek Quilting Company on Facebook.  Click here to see and "Like" their page, leave a comment and be sure to come back and let me know you did.

Gain one chance to win if you hop over to the Bear Creek Quilting Company blog and peruse the "Bouquet Memories" Wall Hanging tutorial.  Leave a comment there letting Shari know what you like about the wall hanging and then come on back here and let me know you did.

Gain one chance each for "Liking" Aurifil Threads or Hoffman California on Facebook!!

As always, if you follow Redbird Quilt Co. on Facebook, Pinterest, Craftsy, Twitter or the blog - leave comments letting me know - I love to know that you're following me!

Also -- share, share, share and get the word out about the Tutorial and Giveaway !  Think about the great karma if one of your friends win!!   Leave me a comment if you shared.

Well -- that's a wrap -- Week 5 in "A Month of Monday Giveaways" is open.  A winner will be chosen on Monday May 5th at 9pm eastern time.

As always thanks for your fine comments and support -- we're really having fun now!

Many thanks to Shari at Bear Creek Quilting Company for hosting this awesome tutorial and giveaway.  Shari has been a gem to work with on this project and I can't wait to do it again!


Oh - and don't forget - the Week 4 Giveaway is open until Monday April 28th at 9:00pm eastern time.  If you haven't already -- be sure to click here to get in on that fantastic giveaway!.

Have a joyous and blessed Sunday all!
Hugs,
Karen

Monday, April 14, 2014

Winners - Week 2 Month of Monday Giveaways!

Greetings fellow quilters!

I'm excited to announce the winners of the Week 2 Celebration in the Month of Monday Giveaways!

For Week 2 we're celebrating the release of my very first Redbird Quilt Co. pattern "Spring Basket".  
Spring Basket is an 11" x 16" Wool Applique on cotton Mini Quilt that is wool charm friendly, uses simple embroidery stitches and works up really fast!   Personally - I think the hardest part of the entire pattern is getting the half moon template ready.  I'll be anxious to get feedback from these Week 2 winners!!    The pattern can downloaded from my Craftsy Pattern Store here or on my blog sidebar.

The first winner was drawn from the set of 49 Followers on Craftsy.  I printed all the entries and let our crazy Yellow Nape Amazon "Cayman" choose the winner....    He was a little hesitant...
 But finally went for it!!
And the winner of one "Spring Basket" pattern is: Shirley Tener from Arlington Texas !!  Shirley blogs over at SimpleSew.   Shirley, you have a choice of a printed or PDF version of the Spring Basket pattern.  I'll contact you via email !  Congratulations!
The next pattern winner was chosen from the 48 comments left on the April 6th Spring Basket announcement on Redbird Quilt Co's Facebook page.

The comments were printed and tossed on the table runner --  Cayman went after the winner but he was moving so fast the picture came out a blur (bummer)....  None the less we have a winner of another "Spring Basket" pattern.

And the winner is Kathi B. Clower!   Kathi blogs over at Design Originals by KC -- Congratulations Kathi!  You also have a choice of a printed or PDF version of the pattern.  I'll send you an email.
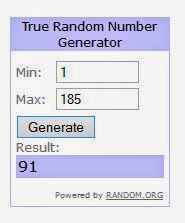
Now Cayman was all tuckered out so it's a good thing that blog comments are numbered and Mr. Random Generator could choose the 3rd and last winner of the "Spring Basket" pattern.   There were 185 comments on the blog and Mr. Random Generator chose #91.
Comment number 91 was Helen!!  Helen blogs at Helen's Patchwork Passion.  Congratulations Helen -- and because you live across the Big Pond I will be happy to send you a PDF version of "Spring Basket".
Last but not least -- the winner of the Thread Pack of Aurifil Mako Cotton 50Wt spools...

But before we get to that winner I want to say "Thank you, Thank You" to Aurifil for sponsoring this fantastic giveaway!  Alex and the whole crew at Aurifil are so very generous and fun!!
t
OK - Drum roll please -- there were a total of 185 comments on the blog post and Mr. Random Generator chose #11. 
Lucky number 11 was Joyce Carter!!  Woohoo!  Joyce you are the winner of this awesome collection of Aurifil thread.   I use Aurifil Mako Cotton 50Wt thread for piecing, needle turn applique AND quilting -- you're going to L-O-V-E this thread !!   Joyce I will contact you via email to get your mailing address!
Well everyone -- that's a wrap -- thank you all so much for participating in Week 2 of a Month of Monday Giveaways.

Stay tuned this week because I'll soon be announcing the Week 3 Celebration and Giveaway!

One last note -- Cayman was really going after the cashew that was buried in the entrant piles... I'm working on training him to choose winners -- but he's not quite there yet...  Isn't he cute though?

Thanks again for your sweet comments and support - they really make my day!

Hugs,
Karen

Saturday, February 22, 2014

Redbird and Berries Mini Quilt - Mask and Beak Tutorial

Hi everyone - those that are working on the "Redbird and Berries" Mini Quilt in cotton (Recipe published at the Moda Bake Shop) and now available as a free download on My Craftsy Store,  I've put together a little tutorial to help position the Redbird mask and beak.  I hope you find it helpful.   
If you are new to needle turn applique please be sure to review "Teardrops of Love - a needle turn applique tutorial" under my blog header or by clicking here.  The 4 Part tutorial shares tools, steps, tips and tricks for basic needle turn applique.

First up:  Using template plastic, cut out the full bird template with face, mask and beak intact.  Additionally, cut out separate mask and beak templates as shown on the pattern.  (Pattern found on the last page of the Printer Friendly PDF at the Moda Bake Shop recipe - click here.)

As outlined in Teardrops of Love Part 2: Marking, Cutting and Basting Shapes, using the template plastic, trace the outline of the redbird on the fabric of your choice.

Place tick lines/marks on your fabric where the top and the bottom of the mask will border the red face of the cardinal.   This will help with mask alignment in a later step.  Be sure to mark the lines on the INSIDE of the face (the outside edge will be trimmed away).

As outlined in Teardrops of Love Part 1: Tools -- I used a Sewline Fabric Lead in Pink to trace the  redbird on the grunge fabric, skipping over the area where the mask and beak will be positioned.
After tracing around the perimeter of the template for your redbird, mask and beak, cut around the traced lines leaving appx 1/4 inch allowance to turn under.  Don't worry if you leave more than that, you can always trim as you go.
Next, as called out in Teardrops of Love Part 2: Marking, Cutting and Basting Shapes, baste the Redbird to the background fabric. I started stitching just above the upper tick mark and worked my way around the Redbird to the bottom tick mark.
When you get to the bottom tick mark for the mask you'll want to trim the excess fabric that is nearby the mask location.  There is no need to turn this fabric under - -the mask will be positioned here for a finished edge.

I used a running stitch to travel along the raw edge that will not be turned under.  This helps keep the fabric stable when you stitch the next layer over it.

Don't travel too close to the edge as you will be turning the black mask fabric under here and you don't want your running stitch in the way of that.
Now, grab that template, position it over the redbird, and align it with the traced lines on the mask to aid in positioning the mask. You can see from the image below that it fits fairly well -- just be sure it also aligns with the tick marks under the black fabric.  The turn or traced line on the mask should be resting on the tick mark you made on the redbird.
Once you find the right position for the mask, use applique pins to secure it for stitching.

The mask should include markings where the beak will be positioned.
Before you begin to sew the mask, trim excess fabric so you have a scant 1/4 inch (or less) to turn under.  There is a fine line between leaving too much bulk to turn under or having too little fabric to turn -- you will find your comfort zone after stitching for a while.  I'm confident that over time your comfort zone will change -- allowing you to leave a smaller seam allowance.

You can see I used black thread for sewing the mask.  Rule of thumb: Try to match thread to the color of the applique piece you're stitching, not the color of the background.
 
OK, before you begin to sew the mask, check once again to ensure that the inside mark on the mask aligns with the tick mark you put on the redbird.  I goofed my first time around and it was not aligned correctly.  That old seam ripper comes in handy at times ;)   When positioned correctly, needle turn it in place like you would any other applique piece.
Stitch around the perimeter of the mask, trimming and turning as you go.  In this case, because the beak area is so small, I decided to needle turn the entire mask. (I did not leave a raw edge where the beak will be positioned).
Once the entire mask is sewn on, then finish off the black thread on the back of the background fabric as described in Teardrops of Love Part 3: Long Edges and Easy Turns
Next up -- get that beak sewn on!!  Before you begin to stitch give yourself a little jump start and finger press the bottom edge of the beak (see below).  This makes it a bit easier to start turning and sewing the beak on.
Referring to the redbird template, position the beak such that that top of the beak is somewhat flush with the top outer edge of the mask - and the bottom of the beak is buried within the mask area (see below).

Pin in place. 

You may notice that I broke the Rule of Thumb when sewing the beak -- I did not have any thread the correct color so I stuck with the black (which really wasn't so smart).  Best to try to match the color of the applique piece - and if you can't exactly match go darker (but not as dark as black (?What was I thinking ?)).
You're almost done, now sew around the perimeter of the beak, bury and tie off your thread on the backside of the background and Admire Your Work !!   Don't be hard on yourself - it doesn't have to be perfect.  It will look beautiful when you're done.... Woohoo!

That's a wrap!!  If you have any questions please leave them in the comments section or send me an email - I will do my best to answer them.  Also remember, if you have pictures of quilts made from Moda Bake Shop Recipes you can share them at the Moda Bake Shop Flickr group.

Also remember you can download the PDF version of Redbird and Berries is available as a free download from My Craftsy Store.

Now be sure to stay tuned for the 100th post milestone giveaway!  I'm getting my thoughts, and some prizes together to share with you!!  Thanks for being loyal followers - it's so much fun... 

Have a wonderful weekend all -- I need to get some rest as we're sledding with the grandchildren tomorrow (oops - today - oh my!!).
Hugs,
Karen