Sunday, January 31, 2016

2016 Free Motion Quilt Along - Part II Pin Basting

Greetings fellow quilters and Welcome to Part II of our 2016 Free Motion Quilt Along. 
If you're just joining us be sure to checkout these prior blog posts:

Introduction => click here
Sponsors => click here
Supplies => click here
Part I Pieced Borders => click here

Many thanks to our fantastic sponsors including:
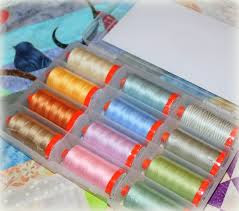
Aurifil
Quilter's Dream Batting
World of Susybee
Creekside Fabrics, Quilts and Yarns
Sew It Is Quilt Shop
Quilty Pleasures Quilt Shop
They've provided some awesome products for Giveaways -- to learn more click here.

This week we're preparing the quilt layers and pin basting.

Why Baste?  

Proper basting technique is essential to avoid tucks, folds, or puckers in your fabrics. It also helps to ensure your flimsy (quilt top) stays somewhat square, and will fit within the batting and backing layers without shifting.

If you do a good job of basting, you can avoid puckers and folds on the back.  If you're a bit sloppy or go without basting - you take your chances.

  The basting process can be completed many different ways -- I prefer pin basting with curved safety pins.

There are many alternatives to pin basting including: basting with straight pins, using straight pins with caps or anchors (brand name Pinmoor), basting with needle and thread by hand or machine, or basting with an adhesive spray.

Personally I avoid spray baste because I'm ultra sensitive to chemicals and aerosol...  and really -- as you'll see from the video clips, I enjoy the process of pin basting.  I use the opportunity to study and think about how to quilt a particular fabric or flimsy I'm working with.

Another possible pitfall to basting with adhesive spray is the potential for it to flatten your batting, therefore limiting the loft you see in your quilting.  I've seen some quilt sandwiches sprayed excessively with adhesive to the point where there was no texture left to the beautiful wool batting.   If you Spray Baste, avoid that pitfall.

Pin Basting - The Process

For Part II of the 2016 FMQ Along I've created two videos and Pin Basting basics tutorial with images and text below.  If you're new to basting, be sure to review the tutorial AND the videos before you begin the process.

Preparation

Cut backing & batting 1.5" to 2" wider than quilt top on each side.
Let your flimsy be a guide for sizing up the quilt backing and batting.
I normally rough cut my backing with shears followed by trimming the straight with a rotary cutter.
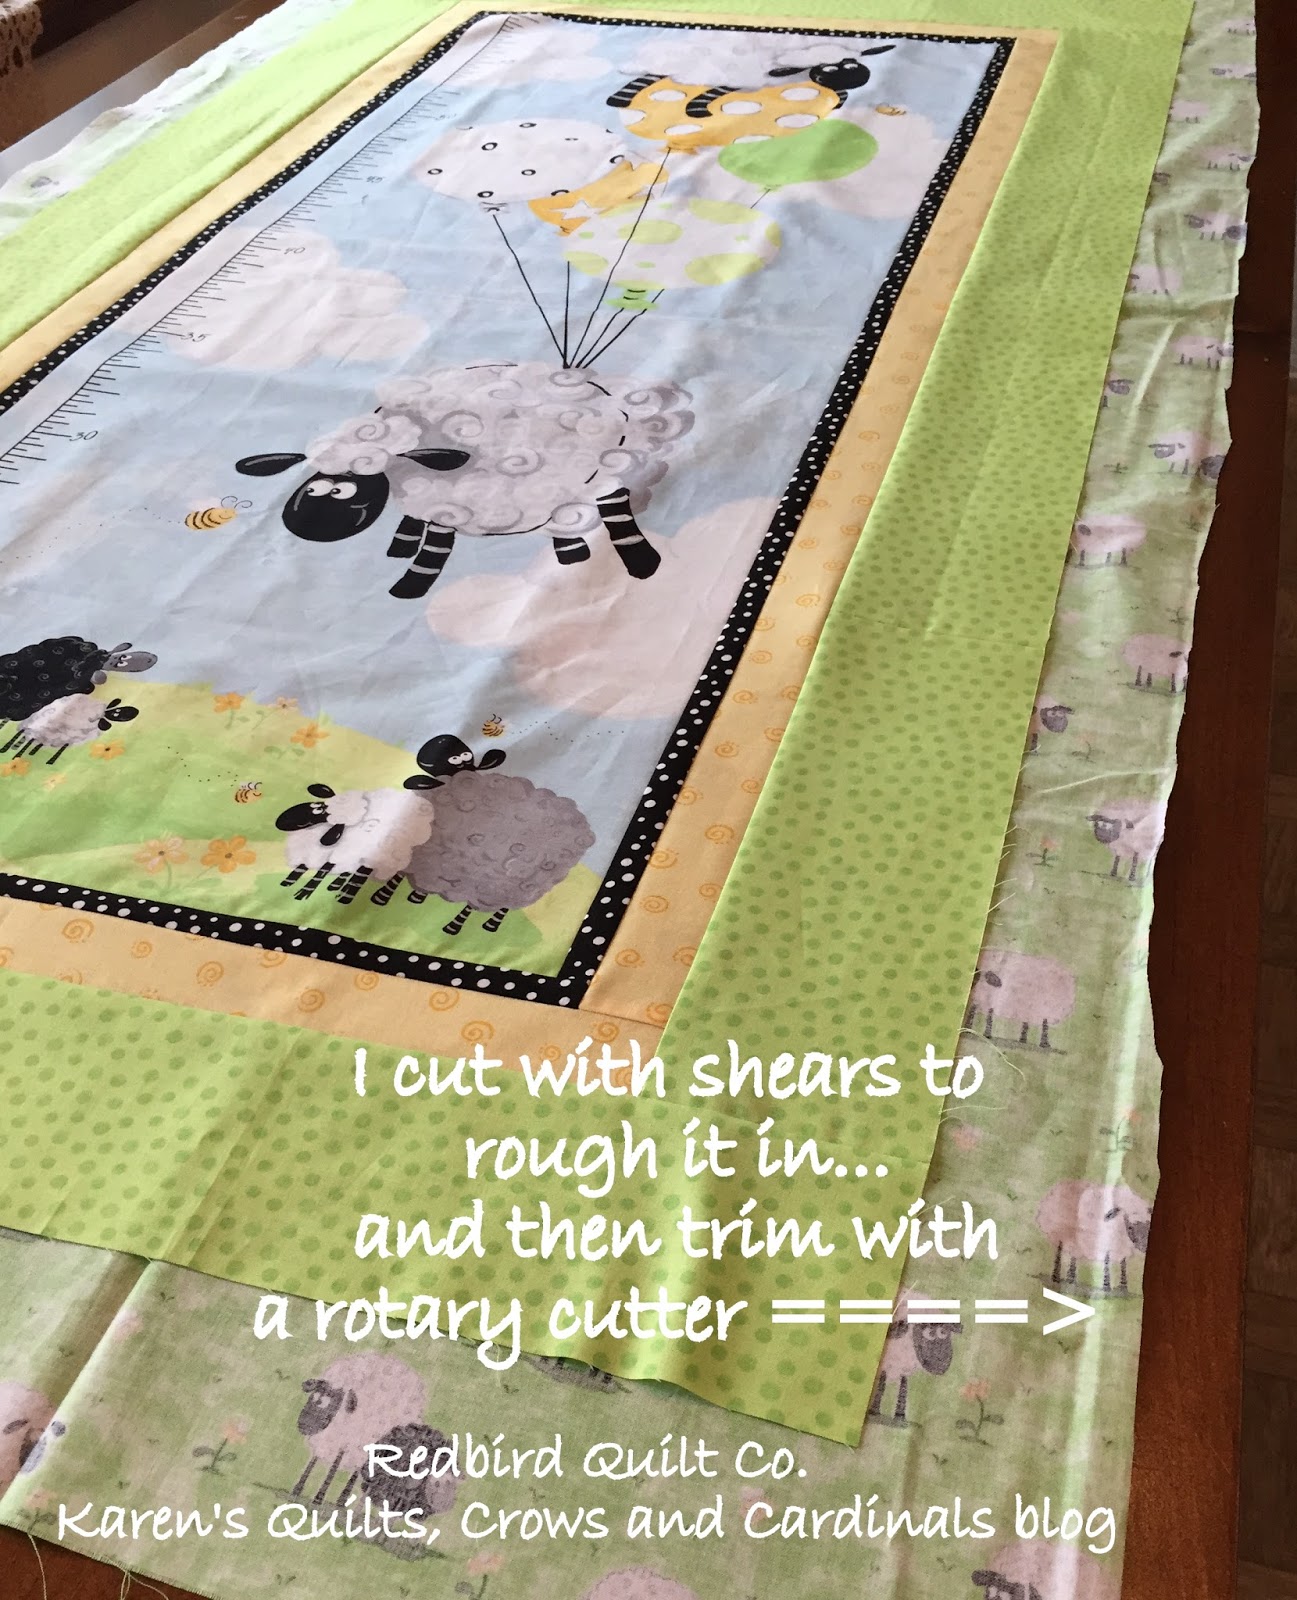
Using pinking shears or a pinked rotary blade will reduce fray.
Having a straight edge helps with the taping process.
Be sure the top and the backing fabric are pressed well.
No need to worry about stubborn creases, they'll work out in the quilting!
 Check batting and fabrics for stray threads that might show through the fabric once quilted. Especially dark threads - Remove as necessary
If you have a table large enough -- use it!  Otherwise consider using the floor, or visiting your local quilt shop, community center or library for this step.
*
Gather up tape to secure the backing -- I love using the 3m Blue Tape.  It adheres just fine but also peels away without taking finish off the table.

Secure the Quilt Backing

After pressing, position the quilt back face-down on a flat surface
Tape along a single long edge, using 3M Blue Tape.  Secure to the surface taping every few inches.
Prepare to tape the opposite long edge.
Below I'm showing the ripples that exist before you tape the opposite side.
NOTE: It's important to pull the batting taut and remove all the waffles or puckers from it to avoid folds or puckers in your quilting.
From the other side of the backing, smooth the fabric, pulling taut and tape it in position.
Once you've secured both long edges, those ripples should be GONE!
Continue the same on the top and bottom of the quilt.
Pull taut but DO NOT STRETCH or DISTORT your quilt back.
One the backing is taut and secured :

Add batting and quilt top layers


Layer batting, one at a time, smoothing from the center outward as you go.
If you're using two layers of batting, use the higher loft batting on top -- for example, in my sample I used Quilter's Dream Cotton on the bottom and Quilter's Dream Wool on top.

Putting the loft toward the quilt top will help build dimension in your quilt stitches -- you will love it!
NOTE:  I DO NOT tape or secure the batting -- after smoothing it rests flat on the quilt top.

NOTE: I never press or put a hot iron on a quilt once the batting is layered.

Because I rely heavily on 100% wool batting, I avoid using a hot iron or steam that may flatten the woolen fibers.

Layer the Quilt top (aka flimsy) right side up on the batting -- centering it in the middle of the arrangement.

Flatten the quilt top starting in the center and smoothing from the center outward

Checkout the Pin Basting Prep video tutorial by clicking the image below:


We're ready to Pin!


Pull out your handy safety pins - I place a handful directly on the quilt top.  This reduces the likelihood of getting poked by reaching into the box.
Over the years, I've acquired several sizes of Dritz Quilting Curved Safety Pins. I tend to use the 1" version more than the larger ones.  Using smaller pins reduces the number of times I need
to stop and remove a pin ;)

Let's get pinning!

Begin pinning in the center of the quilt with a curved pin -- be sure to pin through all 3 (or 4) layers.
Between each pin be sure to smooth outward from the center.
(see video)
Masure a fist-width spacing between each pin.
Work in a circular fashion from the center outward -- smoothing outward and pinning as you go.
Have you tried the Kwik Klip tool?  It's a great way to get your pins closed
without stressing your fingers (or your fingernails). I purchased mine years ago -- give it a try.  If you don't have one readily available, try the blunt end of a small crochet hook.
That works too!
It's effective to put several pins in before going back and closing them.
Try it out - it saves time to do pinning and then closing in batches.
Moving on -- continue smoothing outward and pinning as you go.


Checkout the Pin Basting video tutorial by clicking the image below:


Some tips for pinning:

Try to pin in the middle of a subject area or block.  On our panel I avoid pinning near the edge of Lewe or any of the Balloons.  Anticipate where you'll be quilting first and avoid those areas.

Always smooth an area outward before placing a pin.  You want to be sure your top fabric is smooth to avoid puckers or tucks.

Consider using a Kwik Klip tool to aid in the closing and opening of the pins.

Congratulations!


As the sun drops behind the Keuka Bluff our pin basting is complete.

What next ?


A bit later this week I'll be posting a "How to Quilt That" video to discuss the quilt motif ideas that spin in my head while I'm pin basting...  Stay tuned for that.

I also owe you a bit more about the tools I use to FMQ.  If you want a sneak peek into those tools click here.

It's getting exciting -- soon we'll be learning motifs and quilting away!
Are you ready ?  
Does this help ?

Thanks for your feedback.
Cheers!
Karen

Saturday, January 23, 2016

2016 Free Motion Quilt Along - Part I Pieced Borders

Hello fellow quilters and welcome to the first Redbird Quilt Co. Free Motion
Quilt Along!
I'm so excited that you're joining in the fun -- thanks for your patience and honest feedback while I work my way through this new adventure! 

If you missed the Introductory Post for the Free Motion Quilt Along -- click here to review it. It's never too late to join

If you missed the Supplies Post -- click here.

To learn more about our awesome sponsors (Aurifil, Quilter's Dream Batting, World of Susybee, Creekside Fabrics, Quilts and Yarns, Sew It Is Quilt Shop & Quilty Pleasures Quilt Shop) and the fantastic products they've provided for the Quilt Along Giveaways click here.

FMQAL Part I:  Pieced Borders

We're going to run right though getting the simple borders on this unit so we can move along to basting and quilting next week -- So let's do this!

For Part I of the Free Motion Quilt Along (FMQAL) we're going to add the pieced borders to the whimsical Susybee Lewe's Balloons Growth Chart.
Get those fabrics ready!!

As outlined in detail on the Supplies page, for piecing you'll need:

*  1 Lewe's Balloons Growth Chart Panel
*  1/2 yard of Black Dot fabric for Border 1 (& Binding)
*  1/4 yard of Yellow fabric for Border 2
*  1/2 yard of Green fabric for Border 3
    Also on the Supplies page I've recommended several different colors of Aurifil 50Wt thread.

    Choose your favorite neutral Aurifil 50Wt color for piecing. #2105, 2600, 2024
    I encourage you to try 50Wt Aurifil thread during the FMQAL for piecing AND quilting!

    This fine, yet strong, 100% Egyptian Cotton thread keeps seam bulk minimized - it helps with accurate piecing by not adding bulk with thread.

    Below are some of the colors that go wonderfully with Lewe's Balloons...
    If you're planning to use Aurifil thread for your quilting and you haven't picked it up yet and/or can't find it at your local quilt shop -- Checkout the current sale at the Bear Creek Quilting Company.
    Aurifil thread is currently 25% off!
    That's a great deal.
    Last I looked they had all the colors I outlined above.
    On sale now through 1/31/16  Click here!

    Prepping the fabric - some notes...

    I do not pre-wash my fabrics.
    If you decide to pre-wash yours be mindful that your quilt measurements may differ from what is specified. 

    Also, I love to press with steam!
    Others prefer to use a dry iron.
    Either way, when pressing, try to avoid stretching or distorting the fabric.
    Before cutting WOF (Width of Fabric) strips I normally leave the fabric folded in half and press through both layers (on both sides).  Then I open up the fold and press it flat.

    Additionally, I didn't starch these fabrics.  Starching has become a very popular method to stabilize fabric for cutting and piecing -- but for our simple borders we can scoot-by without.   

    Lastly, all seams were finished with a scant 1/4" seam allowance.
    You can use this method to test your seam allowance.

    Now lets get cutting!

    The Free Lewe's Balloons Growth Chart with Borders Pattern Page 2 specifies the exact cuts necessary for your border fabrics:
    Download and print Page 2 by clicking here.

    I included the cutting requirements (highlighted) in 2 images (below):

    We'll begin with the Lewe's Balloons Growth Chart panel.
    Press it well -- anticipating you'll trim it to 17.75" wide by 42"long.

    When working with panels it's sometimes a challenge to square them up.  If you feel your panel is twisted or NOT square you could consider using starch and steam iron to "persuade" it into shape.
    NOTE: All subsequent cuts are dependent on the panel being trimmed to 17.75" x 42".
     If your panel is a different size, adjust accordingly.

    Cutting requirements highlighted and enlarged:


    How to read the format used above:
    Border 1: Black Dot - Cut (3) 1" x WOF
    means
    For Border 1 you will cut 3 strips that are 1" wide by the Width of the Fabric.

    The Width of Fabric is the distance between the fabric selvages.

    I assume a 42" usable strip after trimming selvages.

    Continuing... following the directions above, cut the Growth Chart and WOF strips for Borders 1, 2 and 3.
    Once the WOF strips for the borders are cut you will piece and/or sub-cut to achieve desired lengths for left/right and top/bottom strips as specified below:

    NOTE:  Border 2-C may need to be pieced to achieve a 43" length
    Border 3-E will need to be pieced to achieve the 45.5" length.
    All other pieces will be sub-cut to achieve the desired length.

    When I am piecing non-binding strips together, I use a straight seam (not mitered).

    Need help cutting long strips?
    See my tip for cutting long strips on the Family Tree Quilted Envelope Pillow tutorial I created for the Moda Bake Shop ==>  Family Tree Pillow   Scroll a few pages into the tutorial to find the Cutting Tip.

    Soooo.... once you have all the pieced or sub-cut lengths prepared you can begin to attach them to the growth chart panel.

    The quilt construction diagram on Page 2 of the free Pattern is labelled alphabetically indicating which strips should be pieced first, second, etc.
    Free Pattern Page 2 - Construction Diagram
    When I piece long strips I like to use this method:

    1. Fold The growth chart in half lengthwise and finger press to mark the center spot with a crease.  (Just along the left/right and top/bottom edges).
    2. Now fold the border strip the same, in half and finger press a crease at the center.
    3. Now align the center marks (creases) right sides together and pin at the crease.
    4. Next, ease and pin the remaining border fabric to the chart.
    If your measurements are correct this should lay flat

    Stitch with a complementary thread using a scant 1/4" seam allowance.

    Continuing... referencing the Page 2 construction diagram (above)

    Begin with:
     Border 1 "A" strips -- attach both.
    After attaching both, 
    Press once to set the seam, and
    press seams toward the outside.

    Attach Border 1 "B" strips.
    Repeat the process through Border 2 and 3 as specified.

    Eventually you'll have a quilt top ready to be paired with batting and backing!
    Woohoo!
    The Big Picture!
    At this stage I normally choose my thread and backing for the project by laying the thread on the quilt top and unwinding a few lengths.

    What's next ?

    You'll have about a week to get the borders pieced on the Lewe's Balloons Growth Chart at which time we'll be layering, pin basting and discussing "How To Quilt That".

    In preparation for the next steps I'll share a post about my favorite quilty tools -- but if you want a sneak peak of the tools I LOVE to quilt with visit this post ==> Do You FMQ? The Process

    Don't Forget The Batting

      For this project I recommend using Quilter's Dream ~ Dream Wool batting.

    Dream Wool is 100% wool made with scoured and super washed domestic and fine merino wool.

    It adds beautiful texture to your quilting, is washable without shrinkage and truly does "Quilt like a Dream".

    I hope you get a chance to try it out.  You can find it at your local quilt shop in pre-cut sizes or off the roll.  You'll be amazed at the tension issues that are helped with a higher loft batting.

    Thread, Thread, Thread

     -- as I mentioned above, you'll want a variety of fine weight threads for quilting.
    I share with you what I've been successful with -- and I adore using Aurifil brand 100% cotton thread.  If you missed it above:

    If you're planning to use Aurifil thread for your quilting and you can't find it at your Local Quilt Shop -- Checkout this sale at the Bear Creek Quilting Company.
    Aurifil thread is currently 25% off!
    That's a great deal.
    Last I looked they had all the colors I recommended for the QAL.
    On sale now through 1/31/16  Click here!

    We're off and running -- now be sure to leave your questions here on the blog and check back here for my responses.  Sometime I cannot reply via email as blogger does not track addresses for everyone.

    Yippee -- I can't wait to Quilt with You!
    Have a blessed weekend - stay warm (or cool).
    Karen

    Monday, January 11, 2016

    2016 Free Motion Quilt Along – Sponsors and Giveaways

    Welcome!
    I'm so looking forward to starting up the Redbird Quilt Co. 2016 Free Motion Quilt Along using Susybee's adorable Lewe's Balloons Growth Chart.

    Are you joining us ?
    Click here for the details.

    Today I'd like to share our Sponsor contributions for the Free Motion Quilt Along (QAL) -- but before I do that, I'll share a little history of my Susybee growth chart quilting.
    My Growth Charts - Image courtesy World of Susybee Buzzz
    Susy's characters are adorable, the artwork is amazing and the fabric is oh! so perfect to learn and practice Free Motion Quilting on a home machine.

    My journey with Susybee began in August of 2012 when I quilted my first Lewe Growth Chart.

    I was VERY new to Free Motion Quilting but anxious to learn and improve my skill.

    As you can see, back in 2012, I took a pretty safe route and quilted minimal echo stitches around Lewe and his friends, but I did play with some loops in the borders!
    It was very basic quilting -- but important to my FMQ progression
    Lewe Growth Chart - Quilted August 2012
    Just two months later, October 2012, I broke away from the echo only quilting and included a variety of motifs on this Zoe the Giraffe Growth Chart... Zoe is adorable -- and so fun to quilt!
    Zoe the Giraffe - Quilted October 2012
    Although I did more quilting on Zoe, I left a considerable amount of negative space un-quilted...  

    Fast forward to January, 2013. For the first time ever I quilted Bird -- of course this sweet Redbird stole my heart.   I'm still very new to FMQ at this time but I practiced, practiced, and practiced my pebbles on this fun growth chart.
    Bird - Quilted January 2013
    Note: Using thread that complements the fabric works wonderfully to cover inconsistencies and beginner issues with starting, stopping and stitch length.  
    Don't be hard on yourself - just have fun!

    The January 2013 Bird was quilted for our great niece Abbie
    Also in January, 2013 I quilted another Zoe the Giraffe.  I did considerably more quilting on this version of Zoe for our grandson Zachary.

    With this growth chart you might notice me getting more and more comfortable with FMQ -- the echos are growing and the filler stitching is getting more dense too!
    Zoe the Giraffe 2 - Quilted January 2013
    Moving ahead to July of 2013, I decided we MUST have a BIRD growth chart for our small cottage at the lake.
    You can see in this quilting of Bird that I added swirls among the pebbles... 
    So fun!   
    Bird - Quilted July 2013
    Bird - Quilted July 2013
    Finally -- in June of 2014
    I quilted Flip the Pig... 
    Talk about fun!  
    I used yummy Aurifil threads on this chart and share details of the journey
    Flip the Pig - Quilted June 2014
    Flip the Pig - Quilted June 2014
    As you can see, my Free Motion Quilting experience and skill grew considerably from the Summer of 2012 to the Summer of 2014.

    I continued doing my own Free Motion Quilting, taking online classes, learning with the famed Karen McTavish and never giving up on my goal of improving my Free Motion skills!  

    To this day I continue to learn and grow those skills -- You TOO can experience this progression as you learn and regularly practice your Free Motion Quilting.   

    The Free Motion Quilt Along Sponsors


    It's time to talk sponsors and giveaways for the upcoming 2016 Free Motion Quilt Along!

    We'll start with my favorite 100% Cotton Thread...
    If you've followed me over the years you KNOW I love to piece, hand applique, top stitch, and quilt with a variety of luscious Aurifil threads.
       
    Aurifil 50Wt thread allows for dense machine quilting without thread build-up and with very little lint.  

    Aurifil 50Wt thread is my go-to thread for machine quilting but at times I'll fold in an Aurifil 40Wt (a little thicker than 50Wt) or a 28Wt (which is much thicker than the 50Wt) for awesome machine quilting highlights.   I also top stitch and blanket stitch with beautiful Aurifil 12Wt thread - I love it!

    I've outlined my recommended list of Aurifil thread for Lewe's Balloons Growth Chart on the QAL Supplies page and encourage you try out this fantastic thread during the QAL.

    For the QAL giveaway the great folks at Aurifil are sending Subtle Strings -- the beautiful new designer thread collection by my favorite FMQ mentor, Wendy Sheppard.  

    Subtle Strings contains 12 spools of Aurifil 50Wt thread -- they're perfect for FMQ'ing most backgrounds and negative space.  

    Checkout the beautiful quilting Wendy did with this collection in this blog post -- don't miss it!

    Thanks so much Aurifil for this awesome product and giveaway!

    Images courtesy: www.wendysheppard.net

    Next up -- the generous team from Creekside Fabrics, Quilts and Yarns in Arcade, NY.


    I had the great pleasure of meeting the owner of this family run business (Sandy) through the Buffalo, Chapter of the American Sewing Guild.   
    Subsequently, Sandy invited me North for a multi-day program at the shop including programs for the local Hope Lutheran Quilt Show.

    We had fantastic turnout and received heartwarming feedback!  I so look forward to returning in 2016! 

      Creekside Fabrics is a full-service shop and an Elite Dealer for Baby Lock Machines and Products.  
    Fabrics, yarns, custom quilting, long arm rental -- you'll find it all at Creekside Fabrics, Quilts and Yarns.

    Sandy is providing a $25.00 Shop Certificate for the QAL Giveaway - Sew exciting! 
    Thank you Sandy & Creekside Fabrics.
    Next up -- the great folks at Quilter's Dream Batting - my favorite batting/waddling. 

    Quilter's Dream is a USA based company and sponsor of the annual Hopes and Dreams Quilt Challenge for ALS


    I've been using Quilter's Dream 100% Wool batting (Dream Wool) for just over a year and absolutely LOVE it.  You can read about my first encounter and see the awesome quilting results using Aurifil thread and Dream Wool batting in this blog post.

    Wool batting provides for great quilting texture, drape-ability, and warmth without adding excessive  weight and with little/no bearding.

    Quilter's Dream wool really does Quilt like a Dream.

    The great folks at Quilters Dream Batting are providing us two products for the QAL giveaway!

    A package of each Dream Wool and Dream Cotton -- Oh So Fun!!!
    Thank you Quilter's Dream!


    Moving right along... our next sponsor is
    Cindy at Sew It Is Quilt Shop
    Sew It Is Quilt Shop is a family run business based out of Endicott, NY.   

    It's funny, Cindy and I became friends when I realized I could ride my horse to her shop in an afternoon!  Seriously, I found this little shop and this sweet lady a few years ago when looking for a specific fabric.  I'm so happy I did.  

    Although compact, this local shop is full of fabric and also offers great long arm quilting services too!

      Be sure to visit SewItIs online (or in person) the next time you can't find something at YOUR local shop.

    Sew It Is Quilt Shop is donating another Susybee Quilt Kit for the QAL giveaway.  

      The quilt kit will consist of a Lewe's Play Mat and Susybee border fabric -- Oh you will LOVE quilting the Lewe Play Mat.

    Thank you Sew It Is!!


    Oh goodness -- another Sponsor!

    Our next sponsor is Quilty Pleasures in Geneva, NY
    Another family owned business, these two lovely ladies, Val and Roni, invited me in last year to teach Free Motion Quilting on domestic machines.  We had such productive sessions we're looking forward to the weather breaking in the Spring so we can continue the fun!

    Quilty Pleasures is another full service shop with beautiful fabrics, classes, and long arm quilting services.  Visit their store in person or online for more information.

    Quilty Pleasures is providing a $20 Shop Certificate for the QAL!
    Thanks so much Quilty Pleasures!

    Last, but certainly not least...  The World of Susybee is joining in the sponsorship fun!

    As I mentioned above, I've been quilting Susybee's adorable and whimsical characters for several years now -- oh the joys of improving your Free Motion Quilting skills on such precious panels!

    I had an opportunity to meet Glynis, the VP of World of Susybee, at the 2015 Spring Quilt Market.  We've created a wonderful working relationship and are planning some more fun adventures for 2016!  

    Glynis, Susy, and the fine folks at World of Susybee are offering up their latest character for the Free Motion QAL giveaway!

    Meet Lal the Lamb -- isn't she adorable?  Lal is a 36" panel that can be used as a floor play mat, turned into a pillow or just quilted and hung in the nursery.   
    Oh I can't wait to quilt Lal!

    Thank you Susy and World of Susybee!

    That concludes the QAL Sponsor overview. 

    Be sure to show your appreciation of our sponsors by clicking on the links provided and, where applicable, liking or following them on social media. 

    To be eligible for the giveaway drawings you'll need to share an image of your quilted Lewe's Balloons Growth Chart on social media or via email. 

    Stay tuned - we're nearly ready to begin to piece and baste the Lewe's Balloons Growth Chart.  

    Do you have your fabric yet ?  

    We recently updated the Supplies page to include distributor information for UK, Australia and Canadian participants.

    All information will be indexed through the main QAL page:

    Thanks for stopping by and stay tuned for updates!

    #RedbirdQuiltCo2016FMQAlong #Aurifil #QuiltersDream #threadmatters #SewItIsQuiltShop #CreeksideFabrics #QuiltyPleasuresNY #WorldOfSusybee #SusybeeArt