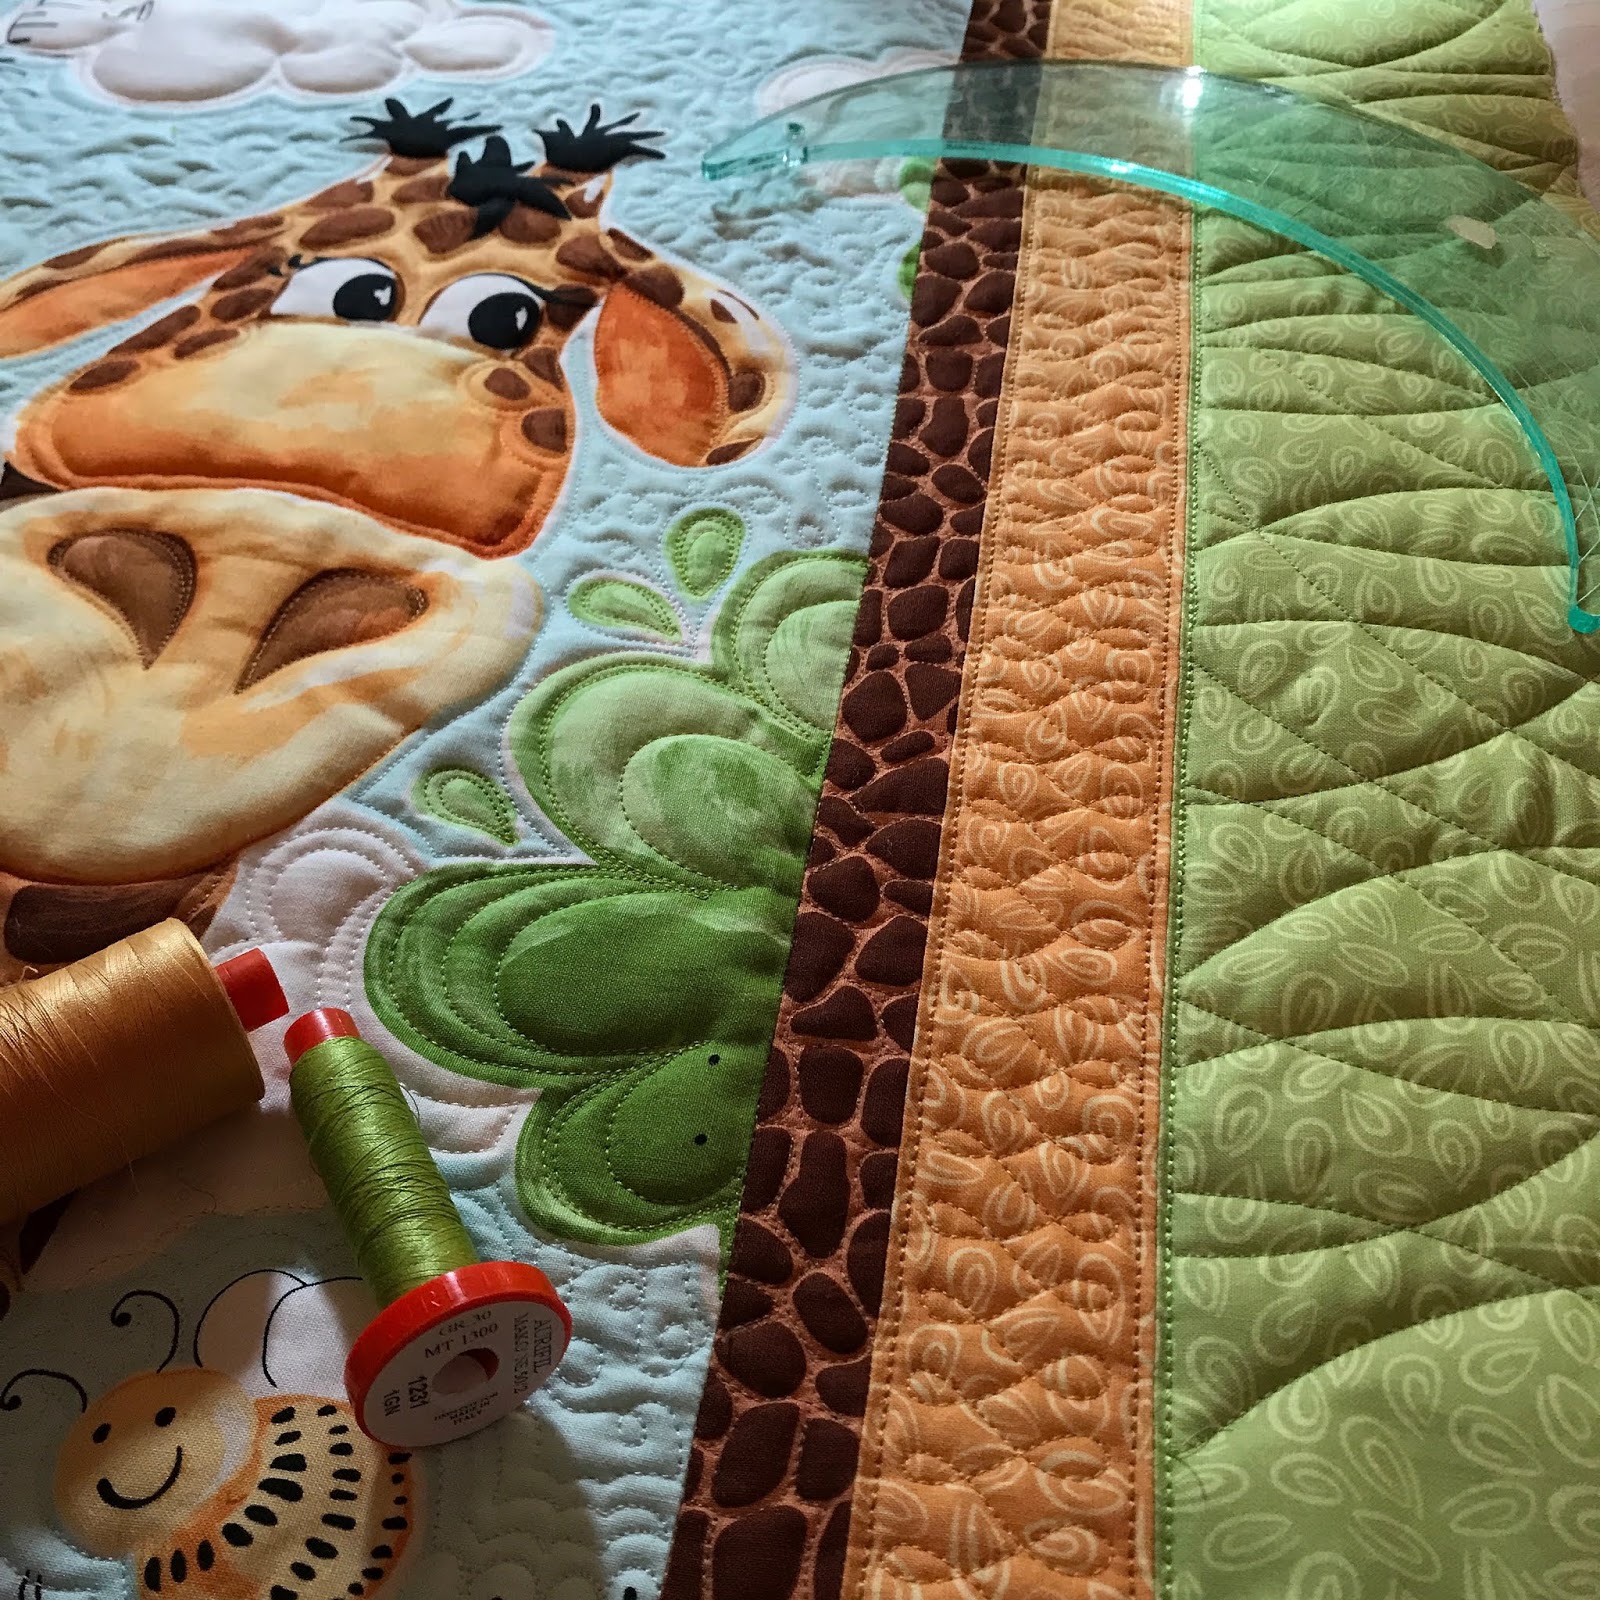
Showing posts with label Long Live Lewe. Show all posts

Monday, January 28, 2019

2019 Free Motion QAL: Part 2 Stabilization & Catch Up

Greetings!
Welcome to Part 2 of the 2019 Free Motion Quilt Along featuring Lewe the Ewe fabric panel by World of Susybee!
I'm so excited to share this quilting time with YOU and my dear friend and mentor Wendy Sheppard of Ivory Spring. 

Thank you for joining us. 

If you're just tuning in to the QAL it's not too late to join in the fun.  We're very early in the process and there's plenty of time to jump on board.

2019 FMQAL Schedule:    

Jan 7:  Announcement Post  ✅
   Jan 21:  Setup, Planning, Basting  ✅
🠞 Jan 28:  Stabilization Quilting or Catch Up 🠜
Feb 4 & Feb 11:  Inside Center Panel
Feb 25:  Top and Bottom Rectangles
March 4:  Top and Bottom Squares
March 11:  Left and Right Panels
March 18: Narrow Sashing
March 25:  Outside Border
April 1:  Binding, Labeling, Hanging if applicable


These posts outline Fabric & Notion Supplies necessary for the QAL.

As mentioned in the announcement we'll be referencing Wendy's awesome book, Stitching Pathways, to help create our motifs and get accustomed to the process of Free Motion Quilting.
Additionally, I'll be using my thread collection, The Subtle Sampler, for most of my stitching.

Looking for more details about the supplies necessary to quilt along, click here. 

Need to purchase supplies ? 
Check with your favorite local shop or 
visit our Participating Shops link == > here.

Did someone mention Giveaway?
Click "here" to learn about our sponsors & available prizes.  
Be sure to visit regularly to see updates to the Prize Packages.  


Stabilization or Catch Up

What is stabilization? 

Stabilization is part of the quilting process that focuses on stabilizing or keeping square the 3 (or more) layers of the quilt prior to beginning to free motion quilt them.

This step is done after basting and is considered part of the quilting process.

It generally involves quilting straight stitches in or around a block - but it could also be done by free motion stitching in or near an applique ditch.  

If quilting a block-based quilt I would consider stitching in the ditch of each block (or, in my case just outside of the ditch) as part of the stabilization process.

For a quilt with many borders -- stitching near or in the ditch of the quilt borders would be considered stabilizing the quilt. 

Here are a few examples where I've stabilized or top-stitched on other Susybee panels.

~ Lief the Caterpillar ~

On this Lief baby quilt I top stitched along the bottom border in white.
It looked so nice I decided to stitch 2 rows of white.

Also -- I top stitched inside of the black sashing with a black 12wt thread.
Stabilization helps keep the quilt or subsections of the quilt "square" -- it keeps them from getting wonky during the quilting process.

~ Zoe ~
One of my favorite Susybee Characters...
I stabilized this growth chart quilt with top stitching.
I stitched around the first 2 small borders.
Love the look!!
 Here's another view...

One Thing To Note: 

Before you begin your stabilize stitching be sure to baste it well -- otherwise -- you may have trouble with fabric gathers as you near the inside edge of your stabilization quilting.

See my basting recommendations in Part 1 -- Click here!

Also note... stabilization is not always necessary and not all quilters do it.  

For me though I really enjoy the stabilization step. 

Some of this LoVe comes from wanting to use my awesome stash of luscious Aurifil threads!!

Another reason I enjoy this process is because I've released myself from having to stitch "in the ditch". 

 Instead, I use that beautiful 12Wt thread and stitch next to the ditch.
 It's so much easier and the thread looks awesome !!

Here's a sample on the Lal the Lamb Growth Chart for World of Susybee.

Let's talk details...

When I want the stitches to show I choose
Aurifil 12Wt Cotton Thread!

I love working with it.

It's heavy and has amazing luster and shows-off a beautiful top stitch.

For this quilt I decided to use color #6722 from The Subtle Sampler

To successfully top-stitch with Aurifil 12Wt  you'll want to have a Superior Titanium Coated Top Stitch Needle size 90/14 or 100/16.

The Top Stitch Needle has an elongated eye and a shaft down the front of it!
Trust me...  this needle makes a
-- HUGE --
difference for top stitch and free motion quilting.

If you're experiencing any trouble at all with your stitching this needle is a MUST HAVE!
In the bobbin I generally use Aurifil 50Wt thread because it's more economical than heavier weight threads.

That's right, for the same price you get more yards of Aurifil 50wt on a large spool (1422 yards) than any other weight..

  Also -- that fine weight thread makes your bobbin last longer!

I stitched most of this project with Aurifil 50Wt color #2312 in my bobbin. 
You'll find this weight and color in The Subtle Sampler.

This color goes nicely across several different top thread colors.
It's my favorite bobbin thread weight and color.

NOTE:  You might find the 50wt too fine for your style of top stitching with 12Wt.

A good indication is thread breaking at the needle or under the throat plate.
 In this case try a heavier weight thread in the bobbin -- I would go one weight thicker with Aurifil 40wt.

Next -- Use a walking foot for your top stitch. 

Some manufacturers call them even feed or dual feed feet. 

They're made to walk multiple layers of fabric through the machine without bunching or pushing.   

Top Stitch with your feed dogs UP.

Set your machine to a Straight Stitch with a length of 3.50 or more -- this way you can admire the beautiful stitches coming your way.

On this panel I decided to stabilize around every panel square or rectangle -- but not along the outside edge. 

I stitched on or near the dotted line on the white edge of the panel squares.


To get started with your straight stitch quilting be sure to bring the bobbin thread to the top.

Set your stitch length down very low (I set mine to 1.0) and take 5 or 6 stitches at this length.


Now set the stitch length back to 3.5 or higher and continue stitching around the design. 

*  Stitch Slowly *

The Aurifil 12 wt thread is a hand embroidery weight thread -- it's not made to take high tension or high speeds.  

Take your time and admire how beautiful those stitches are.

When you  make it around the entire square or rectangle and are nearing the beginning small stitches,  stitch over them with a few of the 3.5 length stitches.

End your stitching by setting your stitch length back down to 1 and taking another 4 or 5 stitches to lock them in place.

Move on to the next square or rectangle and repeat the process:
Bring bobbin thread to top
Set stitch length to 1
Take 5-6 stitches 
Set stitch length to 3.5 
Stitch around the area...
Finish off with 1.0 stitches to lock.


Isn't it beautiful?

Don't worry about the spacing as it relates to the black dots on the panel. 

The Panel prints are rarely ever perfect -- just do the best you can.  
NO-One will notice.

I use my Machingers gloves during this process and take care to ensure my fabric does not have a drag.

The Walking Foot and Long Stitch Length will work wonders if free of drag.


Here it is - the entire panel with the Stabilization Top Stitching done!

Sew Much Fun!

Well -- that's a wrap for this weeks session.
Be sure to jump over to Wendy's Blog and see what she's up to this week.

If you have any questions, please leave them below -- I'll be sure to respond as soon as I can.

Happy Stitching!
Karen

*************

Learn more about how to use various thread weights in these Facebook Live Sessions
hosted by Aurifil at International Quilt Market: 

***
Follow me on social media:
Redbird Quilt Co. on Facebook, Instagram, Pinterest, Twitter, YouTube
Facebook my FMQ Frenzy Community Group
See my other Moda Bake Shop Recipes
Click here to see my upcoming events.
*
***  Guilds, Groups and Shops ***

I'm booking Lectures, Trunk Shows and Workshops
for 2020 and beyond!

If your Shop, Group or Guild is looking for programs or workshops I would love to hear from you.


Free Motion Quilting on Home Machines
Basics ~ A Quilters Doodles ~ McTavishing
A Full Day of Feathers
*
Aurifilosophy
*
Wool & Needle turn Applique
Technique or Project Oriented Workshops available.

Click here to see my upcoming events.
*
Send email inquiries to karen at redbirdquiltco dot com
or redbirdquiltco at gmail dot com


Note:  The FTC requires that I tell you.... I occasionally use affiliate links on my blog and website.  I may be compensated for purchases made using the links.  Rest assured I will only share sales and promotions for products I know and love myself.  Many thanks for your support of my very small business.

Monday, January 7, 2019

2019 Free Motion Quilt Along: Lewe the Ewe

Greetings fellow quilters  --  Happy 2019! 

I hope you had a joyous Holiday Season.

I'm excited to share that I've teamed up with my long time Free Motion Quilting mentor and blogging friend Wendy Sheppard for a 2019 Free Motion Quilt Along.    
It's like a dream come true!  


You see I've stalked followed Wendy for years and years -- getting inspired by and learning from her quilting projects and tutorials -- taking her lead to purchase and use Aurifil thread -- being encouraged to quilt out of my comfort zone...  
Wendy says "put some McTavishing on it Karen"
 -- being tutored to shape up my feathers...    
Yes -- these needed a little help!
Karen Miller -- Feathered Flower Fun Design - 2015
I also helped Wendy promote her early quilting books (still some of my favorites). 

From: Recreating Antique Quilts
Karen's take on "Garden Lattice" by Wendy Sheppard  Recreating Antique Quilts
 And from the same book I made Wendy's Ivory Baltimore Pattern in wool !
Karen's take on "Ivory Baltimore" by Wendy Sheppard - Recreating Antique Quilts
Yes, Yes -- she's truly is an amazing designer, quilter, author, educator, and friend.  
I couldn't be more excited and honored to team up with Wendy for this fun Quilt Along.    
Karen & Wendy - International Quilt Market 2017
Aurifil USA's 10 Year Anniversary Celebration
Sooo you're wondering....
what are we up to?  

Well -- If you know ME
you know MY feelings on this.  

If you'd like to grow your Free Motion Quilting skills on ANY machine the best thing to do is practice, practice, practice.   

AND

I feel that practicing on a panel gives you a stress-free way of learning or improving your FMQ.


First, panels work in your favor -- giving you clues on what to quilt.
Also, the different sections of a panel allow you to practice more than one design.

IN ADDITION
When using a panel to be gifted to someone young -- you'll never have to worry about your quilting being judged.

Young folks are just happy to have something to call their own.

SO...
At All Costs...
Avoid learning to FMQ on a quilt top that you spent a year (or more) piecing!!

Grab a panel -- get it done -- if you're not sure who to gift it to, think about offering it to a local charity, hospice, or children's unit at the hospital. 
They'll LOVE and APPRECIATE it.    

With All This in Mind

Here are the details of the Quilt Along:

It's a Surprise !!

Wendy and I have
- agreed on a schedule
- targeted sections to quilt each week
--  BUT --
I have no idea HOW Wendy will quilt it
and
She has no idea HOW I will quilt it.

So, in a sense,
 it's a MYSTERY
Free Motion Quilt Along!  

Should be SO MUCH FUN!
Are you in ?

Let's talk Supplies, Schedule and Sponsors:

Supplies:

Here's What You'll Need

The Panel

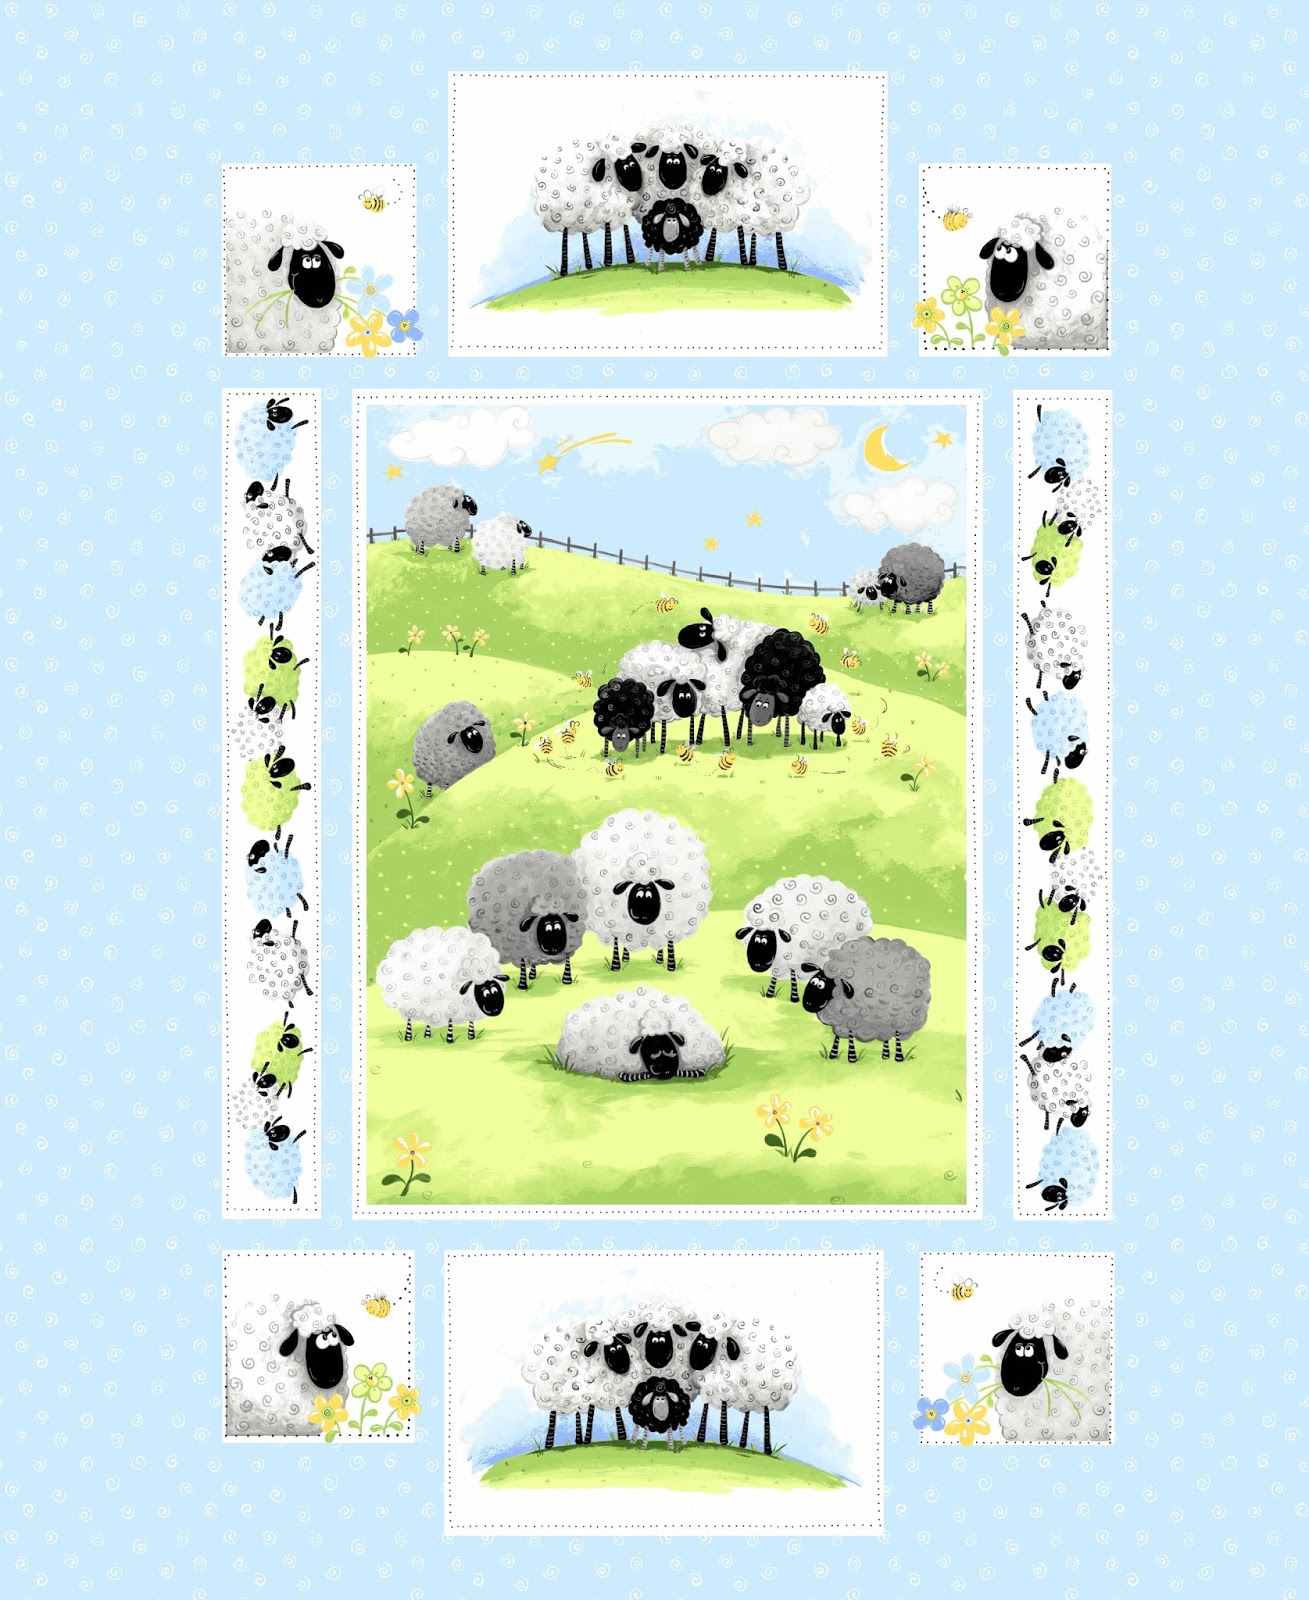
We'll be using one of our favorite panels from World of Susybee, Lewe the Ewe.  
This panel is a 1 yard cut -- we won't add any extra borders or any piecing to it -- 
Who Has Time?
Product Code: SB20042-710.  
You'll need one panel - one 36" x 42" cut.


The Backing

For the backing Wendy and I both love the Lewe the Ewe in the Meadow.   
Product Code: SB20049-810  
For this fabric you'll need about 42" -- or 1.25 yards. 
My general rule of thumb is that the batting and backing should be a few inches larger than the quilt top -- It gives you something to hold when quilting your edge or border designs.


The Binding

For the binding we choose the Susybee Black and White Dot -- it's really an awesome multipurpose fabric.  
I often use it for small sashings too!! 
Product Code: SB20171-199    
A quarter yard of this fabric is perfect for your binding.


The Batting

  My go-to batting to add amazing loft to any project is Quilters Dream Wool batting.  
It really does "Quilt Like a Dream". 
There's minimal shrinkage and it can be machine washed and dried
 (albeit on cool temps) .  
You can read more about Dream Wool by clicking here.
A Crib size piece of batting is perfect for this project (60" x 46").


The Book !!  

Stitching Pathways by Wendy Sheppard

Most, if not all, of the motifs we plan to quilt 
are from Wendy's book,
Stitching Pathways.  
***
 In my opinion this is one of the best Free Motion Quilting books on the market. 
Not only does Wendy give you awesome beginner information and tips, she includes a wide variety of quilting motifs and shares -- in great detail -- HOW to quilt them.  

It's with this detail that you'll learn to stitch the motifs.   
Wendy and I will independently choose 
where to use the motifs, 
you'll learn how to stitch your choices from the book.  
You won't be disappointed -- I promise!  
Best Book Ever!

Thread ~ Thread ~ Thread

For my quilting I choose to use threads from my Aurifil Designer Collection, The Subtle Sampler.   If you're not familiar with The Subtle Sampler you can read more about it here ==>  The Subtle Sampler.


The Subtle Sampler contains 4 weights of Aurifil thread and I use all 4!  

 During the Quilt Along I'll explain why I choose one weight over another -- and why I choose the specific color I use.   I'll share as much insight on motif and thread selection as possible. 

Be sure to jump to Wendy's Blog to find out what she's Quilting with.  
I assume she'll be using her Subtle Strings collection by Aurifil.
Which will you choose?

Standard FMQ Supplies...

You'll want to consider having some of these basic FMQ Supplies:

Top Stitch Needles:  My favorite are Superior Titanium Coated Top Stitch Needles.  Because I use a variety of different weights of thread I choose to purchase the Assortment Pack of these needles.   We'll chat a bit about why I love these needles in the next post.   
NOTE:  If you're stitching on a Janome machine consider purchasing the Janome PURPLE Tip needles.  This needle is made specifically for Free Motion on the Janome.   I also keep the RED Tip  needles on hand.    Sometimes that Janome of mine gets a little temperamental.

Machingers Quilting Gloves -- To help you CONTROL your quilt top -- it's key to making awesome looking motifs!     Purchase them in the smallest size possible to comfortably fit your hand -- that way you can still change a needle, re-thread your machine, etc.  

Teflon Slider:  My favorite is the Supreme Slider.  It comes in several sizes.  I started with the standard size and eventually moved up to Queen.   This tool helps the fabric slide easily across your machine bed.   It's worth its weight in gold.

Machine Extension Table:  Ideally, having your machine drop into a table is the best solution -- this way your machine bed is flush with the table top that will hold your fabric while you're stitching.
If you can't do this, the next best solution is a machine extension table.   Your favorite shop can order these for you (I can too if you're not near a shop).   

Check out this blog post from years ago to understand options for machine setup.  I'll talk about this more next post too.

If you're interested in getting a Sew Steady extension table package there are some awesome package deals right now -- chat with your local shop owner or send me an email to learn more.  (redbirdquiltco@gmail.com).

More Information:  You can read more about the quilting area setup and supplies that I love by reading this POST from the 2016 Free Motion Quilt Along.    There are a few images, tips and a video to help you understand why I love the tools I love.  

Quilt Along Lessons:

Jan 7th
Karen's Announcement Post  ✅
Wendy's Announcement Post

Jan 21st
 Karen's Setup, Planning, Basting ✅
Wendy's Setup, Planning, Basting

Jan 28th
Karen's  Stabilization or Catch Up ✅
Wendy's  Stabilization or Catch Up 

Feb 4th
Karen's  Inside Center Panel ✅
Wendy's  Inside Center Panel

Feb 11th
Karen's Progress Pics ✅
Wendy's Random Thoughts 

Feb 25th
Karen's   Top and Bottom Rectangles ✅
Wendy's  Top and Bottom Rectangles

March 4th
Karen's  Top & Bottom Squares  ✅
Wendy's   Top & Bottom Squares  

March 11th
Karen's  Left & Right Panels  ✅
Wendy's Left & Right Panels 

March 18th
Karen's  Narrow Sashing Swirls ✅
Wendy's Narrow Sashing

April 1st
Karen's Fast Feather Border ✅
Wendy's Outside Border

April 8th
Karen's Binding, Sleeve & Label  ✅
Wendy's Binding, Sleeve and Label


Need to Purchase Supplies ?

We'd LOVE YOU to support YOUR favorite shop!!
 So please check with your local shop first, and if you're having trouble finding supplies jump over to this post for other options.

We'll be keeping a working list of shops that have at least 2 of the main items available (fabric, book, or thread collections) for purchase. 

Click "here" for participating shops.  
Check back often -- we're updating this list as we learn of new participating shops. 

Giveaway Items: 

NO QAL is Complete without Prizes!! 
We're working with a few awesome Sponsors to get you some fun prizes.

Click "here" to learn about our sponsors & available prizes.  
Be sure to visit regularly to see updates to the Prize Packages.  

Stay In Touch -- Follow Us!


To get some sneak peeks, learn about new posts on the blog or just see what's happening be sure to follow Redbird Quilt Co on Facebook and/or Instagram 

To save time you can also signup for blog email notifications.  
Scan my blog sidebar to sign up via Feedburner or Bloglovin'.
Each time I make a blog post you'll be notified via email.

Wendy Sheppard

Be sure to follow Wendy Sheppard on Instagram and/or her blog.

Support Our Main Sponsors:  


Follow World of Susybee on Facebook or Instagram - Signup for the "Buzzz"

Follow Aurifil on Facebook or Instagram - Signup for Auribuzz 


Joining in the FUN?

Aweseome!!

Please leave a comment below 
-- tell us where you are joining from.

Woohoo!  We're on our way!
So exciting to be here... 
 If you have questions drop me an email, 
leave me a comment below (but be sure to check back for an answer) 
or tag me in a Facebook or Instagram message.   
I'll get back to you as soon as possible.

Also -- be sure to share with all your Free Motion friends!  
The more of us the merrier. 
Have a blessed week all -- I'll tie in later.
Keep on Stitchin' 
Karen


Thursday, March 31, 2016

2016 Free Motion Quilt Along - Part VII Landscape & Background FMQ

Greetings Fellow Quilters!
&
Welcome to Part VII of the
2016 Redbird Quilt Co.
Free Motion Quilt Along
using the whimsical 
Lewe's Balloons Growth Chart
by Susy Bleasby
for World of Susybee

We're in the home stretch and it's sew exciting!
If you're just joining us be sure to checkout the previously published
Free Motion Quilt Along Posts:

Introduction => here
Sponsors =>  here
Supplies =>  here
Part I Pieced Borders =>  here
Part II Pin Basting ==>  here
How to Quilt That =>  here
Part III Tools, Setup + Practice => here
Part IV Let's FMQ => here
Part V More FMQ => here
Part VI Echo, Pebbles, Loops & Swirls Oh My! => here

Also, do checkout our fabulous Sponsors and their generous Giveaways....
You can read all about it  ==> here

This week we're going to get busy quilting the Lewe's Balloons Landscape (at bottom of panel) and Background.

Lets start with the Landscape quilting.
There is 1 video and a few still images (below) to check out.

On the landscape quilting....
Yes I did -- I changed my mind on the thread color .
(Isn't that a quilters prerogative ?)

In our "How to Quilt That" session I thought we would go with the Aurifil 50Wt in Creme Brulee -- but at the last tossing of the colors on the quilt top, the Aurifil 50Wt Spring Green color won!

It just spoke to me.
Does that ever happen to you ?

Of course you should always do what speaks to YOU!
It's a personal choice.

Take a few minutes and watch the YouTube video by clicking the image below:
Here are a few close up images of the landscape quilting:
This one addresses the "Ghost" quilting that I mentioned in the video
 Of course I quilted both Susybee's the same as we had before. Pebbles on the flight path and a slight echo around everything.

The landscape Susybee was a bit of a challenge.
My stitches were a little small and the quilting area was TINY.

Feel free to make bigger pebbles here - you don't have to pebble every
flight path dot.

Remember though - no stressing - we're in learning mode.
 I also tried to follow the landscape lines in this area.  it worked out pretty well.
The Spring Green color was just right.
Next up:
Lets Talk Background motif ideas and a
ways to Test Drive the motif on your quilt top.
Click the image below to watch the video:
I used my nifty Dritz Longarm Transparent Quilting roll to "test drive" a motif.

I love being able to "test drive"
a motif on the quilt top.

Unfortunately, I could not longer find the product on the market.

In its absence though you could try one of these alternatives:
Clear Vinyl Sheets
Plexi Glass
Press-n-Seal
Other...
Be sure to use a dry erase marker so you can try a variety of designs.

If you decide to go with Windy Swirls on your Quilt top, use the images below for a guide in placing them.

NOTE:  Now that my quilting is complete -- I have a few "things to consider" before your quilt your "windy swirls"

It may be easier to quilt a nice looking "windy swirl" by making them short and keeping a nice curve along the way.

Also -- consider stitching your Windy Swirl echos further apart.

I made mine a little tight and, if I were to do it again, I would make the echos a little further apart to use up a bit more of the background fabric.

Does this make sense ?

The last video of this lesson shows you how I quilted the
"Windy Swirls"

See disclaimers above on length and echo width for your Windy Swirls.
Here are still images to help you consider placement for your Windy Swirls.

As I mention in the video, use an air or water soluble pen to mark a windy swirl guide line on the fabric.  No need to mark each line in a Windy Swirl - just one should do the trick.
Also -- it's only a guide, don't let it control you.

My positioning for the Bottom left panel area:
Middle right:
Top left:
Top right:
And finally -- I also used my FMQ foot and the Aurifil #4241 Very Dark Grey to stitch the growth chart lines up the left side of the panel.
And here's a view of the top of the panel:
I am just LOVING the way this panel is finishing.
I must admit though, it's hard for me to NOT quilt every open space.
I tend to quilt very dense on my home machine.  It's quite a hard habit to break.

For the purpose of our QAL and our Growth Chart though, there is no need to do dense quilting in the background.   

I hope you're enjoying our progress. 
I sure am!

Finally:

The next lesson will cover the two outside border fabrics.
I'll add in a short tutorial on the hanging sleeve and binding and we'll be all set.

Are you excited ? 
How is your quilting coming along ?
Be sure to leave me a comment on the blog,  any YouTube Video, or over on Facebook. 
I would love to see your progress and hear your woes (if you have them).

Happy Quilting!
Karen

More Info:


I'm booking Redbird Quilt Co. Lectures, Trunk Shows and Workshops for 2017.
If your Shop, Group or Guild is looking for programs or workshops I would love to hear from you.
Domestic Machine Quilting,  Wool & Needle turn Applique - Technique or Project oriented workshops are available.

Send email inquiries to karen at redbirdquiltco dot com
or redbirdquiltco at gmail dot com
*
Social Media:
*** Follow Me ***
Did you know you can visit me on
and/or
I post all sorts of fun things there!!
**
If you love to Free Motion Quilt consider joining my 
Facebook Community Group
*
Plus
I share quilting related
videos on my YouTube Channel
*
I'll soon be sharing live feed TV on my Periscope
*
I'm also on Pinterest and Twitter 
and I share other tutorials and patterns on
My Tutorials on my blog
*
I have a few patterns available in my Craftsy Store
Thanks again for stopping by...