Showing posts with label #quilting. Show all posts

Monday, March 16, 2015

FMQ - Chevron with a Twist - Part I - QP Curved Template Crosshatch (Giveaway too!)

Hi everyone -- I hope you're surviving this crazy March weather.  Here in the Northeastern USA we've had a few days of nearly 50 degree temps and sun - but many more days with sub freezing temps, nasty wind and snow.  Although the sewing days have been fun, we're all ready to break into spring.  Here's hoping it comes soon - these are the evenings I'm dreaming of...
Keuka Lake - Summer 2013 - Family Fishin'
In case you missed it, my latest free quilt design, "Chevron with a Twist" was published on the Moda Bake Shop on February 23rd.  You can read my introductory blog post here or go directly to the Moda Bake Shop recipe by clicking here.

In the recipe, I outline all the cutting, piecing and applique details for making the quilt, but only a few images and details about the free motion quilting.  What's fun was that the free motion quilting was stitched using Aurifil 50Wt Mako Cotton (love that thread!!) on my Janome Horizon domestic sewing machine -- YOU can do it too!!
In today's post I would like to share more about free motion quilting
Chevron with a Twist
and let you in on a great giveaway!
Woohoo...
Let's start with detailing the Curved Crosshatch quilting.

Some background:

Chevron with a Twist was my first attempt at using EQ7 software for designing a quilt.
Although the learning curve was big, it was well worth the investment (time and $$).
EQ7 Chevron with a Twist Design Print
Just prior to finishing Chevron with a Twist, Linda Hrcka of The Quilted Pineapple announced her brand new QP Curve Templates for Free Motion Quilting (long arm, mid-arm, and domestic machines).
Linda is one of the amazingly talented quilters that I follow on social media.  She has a great blog, a Facebook page and an Instagram account that I stalk.  I'm always inspired by what she creates on her long arm machine -- really -- over the top beautiful every time!  

Follow her - I promise you won't be disappointed.  Even if you don't FMQ your own quilts, Linda's quilting designs will give you tons of ideas to share with your long arm quilter.

Here is a sample of Linda's beautiful quilting.
"Portland Rose" was created by the amazing Lisa Bongean (Primitive Gatherings Quilt Shop) and quilted by Linda Hrcka.  The Linda and Lisa quilt won a BLUE RIBBON at AQS Paducah in 2014!  What an honor and certainly much deserved by these two talented ladies.
You can read/see more "Portland Rose" on Linda's blog here.
Image courtesy The Quilted Pineapple
SO, here is this very talented professional long arm quilter with a awesome set of curved acrylic templates that SHE DESIGNED... The QP Curve Templates.
I had to have them! 
I ordered the entire set and started on a mission to find a way to use them.

Back to EQ7 -- What's neat about EQ7 is that you can print a black and white image of your design (layout only) and use it to sketch potential FMQ motif.

I was pretty sure I wanted to stitch feathers in the Chevrons, and because I was itching to use the QP Curve Templates, I came up with this new to me "Feather Fireworks" aka "Feather Star-Burst" design for the non-Chevron blocks
I kinda liked the sketch so I started quilting.  Chevrons first... after considering two different designs for the Chevrons I settled on feathers.  What a great way to hone your feather skill - that's a lot of feathers!
I will share the chevron feather process in a separate post.
Next quilting step:  Feather Star-Burst aka Feather Fireworks!  Here's the design and I'll share how to stitch this one too -- in a separate post.

**NOTE: I posted more information about Feather Starburst here -- check it out **
The full-size on-point blocks were all filled with Feather Star-Burst.
I'm really having fun with this quilt and learning The QP Curve Templates!
 At this point I realize I need something a little different in the half blocks or the setting blocks....
A new sketch...
 Hummmh... this might work...Curved Crosshatching!  

Note: I'd been itching to stitch a curved crosshatch on my domestic machine since I purchased Karen McTavish's "Custom Curves" book.  Karen and Rhonda Beyer make beautiful designs with curved templates in that book (a must have book for anyone that FMQ's).

Ok - lets see if I can actually create a acceptable curved crosshatch on my domestic machine using The QP Curve Templates...
I used the #20 QP Curve Template for the Curved Crosshatch
Remember, I'm new to using rulers of any type on my domestic machine... 
Here's the trial run with a narrow Crosshatch...
Trial run for the large Crosshatch
Trial run for "Just the right size" Crosshatch

It was fun to learn how to use The QP Curve templates on practice pieces ...  Once they were created and I placed them near the quilt -- it was obvious that I should go with the "not too wide, not too narrow" design... ha ha ha!! (I won't mention that it had a lot to do with how much time I wanted to spend quilting...).  The "just the right size" crosshatch had 11 lines each side of the crosshatch.

Because I'm new to using acrylic rulers/templates  I chose to mark each line on each block - it gave me piece of mind to get the quilting done with minimal ripping (picking).
I used a run of the mill water soluble marking pen to mark each line.
(Details in the video below)

 What's in a Foot?

To work with acrylic templates on a domestic machine you need a foot that won't slip under or on-top-of the template.  Many thanks to Amy at Amy's Free Motion Quilting Adventures for sharing her knowledge on the subject last year.  I ordered the Janome "Free Motion Frame Quilting Feet Set" for the 1600P - Part# 767-434-005 which included a 1/4" Ruler Foot and an Open Toe Quilting Foot.  Also showing (below) is the closed toe foot (not included in the kit) I use when stitching around wool applique.

The 1/4" Ruler Foot is similar to a hopping foot for a long-arm machine.  It is perfect to ride against an acrylic template that is 1/4 thick.

On the Janome, if the template was much thicker than a 1/4", I may have run into trouble with it hitting against the built in walking foot mechanism.  I'm just sneaking under it with The QP Curve Templates (thankfully).

So I marked and quilted 13 outside 1/2 blocks, 6 inside 1/2 blocks, and 2 corner 1/4 blocks with the curved crosshatch.  
By the time I finished them I was feeling pretty confident -- maybe the next time I'll only have to mark my starting lines.
Now I'll share with you my Not So Professional YouTube videos outlining the marking and quilting process using The QP Curve Templates.

The first video shows you how I marked this particular quilt using
The #20 QP Curve Template.
(Click the image below to watch the video)
 The second video shows you how I quilted the blocks using The #20 QP Curve Template and my Janome Ruler foot.
(Click the image below to watch the video)
Please note -- these are first takes of videos AND the first time I've prepared anything like them.
I stumble over a few words - but I hope they will still be helpful to you.  
Prepare yourself to see and hear me at my quilting finest ;)

Do you want to see more of my quilting videos ? 
Subscribe to my YouTube Channel for upcoming videos.
See more about Feather Starburst in this post !!

***

Wow... that was a bunch of information...
Now we're at the fun part of the post!
The wonderfully talented and always gracious Linda Hrcka of The Quilted Pineapple is providing a 
COMPLETE SET of 
The QP Curve Templates 
to one lucky reader!  

Yes, that's right, an entire set of QP Curve Templates - that is 6 different templates including the smallest template that Linda has coined the "BFF Template" (Best Friend Forever).
Image Courtesy The Quilted Pineapple
The giveaway is open to domestic AND international friends alike!!

The giveaway will close at midnight on Saturday, March 28th. 

*** This Giveaway has Ended  - Congratulations Laura ***
To enter the giveaway, leave One comment below letting me know what YOU would like to use The QP Curved Templates for, what kind of machine you're stitching on and how long you've been free motion quilting (if you are).

For a 2nd chance to win, hop over to one of The Quilted Pineapple social outlets (Blog, Facebook or Instagram and let Linda know how much you appreciate her sharing TheQPCurveTemplates with us.  Be sure to come back and leave me a second comment letting me know how you reached out to Linda. 

Please Note:

If you are NOT A BLOGGER and/or you're not sure if blogger shares your email address on a comment, please, please leave your email address in the comment(s).  For the last giveaway the random winner was tossed out twice because I had no way to contact them (So Sad).  Blogger does not always share your email address with me - so please, if you're not sure, leave an email address in your comment(s).   Thank You!!

Also, many thanks for the support and encouragement you've shown me lately -- It's been a little nuts and I haven't been able to reply to each comment.  Know that I read and cherish each and every one and I so appreciate you leaving them.

Stay tuned - I'll share more FMQ details for Chevron with a Twist in near term posts.
Hugs, 
Karen

PS - Linking up to other blogging friends like Hope Studios Tutorial Tuesday,  Quilt Story Fabric Tuesday, and FreeMotion by the River...

Saturday, August 23, 2014

2014 Quilts, Vines & Finger Lakes Wines Show

Greetings quilting family -- last week I promised to share images from our local quilt show "Quilts, Vines & Finger Lakes Wines" hosted by O'Susannah's Quilts and Gifts in Watkins Glen NY.

There were so many beautiful quilts that I couldn't possibly photograph all of them -- but I did gather a few of the most awesome applique and/or free motion quilted entries at the show.  I've included a few of my favorite entries below and all of the images can be seen by clicking here. 

First up: "Roses in the Vineyard" by Lynn Ink - Lynn hand stitched appx 700 grapes on this 16" mini and she also hand quilted it.  What wonderful talent. See more images here. 
"Roses in the Vineyard" by Lynn Ink
Next, "Belva's Fat Quarters Appliqued" was done by a friend and local guild member, Joan Thorpe - - and was inspired by two Kim Diehl patterns.   Joan created, stitched, and machine quilted (on her domestic) this little number -- you can see more images of it here.
"Belva's Fat Quarters Appliqued" by Joan Thorpe
The variety of quilts in the show was amazing -- some traditional, some modern, many applique and antique -- here is another one I just love...
This beauty was cross stitched and quilted by Vivian Pritts and entered into the show by her daughter-in-law Allison.   I seem to be drawn to cross stitched quilts -- you can see more images by clicking here.

In some cases the overhead lighting at the Community Center didn't get along well with my IPAD and I missed getting images of some fabulous quilts -- kudos to all the entrants in the show!!

I did take about 45 pictures of quilts at the show -- you can see all of them in this Post by Redbird Quilt Co.  on Facebook.  You don't need a Facebook account to view it, and please feel free to share  with your quilting friends -- you never know when inspiration will hit! 

If you would like to see my entries in the Quilt Show, and some lovely quilts from the 2013 show -- visit this post.

Finally, I've been trying to follow a suggestion by Mark Lipinski and the Slow Stitching Movement to keep Inspiration flowing, so, after I left the QUILT SHOW on Sunday, I broke out of my habitual route home and took a new path.  Check out the beautiful scenery I found on this route just North of Watkins Glen, NY.  
If you're interested, read more of Mark's suggestions to break out of your inspiration slump here.

Let me know if you enjoy posts like this.. I always enjoy looking at quilts -- do you?

Stay tuned for my entry in the "Around the World Blog Hop" on Monday, and some other fun announcements next week.

Have a blessed day all!
Hugs,
Karen

Wednesday, June 4, 2014

Do you FMQ? The Process...

It's been many, many weeks since I've had my hand at moving fabric around under a needle - I needed the practice, I needed the down time, I just needed to do it!  

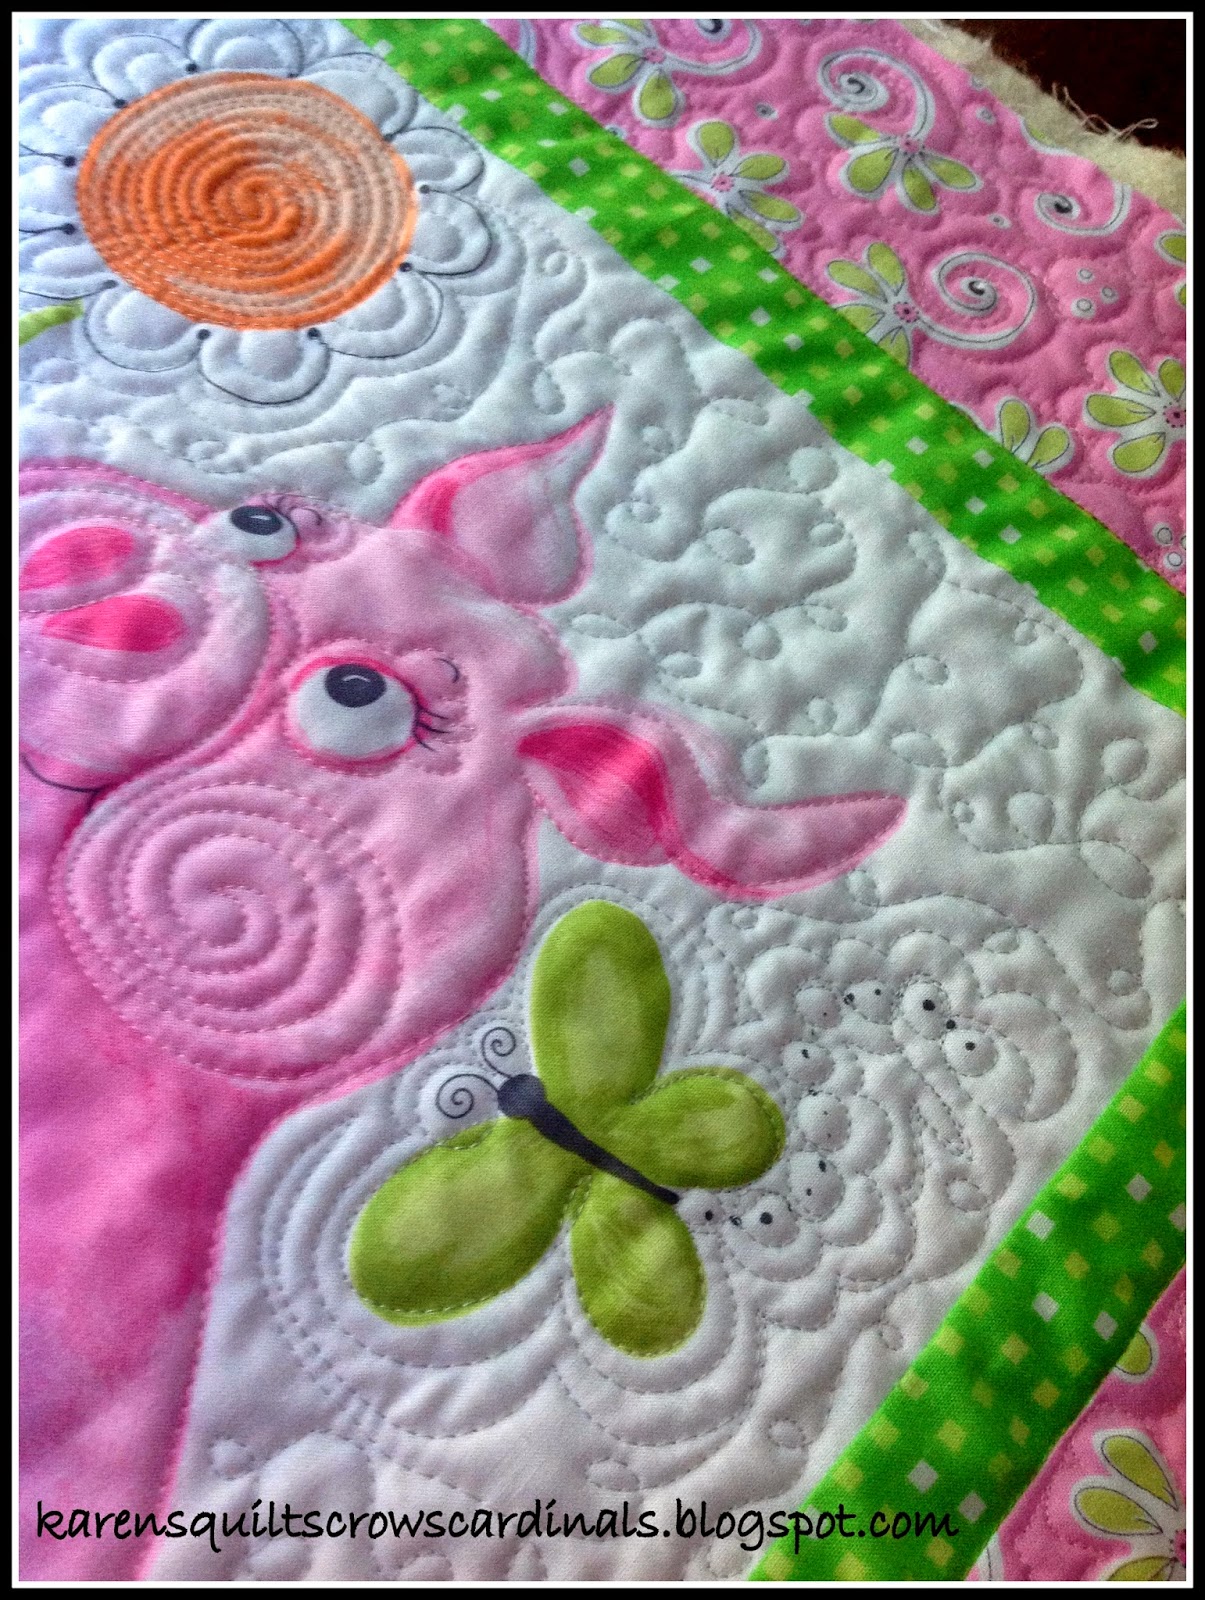
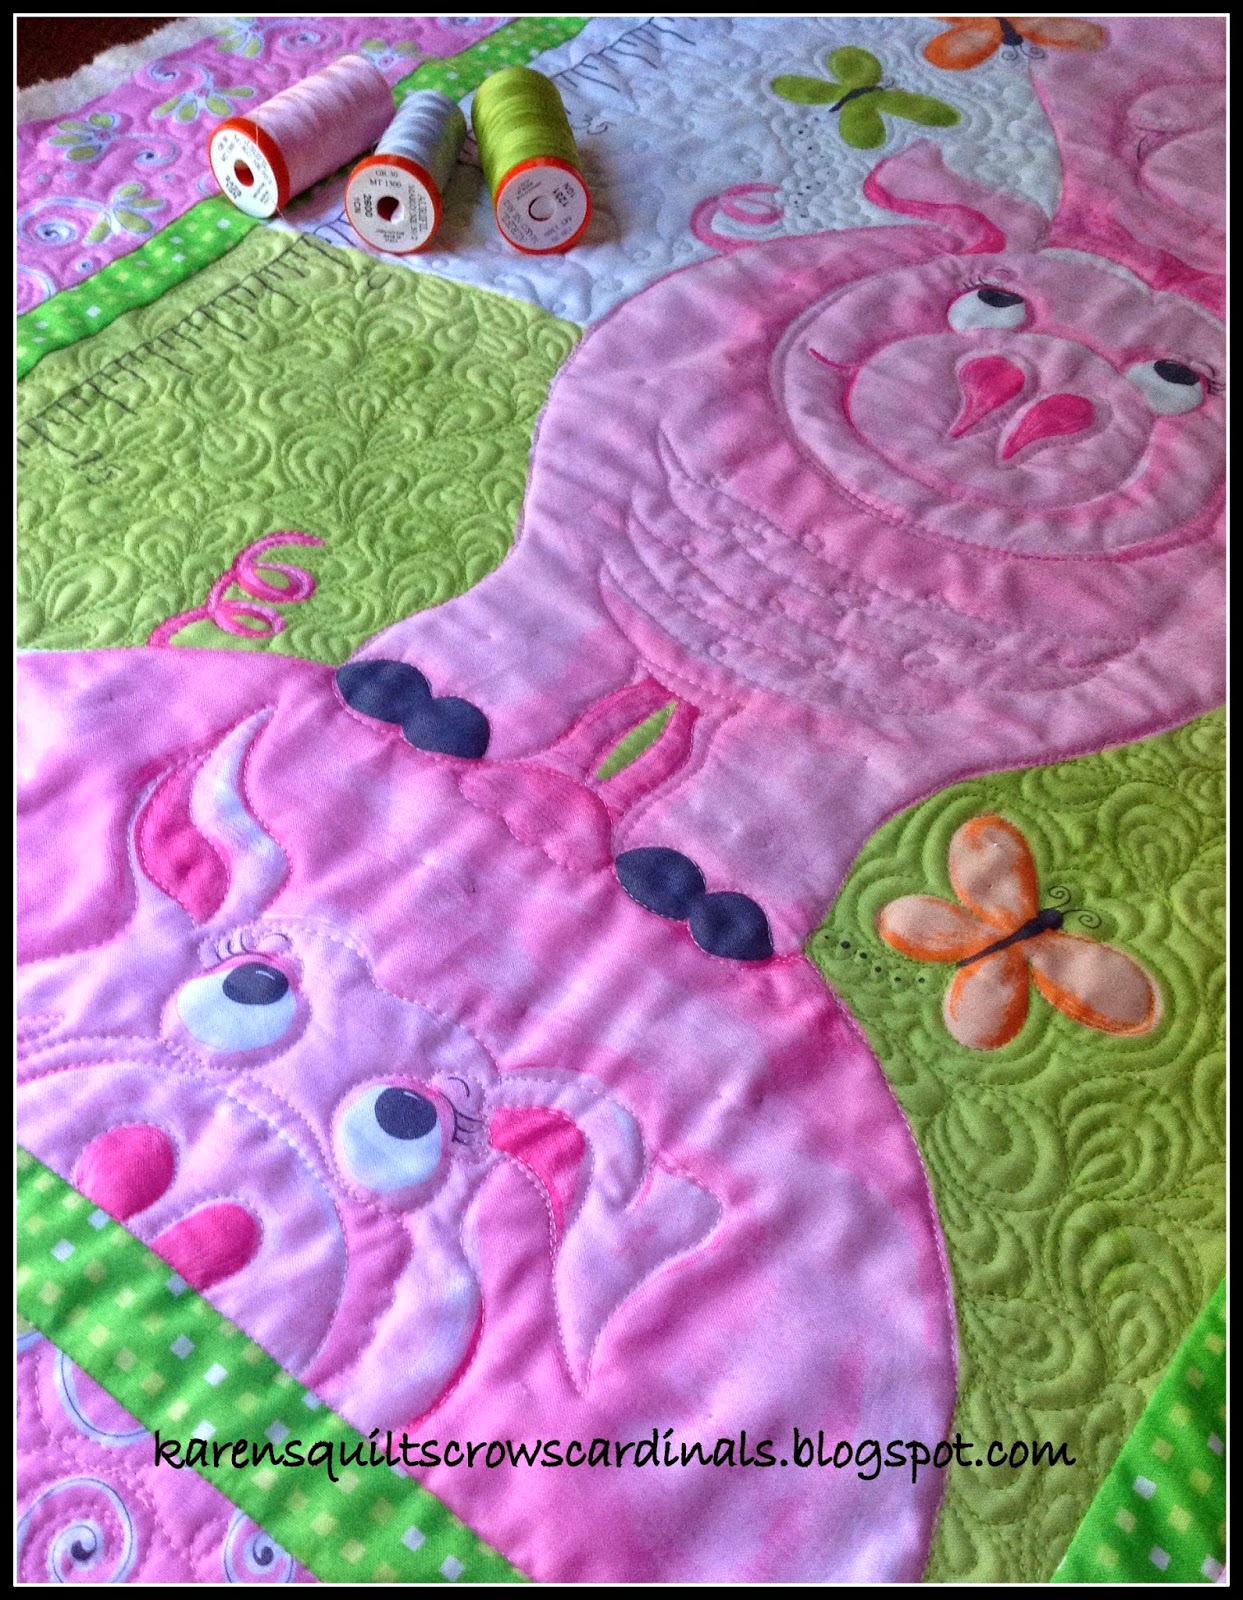
This is a sweet little Piggy Growth Chart by The Wonderful World of Susybee and it's a fun way to get those FMQ juices flowing again.   I dove into my stash of beautiful #Aurifil Mako Cotton 50Wt threads and had some fun!!
Here are the steps that worked for me:

1.  Give your machine a good cleaning inside and out.  The Janome Horizon doesn't need to be oiled, so a good dusting did the trick.  I removed the face plate, swept all around, and discarded those dust bunnies!  It's extremely important to start with a clean machine.

2.  Outfit the machine with a Little Genie Magic Bobbin washer -- (see it below in the bobbin area ?)  These little guys are the best.  They take up that little extra space in your bobbin area and help your bobbin thread glide smoothly - especially during Free Motion Quilting zigs and zags.  One washer lasts years so they are well worth the investment (12 per package).  I've never done without one and purchased them originally on recommendation from Leah Day.   Give them a try!  Share with your friends!

3. Start with a full-up bobbin loaded with Aurifil Mako Cotton 50Wt thread.  YOU KNOW I love this thread! The 50Wt thread is thin and goes a long way to make your bobbin last and last...  I use the same thread in the top and bobbin and it works out wonderfully.  
4.  Thread, thread, thread -- was fun to open and use a brand new, full spool of Aurifil thread on the machine.  This is Mako Cotton 50 Wt in Color #2423.  Just right for the piggy and the border...
5. Feed Dogs -- to Drop or Not to Drop:
Oh NO!  Now all my secrets are out... this is a sweet little workaround to avoid dropping the feed dogs and setting the thread length to zero.

On the Horizon I find that the machine makes more consistent stitches when I leave the feed dogs UP and the thread length at 2.5.    (Yet another tip from the wonderfully skilled Leah Day).

I tape this little helper down so that my feed dogs don't damage the underside of the Supreme Slider...  PS - I do NOT engage my single hole throat plate on the Horizon as I have a small burr on the underside and it snags and breaks my thread -- I really should have that checked out ;)

NOTE:  I've replace my cardboard feed dog cover with one made from template plastic.  The template plastic holds up better to the feed dog movement and puts less "dust" into the casing area.
6. Insert a new needle --  This time I was running with a  Microtex 80/12 needle.  The Microtex Sharps are fantastic too! Aurifil recommends you use Microtex 80/12 with 50Wt thread - (I didn't realize that).  You can see their recommendations for Mako Cotton 50Wt by clicking here.

Note: My Janome Horizon 7700 REALLY likes it when I use Janome brand needles.  Superior Brand Sewing Needles are awesome too!.  If you're skipping stitches chances are your needle need to be changed and/or "right sized" or your foot needs to rest closer to the fabric.

7. Supreme Slider & Gloves:  I washed the linty back-side of my Queen Supreme Slider (so it will stick well) and gathered my Machiners X-small gloves.  The slider is a Teflon like sheet that allows your quilt to move smoothly over the machine bed.  There are other less expensive models available as well but I've not yet tried them.   The Gloves are prefect to Grip your quilt layers while manipulating for quilting.  The Machingers gloves run large -- so the X-small was well large enough for my hands.

8. Quilting Foot:  Choose and attach your favorite FMQ foot. I normally work with my open foot --if I could only find it (Where did it go ??)

Note: When I quilt around applique I almost always use a CLOSED foot.  The Open Toe Feet may catch on wool or needle turn applique pieces, especially if you're using a higher loft batting. Personally I also prefer to use a foot that is ROUND.  Some feet are square or oblong and personally I find this distracting, especially when I am echo quilting.

9. Needle down position:  Before you start stitching -- engage the "needle down" option if your machine has it.  This way, whenever you stop sewing your needle will stop in the "Down" position.   This allows you to reposition your hands without the quilt top moving.
10.  Top thread tension:   Last but not least, up the top thread tension -- this is a MUST DO for me on the Janome with Cotton fabric, Aurifil Thread, and one or two layers of batting (cotton/wool).  Works like a charm every time.  

Note: Each machine and quilting style will vary.
Woohoo!  We're ready to stitch !!

Note:  This quilt was prepared with one layer of warm and natural batting.  An additional layer of Wool or Silk batting would give much more texture to the quilting.

First I wanted to outline all the pigs, then follow their inside features as well, eyes, noses, etc.

On this sweet little growth chart my customer sister told me not to fuss... so I took a few shortcuts.

To start, bring the bobbin thread to the top, take a couple stitches in place and trim threads (do not do this on a show or juried quilt).
Proceed around the piggy , highlighting the piggy features as best you can. 
This top piggy was fun to stitch -- the rounded features of his face and belly screamed spiral!!  I was a little wonky starting out but he's still sweet!!
After outlining the piggies and filling in their features, decide on a background filler (and color).

Use the filler to travel from background component to background component.

I chose to use a quick "loop de loop" and it worked out great.

The Aurifil Mako Cotton 50Wt in Color 2600 gave the background a bit of sparkle...  Sweet!
While traveling with the background loop de loop I would find myself inching up on a background component (butterfly, bee, etc).

When close enough stitch in the ditch around the item -- then make a few echo stitches to complete the shape.  I love the way stitching the pebbles gives the butterfly movement...
The flower component was fun to quilt!  Start on the perimeter and work your way to the middle with a swirl -- then split the width of the quilting on your way back out.  Be sure to outline the inside and outside of the petals - and echo stitching always makes things look more defined.
The green background spoke of leaves and grass to me -- so I decided to incorporate an Angela Walters design -- I love the way it turned out.
Oh, and that Aurifil Mako Cotton 50 Wt in Color #1231 matched the greenery perfectly!!

I had a tough time deciding what to stitch in the outer border -- so again I let the fabric talk to me and did an outline stitch around the flowers and swirls and pebbles... I think it came out just fine.  Do you like it ?
Here is the status as I head to bed -- I think I need to do something with the green border but my customer sister is telling me not to fuss.  
We'll see what tomorrow brings ;)

You can see other Susybee Growth charts I've quilted here, here and here.

***
There are more Free Tutorials and Patterns on my blog - just click here -- or visit the My Tutorials tab at the top of this page (or, on a mobile device drop down the line options).

I also share Free Motion Quilting on a Domestic machine on my YouTube Channel -- Click here!

I would love to hear your feedback - Thanks for stopping by!

*****

For a more in depth Free Motion Quilting tutorial -- please visit the "Free Motion Quilting Fun" post where I share insight to different weight threads and quilting motif.  This main tutorial is hosted by the Bear Creek Quilting Company but you can click here for my introductory post. 

*****

Linking up to a few of my favorite parties -- check them out on the sidebar and click on over to view the eye candy.

Hugs,
Karen

Tuesday, May 20, 2014

Bloggers Quilt Festival - Original Design - Redbird and Berries

Hello everyone!  I'm excited to present my entry into the "Original Design" category of the Spring 2014 Bloggers Quilt Festival hosted by Amy's Creative Side. 
Meet Redbird and Berries - an original design and tutorial created earlier this year for the Moda Bake Shop.  

Download the free Redbird and Berries PDF from the Moda Bake Shop or from my Craftsy pattern store.

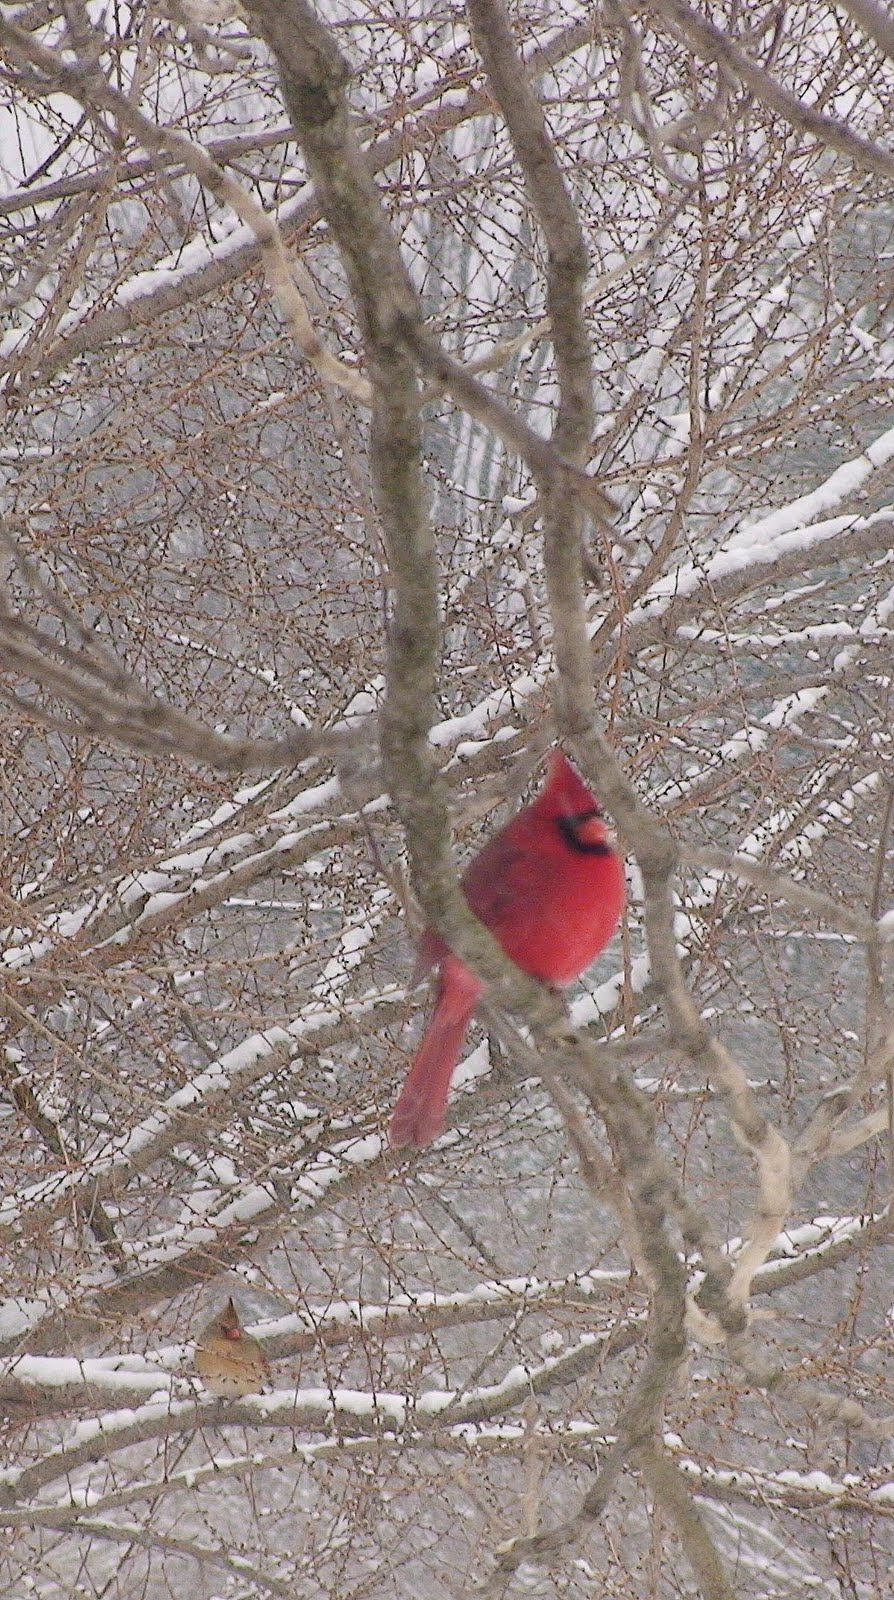
Redbird and Berries was inspired by my love of Songbirds -- especially the Northern Cardinal.
You see, my mom passed 10 years ago and since then I've felt a special connection to the beautiful Northern Cardinals that continually cross my path. 

I feel my interactions with them sometimes include small, yet meaningful, messages from my mom.

Even the name of my blog reflects my love of this precious little songbird.
If I'm driving a little too fast and a Cardinal flies in front of me, I *slow down*.
If I'm having a bad day and I hear the sound of the Male cardinal singing to his mate,
I *smile*.
Cardinals frequent our many bird feeders during the winter months and act as a daily reminder that my mothers love and guidance is always near.
To continue my obsession with the Northern Cardinal, in the fall of 2013 I participated in the "Wool Lovers Blog Hop" and created this darling little wool felt "Redbird" as my entry -- later I created a tutorial so you can make your own felted Redbird.  You can see the tutorial by clicking here.
So when I first laid eyes on the beautiful grunge fabric on the Moda / United Notions web site -- I knew I had to make something with it.  That red colored Grunge was perfect for a Redbird. 


I'm also big fan of anything Mackenzie Childs, so the rest of my inspiration came from the Mackenzie Childs "Courtly Check" pattern (Courtly Check is a registered trademark of MacKenzie-Childs) --  one of her very popular lines.

Here are two of my favorite Courtly Check pieces by Mackenzie-Childs.   Isn't that ring dish sweet?  I keep waiting for it drop in my lap... I'm afraid $185 is a bit out of my price range!
Image from MacKenzie-Childs.com
To mock that beautiful Checkerboard border I found the sweet line "Little Black Dress 2" by BasicGrey for Moda. 

The rest is history - I sent a proposal to the lovely team at the Moda Bake Shop and they graciously accepted.

The fabric (once available) magically shows up on the doorstep and, after a few weeks of  pulling my hair out fussing, the result is "Redbird and Berries - Mini Quilt" recipe on the Moda Bake Shop (click here to see it).
If you've decided to download and make Redbird and Berries -- be sure to check out the special Redbird Mask and Beak tutorial by clicking here.

Redbird and Berries Mini Quilt
An Original Design by Karen L. Miller 
for the Moda Bake Shop
Size:  22" x 30"
Hand Appliqued & Machine Pieced 
Machine Quilted on my Domestic Machine 
Awesome Aurifil Mako 50wt Thread
for applique, piecing and quilting!

I hope you get a chance to hop over to Amy's and view all of the fantastic quilts on display.  

Voting begins May 23rd.  You'll find "Redbird and Berries" in the "Original Design Quilts" category.  

There is also "Viewers Choice" voting -- be sure to nominate your favorite "Viewers Choice" quilt here by May 23rd.

As always -- thanks for your continued support and encouragement!

Hugs,
Karen