Showing posts with label SewItIs. Show all posts

Monday, May 30, 2016

2016 Free Motion Quilt Along - Winners!

Woohoo!
I've completed the random drawings 
for the prize winners in the
2016 Free Motion Quilt Along !!
***
Before I announce the "official" winners I want to congratulate everyone that Quilted Along with us on the Susybee Lewe's Balloons Growth Chart or otherwise.  
See the original QAL Post here

Learning to Free Motion Quilt is sew fun but can sometimes be frustrating -- so persistence and practice is key to improving your FMQ Skills.

There were a total of 13 projects (some finished and some work in progress) submitted by the extended deadline -- and at least one completed project was submitted after the deadline.

I used Mr. Random Generator to choose the Winners in the order the sponsors were listed in the original post.
Because we had a total of 13 entries
I've thrown in a few "extra" prizes
for those that didn't win
a sponsored prize...
Everyone's a winner today!

***

Many thanks again to all of our fabulous Sponsors -- for offering quality products and great prizes.

Let's start with the winner of the awesome designer thread collection 

Thank you
for Subtle Strings...
The beautiful new designer thread collection by my favorite 
FMQ mentor, Wendy Sheppard.  


The winner is:
 Glenice from Australia!
Woot Woot -- Glenice I KNOW you will love this 50Wt Aurifil thread collection!

Next
Thank you Creekside Fabrics, Quilts and Yarns in Arcade, NY.


For the:
 
The Winner is: 

 Di Di -- from the USA!

Congratulations DiDi -- You'll have some fun at the Creekside Fabrics Online Store!


Next,
Thank You
 Quilter's Dream Batting - my favorite batting/waddling. 


For one package each of
Dream Wool and Dream Cotton!

And the Winner is:
 Sharon from Upstate NY!
Sharon I know you'll find great things to do with this fantastic selection of batting!

Moving right along...
Thank you Sew It Is Quilt Shop
For providing another Susybee Panel
with some coordinating fabrics!

And the Winner is:
 Patti H from USA
Congratulations Patti -- You'll have fun making a selection from the Sew It Is Online Store!

Next up:
Thank you Quilty Pleasures in Geneva, NY
 For providing a $20 Store Credit
And the Winner is:
 Ellen from Albany, NY
Congratulations Ellen!
I know you'll love your selection from the
Quilty Pleasures Online Store!

Finally
Thank you World of Susybee !

For providing this fun Lal the Lamb 1 yard cut

And the Winner is:
 Karen C from the USA!
Congratulations Karen -- Lal is sew fun to FMQ - You will be thrilled!

And for the remaining ladies that submitted
Quilt Along entries....
***
I have some sweet older Susybee panels
you can use to
continue to practice your FMQ!!
***
Some Flip the Pig, and Bird and
a few other awesome panels...

Everyone....
To collect your prizes
I'll need an email and mailing address sent to me.
Once I receive this information
 I'll coordinate
getting your prizes shipped to YOU!

eMail me at redbirdquiltco at gmail dot com

Also, I've already rec'd some feedback on the Quilt Along -- if you have feedback too please send it to me, we can all learn together from this first Redbird Quilt Co event.

Happy Stitching!
Karen

Saturday, April 30, 2016

2016 Free Motion Quit Along - Part IX Finishing Steps

Greetings Fellow Quilters!
&
Welcome to Part IX of the
2016 Redbird Quilt Co.
Free Motion Quilt Along
using the whimsical 
Lewe's Balloons Growth Chart
by Susy Bleasby

Many thanks for your patience the last 2 weeks while I traveled from Eastern NY to Western NY sharing my love of quilting with Guilds and Shops along the way!
I'm pretty blessed to travel around sharing what I love with others -- sometimes I have to pinch myself to make sure I'm not dreaming.

In the final installment of our 2016 FMQ Along we're talking finishing steps for the World of Susybee
Lewe's Balloons Growth Chart Panel.


But FIRST !!

If and when you're done quilting the final border on Lewe's Balloons I REALLY want you to follow these instructions!!
  1. Take a step back
  2. Admire your work
  3. Really -- admire your work!   You Did It!!
  4. Now go to a mirror and give yourself a "high five" for walking through this beginner Free Motion Quilt Along and making it to the very end --- WOOHOO!!

If you've quilted along from the 1st to the last session you deserve a BIG pat on the back!   Great job! 

If you're just joining us be sure to checkout the previously published
Free Motion Quilt Along Posts:

Introduction => here
Sponsors =>  here
Supplies =>  here
Part I Pieced Borders =>  here
Part II Pin Basting ==>  here
How to Quilt That =>  here
Part III Tools, Setup + Practice => here
Part IV Let's FMQ => here
Part V More FMQ => here
Part VI Echo, Pebbles, Loops & Swirls Oh My! => here
Part VII Landscape & Background => here
Part VIII Borders ==> here

Also, do checkout our fabulous Sponsors and their generous Giveaways....
You can read all about that  ==> here

****

Finally -- lets talk finishing steps...
They include:

1. Squaring-Up the quilt top
2. Preparing a Hanging Sleeve
3. Prepare and attach the Quilt Binding
4. Prepare and attach a Quilt Label


In lieu of writing tutorials for each of the above steps I've decided to describe and/or refer you to some of my favorite tutorials that cover the finishing steps...

1. Squaring up the Quilt top -- the objectives of "squaring up" include:
  • determining the length and width that the quilt top can be trimmed such that you'll have the same width across the top, middle, and bottom of sections of the quilt and the same length to the left and right of center   
  • determining the length and width of the quilt that will allow roughly the same amount of final border showing around the perimeter of the quilt   
  • ensuring that your corners are cut at a 90 degree angle 
In my Lewe's Balloons Sample Growth Chart I was able to "square-up" to 51" tall by 27.75" wide and with appx 3.75" of the Green Dot border showing all the way around.
Use a large square ruler, a LONG ruler, and a good rotary cutter to "square-up" your quilt.   You may have to "fudge" the squaring along the way -- you'll want to be sure that your corners are at a 90 degree angle.   "Fudging" means you may have some corners or lengths that only have batting showing (and not top or back) -- but that is OK as long as the binding will cover that area.  The main thing is that your quilt is "square", that the corners are at a 90 degree angle and that the width and length measurements don't vary from top to bottom or side to side.
I normally start on a corner of the quilt -- and double check measurements and ruler placement to ensure that I'll end up with a 90 degree angle in each corner.    If you need detailed instruction for "squaring-up" a quilt top there are several different YouTube and written tutorials available online.  I also talk about it briefly in my Family Tree Quilted Envelope Pillow tutorial on the Moda Bake Shop.   You're also welcome to reach out to me via email for help -- I would be happy to help if I can.  My email address is available at the bottom of the post.

2. Preparing a Hanging Sleeve....  

NOTE:  The sleeve instructions below are not quilt show approved....  Preparation of an AQS Approved Quilt Sleeve can be found here.

Image shows the beginning of the sleeve process.  I cut a 8" tall by WOF piece to begin.
For quilts used at home or gifted... my standard way of preparing a quilt sleeve is:
  • Cut the sleeve fabric 8" tall by the width of the squared quilt minus 1 inch
  • Fold the short ends of the sleeve fabric over twice at .5" (each fold) and machine top stitch to make finished short edges
  • Fold the sleeve in half length (long) wise with wrong sides together.
  • Center and position the raw edges of the folded sleeve at the top of the quilt sandwich on the back and pin or baste in place -- be sure it is centered left to right.
  • The sleeve will be sewn to the quilt back when the binding is applied
  • Once the binding is complete, hand sew the bottom and sides of the sleeve to the quilt back -- leaving the outer layer of the short edge open for the rod.
For our Lewe's Balloons Growth Chart I suggest you start with a raw edge sleeve 8" tall by 27" wide -- once it's sewn into the binding it will finish to be 3.75" tall by 25" wide.  

3. Preparing and attaching a quilt binding...  

Oh there are so many ways to make and attach a quilt binding.   The most common method is detailed in this Moda Bake Shop Binding tutorial.

PLEASE NOTE:   We planned for binding strips 2.25" wide and sewn on with a 1/4" seam allowance.   The referenced Moda Bake Shop tutorial assumes the strips are 2.5" wide and sewn with a 3/8" seam allowance.   You can follow the Moda Bake Shop tutorial step by step -- except you'll cut your strips 2.25" wide and use a 1/4" seam allowance.   (If you have enough fabric to cut your strips 2.5" wide, you can follow the Moda Bake Shop tutorial exactly as written).

For our Lewe's Balloons Growth Chart Binding:
  • I cut (5) 2.25" strips by Width of Fabric
  • I sewed the 5 strips together (end to end) with a mitered connection - this reduces bulk when you're attaching your strips to the quilt top.  (See Moda Bake Shop tutorial above). 
  • Once your strips are sewn together end to end and the seams are pressed open, fold the binding in half lengthwise (wrong sides together) and press
  • Now align and pin the raw edge of the binding on the raw edge of your squared quilt on the front side of the quilt (machine stitch to the front and hand stitch on the back). 
  • See detailed instructions for the remaining steps in the Moda Bake Shop recipe.

Label -- it's really important to label you're work.  I normally include these items on my quilt label:

  • Name of Quilt
  • Name & Location of Person who made the Quilt
  • Name of Person who quilted the quilt (if different than the maker)
  • Date the Quilt was completed or gifted
  • Name of Person the Quilt was gifted to
I've tried many times to make a hand-written label and I never seem to be satisfied with them.  For quilts that won't require extensive washing and drying I use the computer to prepare and print the label on fabric.   I've written a tutorial for preparing a label with your computer, you can see it ==> here ==> Printed Quilt Label Tutorial -- sew fun!

Ok then -- once you've completed these steps you've made it to the end game.

In the next few days I'll be posting a recap of our Redbird Quilt Co 2016 FMQ Along AND having a Linky Party so you can submit entries for the Giveaway.   If you don't have a blog, Instagram or Facebook account you can submit your entries to me directly (email below) and I will post them for you so you are eligible for the giveaway drawings.
Great job everyone!! 

Take care now and Keep on Quilting!
Karen

****

More Info:

I'm booking Redbird Quilt Co. Lectures, Trunk Shows and Workshops for 2017.
If your Shop, Group or Guild is looking for programs or workshops I would love to hear from you.
Domestic Machine Quilting,  Wool & Needle turn Applique - Technique or Project oriented workshops are available.

Send email inquiries to karen at redbirdquiltco dot com
or redbirdquiltco at gmail dot com
*
Social Media:
*** Follow Me ***
Did you know you can visit me on
and/or
I post all sorts of fun things there!!
**
If you love to Free Motion Quilt consider joining my 
Facebook Community Group
*
Plus
I share quilting related
videos on my YouTube Channel
*
I'll soon be sharing live feed TV on my Periscope
*
I'm also on Pinterest and Twitter 
and I share other tutorials and patterns on
My Tutorials on my blog
*
I have a few patterns available in my Craftsy Store
Thanks again for stopping by...

Sunday, April 10, 2016

2016 Free Motion Quilt Along - Part VIII Borders

Greetings Fellow Quilters!
&
Welcome to Part VIII of the
2016 Redbird Quilt Co.
Free Motion Quilt Along
using the whimsical 
Lewe's Balloons Growth Chart
by Susy Bleasby
for World of Susybee

If you're just joining us be sure to checkout the previously published
Free Motion Quilt Along Posts:

Introduction => here
Sponsors =>  here
Supplies =>  here
Part I Pieced Borders =>  here
Part II Pin Basting ==>  here
How to Quilt That =>  here
Part III Tools, Setup + Practice => here
Part IV Let's FMQ => here
Part V More FMQ => here
Part VI Echo, Pebbles, Loops & Swirls Oh My! => here
Part VII Landscape & Background => here

Also, do checkout our fabulous Sponsors and their generous Giveaways....
You can read all about it  ==> here

In Part VIII of the QAL
we're talking borders -- woot woot!
*
I'll share what I did for Border 2
and offer FMQ options & lessons
for YOU to quilt Border 2.
We'll also talk Border 3 ideas and FMQ.

Let's get started:
There is 1 video and a few still images to check out.

As always, be sure to watch the video first....
(Click image below)
Here are a few still images of my completed borders.

I decided to go with Aurifil 12Wt
for MY Border #2.
The 12Wt thread adds
sheen & beautiful dimension.
Color #2105 was perfect.
Tips for using Aurifil 12Wt
on your home machine:
  • Use a "walking" or "even-feed" foot
  • Use a 100/16 or 110/18 needle
  • Use 50Wt thread in the bobbin
  • Set your stitch length to a "top-stitch" setting (3.5) 
  • Set your top tension down (a lower number)
  • Stitch slowly
If you're needle is not the right size or it's just old, you may see skipped stitches.
I had a few in my quilting of Border 2.
It's not a disaster -- but it's always better if you can avoid "Skipped" stitches.
To begin and end stitching with 12Wt thread take very small stitches or make a backtrack to lock the stitches.  It's hard to stitch in in place with such a thick thread.

For those of you that want to Free Motion Quilt Border #2 -- please review the Part VIII video where we review and practice 4 different FMQ Motifs for this border.
*
I can't wait to see what you decide.

For Border #3 I went with varying size pebbles around the perimeter of the green dot fabric.
*
Don't worry too much about the uniformity of the pebbles...
Make them all sizes!
Don't even worry about making them all round.
It's a great opportunity to
Practice, Practice, Practice
your pebbles...
Some the pebbles in my border look to be overlapped.
It worked out just fine.
Great thing about pebbles for a border, you can just stitch a continuous design around any corner.
No need to stop or measure!
I love the way it worked out.
Stay tuned....

I'll be sure to talk a little about binding and hanging sleeve in our next blog post.
Now get that stitching done so we can have a giveaway!!

Are you excited ? 
How is your quilting coming along ?
Be sure to leave me a comment on the blog, any YouTube Video, or over on Facebook. 
I would love to see your progress and hear your woes (if you have them).

Happy Quilting!
Karen

More Info:

I'm booking Redbird Quilt Co. Lectures, Trunk Shows and Workshops for 2017.
If your Shop, Group or Guild is looking for programs or workshops I would love to hear from you.
Domestic Machine Quilting,  Wool & Needle turn Applique - Technique or Project oriented workshops are available.

Send email inquiries to karen at redbirdquiltco dot com
or redbirdquiltco at gmail dot com
*
Social Media:
*** Follow Me ***
Did you know you can visit me on
and/or
I post all sorts of fun things there!!
**
If you love to Free Motion Quilt consider joining my 
Facebook Community Group
*
Plus
I share quilting related
videos on my YouTube Channel
*
I'll soon be sharing live feed TV on my Periscope
*
I'm also on Pinterest and Twitter 
and I share other tutorials and patterns on
My Tutorials on my blog
*
I have a few patterns available in my Craftsy Store
Thanks again for stopping by...

Thursday, March 31, 2016

2016 Free Motion Quilt Along - Part VII Landscape & Background FMQ

Greetings Fellow Quilters!
&
Welcome to Part VII of the
2016 Redbird Quilt Co.
Free Motion Quilt Along
using the whimsical 
Lewe's Balloons Growth Chart
by Susy Bleasby
for World of Susybee

We're in the home stretch and it's sew exciting!
If you're just joining us be sure to checkout the previously published
Free Motion Quilt Along Posts:

Introduction => here
Sponsors =>  here
Supplies =>  here
Part I Pieced Borders =>  here
Part II Pin Basting ==>  here
How to Quilt That =>  here
Part III Tools, Setup + Practice => here
Part IV Let's FMQ => here
Part V More FMQ => here
Part VI Echo, Pebbles, Loops & Swirls Oh My! => here

Also, do checkout our fabulous Sponsors and their generous Giveaways....
You can read all about it  ==> here

This week we're going to get busy quilting the Lewe's Balloons Landscape (at bottom of panel) and Background.

Lets start with the Landscape quilting.
There is 1 video and a few still images (below) to check out.

On the landscape quilting....
Yes I did -- I changed my mind on the thread color .
(Isn't that a quilters prerogative ?)

In our "How to Quilt That" session I thought we would go with the Aurifil 50Wt in Creme Brulee -- but at the last tossing of the colors on the quilt top, the Aurifil 50Wt Spring Green color won!

It just spoke to me.
Does that ever happen to you ?

Of course you should always do what speaks to YOU!
It's a personal choice.

Take a few minutes and watch the YouTube video by clicking the image below:
Here are a few close up images of the landscape quilting:
This one addresses the "Ghost" quilting that I mentioned in the video
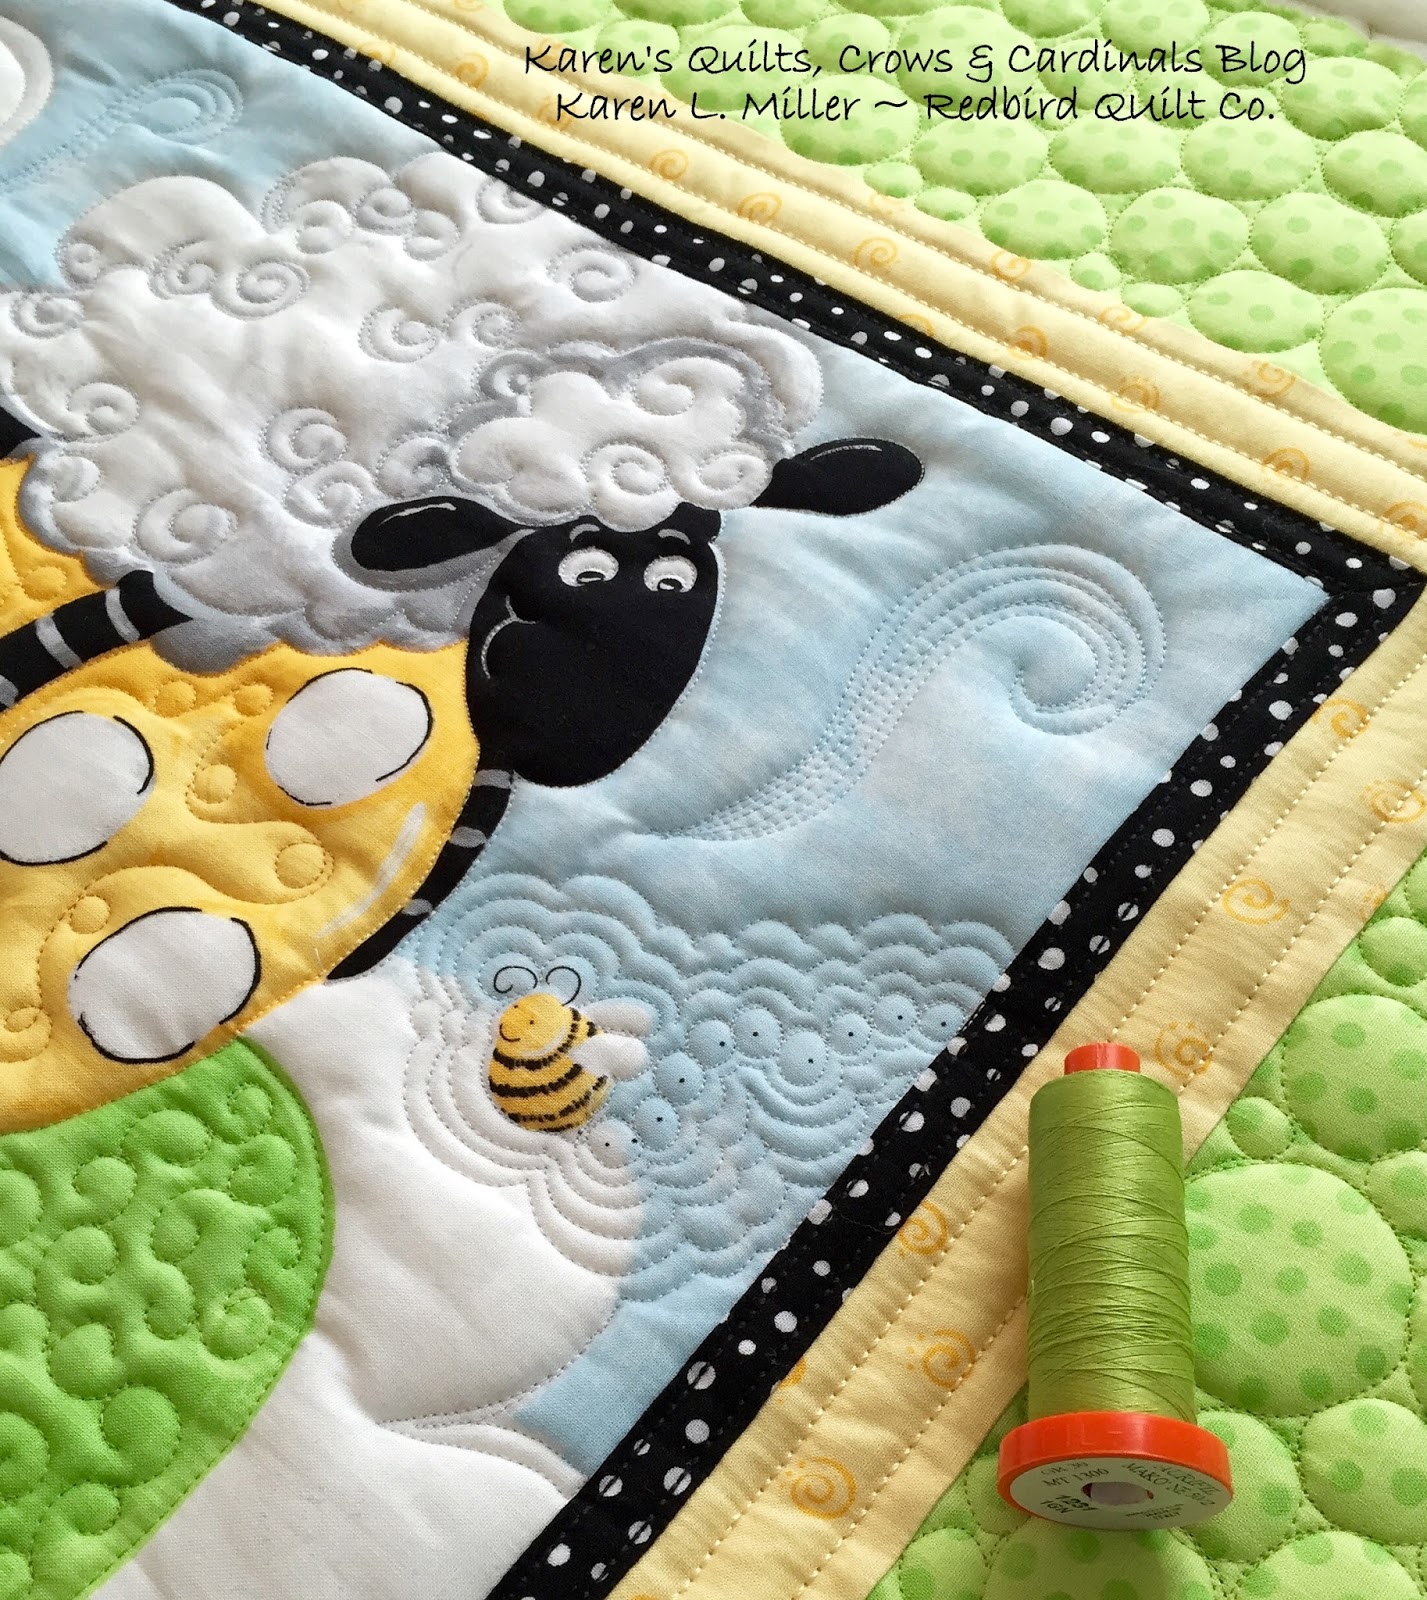
 Of course I quilted both Susybee's the same as we had before. Pebbles on the flight path and a slight echo around everything.

The landscape Susybee was a bit of a challenge.
My stitches were a little small and the quilting area was TINY.

Feel free to make bigger pebbles here - you don't have to pebble every
flight path dot.

Remember though - no stressing - we're in learning mode.
 I also tried to follow the landscape lines in this area.  it worked out pretty well.
The Spring Green color was just right.
Next up:
Lets Talk Background motif ideas and a
ways to Test Drive the motif on your quilt top.
Click the image below to watch the video:
I used my nifty Dritz Longarm Transparent Quilting roll to "test drive" a motif.

I love being able to "test drive"
a motif on the quilt top.

Unfortunately, I could not longer find the product on the market.

In its absence though you could try one of these alternatives:
Clear Vinyl Sheets
Plexi Glass
Press-n-Seal
Other...
Be sure to use a dry erase marker so you can try a variety of designs.

If you decide to go with Windy Swirls on your Quilt top, use the images below for a guide in placing them.

NOTE:  Now that my quilting is complete -- I have a few "things to consider" before your quilt your "windy swirls"

It may be easier to quilt a nice looking "windy swirl" by making them short and keeping a nice curve along the way.

Also -- consider stitching your Windy Swirl echos further apart.

I made mine a little tight and, if I were to do it again, I would make the echos a little further apart to use up a bit more of the background fabric.

Does this make sense ?

The last video of this lesson shows you how I quilted the
"Windy Swirls"

See disclaimers above on length and echo width for your Windy Swirls.
Here are still images to help you consider placement for your Windy Swirls.

As I mention in the video, use an air or water soluble pen to mark a windy swirl guide line on the fabric.  No need to mark each line in a Windy Swirl - just one should do the trick.
Also -- it's only a guide, don't let it control you.

My positioning for the Bottom left panel area:
Middle right:
Top left:
Top right:
And finally -- I also used my FMQ foot and the Aurifil #4241 Very Dark Grey to stitch the growth chart lines up the left side of the panel.
And here's a view of the top of the panel:
I am just LOVING the way this panel is finishing.
I must admit though, it's hard for me to NOT quilt every open space.
I tend to quilt very dense on my home machine.  It's quite a hard habit to break.

For the purpose of our QAL and our Growth Chart though, there is no need to do dense quilting in the background.   

I hope you're enjoying our progress. 
I sure am!

Finally:

The next lesson will cover the two outside border fabrics.
I'll add in a short tutorial on the hanging sleeve and binding and we'll be all set.

Are you excited ? 
How is your quilting coming along ?
Be sure to leave me a comment on the blog,  any YouTube Video, or over on Facebook. 
I would love to see your progress and hear your woes (if you have them).

Happy Quilting!
Karen

More Info:


I'm booking Redbird Quilt Co. Lectures, Trunk Shows and Workshops for 2017.
If your Shop, Group or Guild is looking for programs or workshops I would love to hear from you.
Domestic Machine Quilting,  Wool & Needle turn Applique - Technique or Project oriented workshops are available.

Send email inquiries to karen at redbirdquiltco dot com
or redbirdquiltco at gmail dot com
*
Social Media:
*** Follow Me ***
Did you know you can visit me on
and/or
I post all sorts of fun things there!!
**
If you love to Free Motion Quilt consider joining my 
Facebook Community Group
*
Plus
I share quilting related
videos on my YouTube Channel
*
I'll soon be sharing live feed TV on my Periscope
*
I'm also on Pinterest and Twitter 
and I share other tutorials and patterns on
My Tutorials on my blog
*
I have a few patterns available in my Craftsy Store
Thanks again for stopping by...