Pages

Wednesday, November 30, 2016

Pat Sloan's Book Tour and Giveaway!

 Welcome fellow quilters!!

You've landed in upstate New York, USA
for one of the many stops along
A book tour you say ?
YES !!  
*
Pat Sloan has done it again with a new book in her "Teach Me" series -- this one is focused on one of my favorite topics,
Machine Quilting.    
Did you know:
Pat has published 33 books in 16 years?
*
Holy WOW -- See some of them here.
*
For this book,
Pat invited 41 of her Quilty friends
including !! ME !!
to participate in the tour.
*
If you haven't been following along, be sure to hop on over to this post and get busy!
There are projects, giveaways, tips, tricks and fun all along the way.
*

Some History

I had the opportunity to meet Pat at International Quilt Market oh... ? 2 years ago.  She was hanging out in her Moda Fabrics booth -- surrounded by her amazing new fabric line and beautiful inspiring quilts and flashing her fabulous smile.

It was my first trip to Market and I was already in awe of the entire event -- but getting to meet "THE" Pat Sloan was certainly a highlight!

We had all of about 2 minutes to chat before she was whisked away to another crew of anxious followers.  

About a year later Pat invited me to be a guest on her American Patchwork and Quilting Podcast.

Talk about completely and utterly honored.

You can read my take on it here and listen to the podcast by clicking the image below.
Fast forward about 5 months when I learned that Pat was publishing a book on Machine Quilting.!!

Oh Boy!!
I sent Pat a note to congratulate her and tell her how anxious I was to peruse and learn from her new book.  
What Machine Quilter wouldn't be?

  So I was completely honored that Pat asked me to be a part of her Mega Fun Book Tour.  

Let's get to it then....  

If you're interested in learning to Machine Quilt on your home machine this is the book for you.

It's one of the most comprehensive Machine Quilting books I've read.

How can you NOT love a book that opens with this:
Not a beginner ?
You'll still love the content AND I know you'll want to create one of Pat's beautiful projects !
I did!!

There are 5 projects focused on machine quilting with a walking foot.
Here's my favorite -- Mini Charm Star:
and 4 projects focused on free motion machine quilting.
*
This applique project, Winter Bliss, just pulled at my heartstrings...
Can you see why?
I just had to make it!
Oh my goodness - sew much fun!

I decided to create with wool on a beautiful background of Primitive Gatherings Flannel Muslin.  The lovely Autumn Lily fabric by Blackbird Designs for Moda Fabrics topped off the borders.

Of course, I used Pat's (and my) favorite Aurifil 12Wt thread for hand stitching and a variety of Aurifil 40Wt for the free motion quilting.
*
Aurifil cotton thread is the best!
Pat has a fabulous section on thread and thread weights in the book -- very informative and helpful.
Pat's pattern and quilting instructions were perfect.
*
"Up Close and Beautiful" images of Pat's quilting are scattered throughout the book.
Pat's Winter Bliss Quilting
They helped me get past my fear of quilting on applique.
I used a few of Pat's very basic motifs in the center and some simple paisley and pebbles in the border.  My border pattern was pretty busy -- so the quilting is NOT the highlight of that section.
*
What I love about "Teach Me To Machine Quilt" is that Pat recognizes and calls out the pitfalls of machine quilting.
She clearly and accurately describes ways of getting around the worst of the them -- AND - it seems like she's sitting in the room with you, guiding you all the way.
*
I especially appreciate Pat's recommended 5-Step Plan for
improving your machine quilting skills.

You can do it!!  
I know you can. 
*
Are you inspired??
Get a copy of Pat's book, read it cover to cover, and get going one one of Pat's fabulous projects.
*

Finally

No Mega Fun Book Tour is complete without a Giveaway!
*
Visit Pat's Giveaway Page and Enter
to win 1 of 5 copies of
Pat's "Teach Me to Machine Quilt" book!

Physical copies for US Residents and e-books for all others.
*
While you're there, be sure to tour all the other stops.  You won't want to miss out on the other giveaways and projects.

I'm thrilled to share my day, November 30th with these talented quilters:

Kim Niedzwiecki -- www.gogokim.com/
Karen Miller -- YOU ARE HERE!!
Wendy Sheppard -- ivoryspring.wordpress.com/
Brenda M. Ratliff -- www.pinkcastleblog.com/

If you've not visited my blog before, you may want to get in this giveaway and sale before it ends on midnight November 30th!! 

Many thanks for stopping by!

Are you looking for Programs or Workshops for you Guild?
I'm booking Redbird Quilt Co. Lectures, Trunk Shows and Workshops for 2017 & 2018

If your Shop, Group or Guild is looking for programs or workshops I would love to hear from you.
Domestic Machine Quilting,  Wool & Needle turn Applique - Technique or Project oriented workshops are available.

Send email inquiries to karen at redbirdquiltco dot com
or redbirdquiltco at gmail dot com
*
Time to run... a have a little shopping to do.
Have a blessed weekend all and many thanks for your continued support!
YOU Make my World a Happy Place!
*
Follow me on social media:
Redbird Quilt Co. on FacebookInstagramPinterestTwitterYouTube
Facebook my FMQ Frenzy Community Group


Note:  The Federal Trade Commission requires me tell you that some of my blog content may contain affiliate links that, when clicked, may result in me earning a small commission.  


    Friday, November 25, 2016

    Giveaway & Sales, Sales, Sales!!

    Black Friday -- Cyber Monday
    So Many Sales... !!!

    I'm excited to host the first ever sale on
    my printed patterns
    and
     A Quilter's Doodle I FMQ Inspiration and Coloring book...

    Here's the deal...
     I have 2 published Wool Applique Patterns...
    and
    One Free Motion Quilting Inspiration & Coloring Book
    Buy any two items for $18* and get any 3rd item free!

    The patterns, Wooly Wren and Spring Basket, are darling little wool applique designs that I created on cotton backgrounds.

    The printed pattern comes complete with detailed instructions AND applique templates already printed on freezer paper -- making the wool applique a breeze.

    A Quilter's Doodle is a bound book containing 20 of my hand drawn FMQ Inspired Doodles -- it's printed on heavyweight perforated paper.   I've shared many of the doodles online -- you can peruse them using the #aquiltersdoodles hashtag on Social Media.

    The fun part ---
    You decide what 2 items you would like to purchase AND any 3rd item is free*!!


    You can order through my website
    -- OR --
    order by leaving your email address, shipping zip code and 3 item details in a comment below.

    Mix and match as you like.

    *I will use the most cost-effective shipping possible, add shipping to the total, and send a PayPal invoice to the email specified.

    Learn More

    Spring Basket was my first ever paid pattern -- I created it and started teaching it locally in 2014. It was originally made available as a PDF download from my Craftsy Store.  
    Spring Basket Wool on Cotton - 16 wide x 11 tall
    You can read more about Spring Basket it in this blog post.

    Wooly Wren was my 2nd pattern -- and is only available in a printed version.    I've never done a formal introduction for Wooly Wren but you can read a little more about it in this blog post.
    Wooly Wren - Wool on Cotton - 11" x 13"
    A Quilter's Doodles I" was introduced earlier this year and is only available in printed format.  The booklet contains 20 of my hand drawn black and white doodles -- perfect to color or for some Free Motion Quilting Inspiration!!
    I know you'll LOVE the content.
    Here's a sample of one of the pages that were colored by my daughter-in-law -- isn't it fabulous ?

    This is one of my favorite doodles in the book:

    You can read more about "A Quilter's Doodles I" in this blog post  or on this web page.

    *
    It's a great sale and I appreciate your support.

    Here are a few other Sales you Just Can't Miss!!

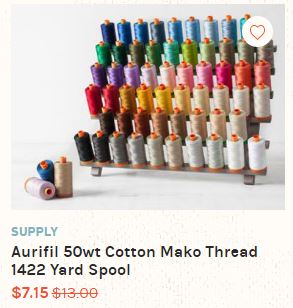
    Aurifil Thread

     OH MY GOODNESS !
    I've never seen such a low price on Aurifil 40 & 50Wt thread...
    Spools AND Cones for an amazing price.
    Click either image below:


    Need a Creative Class?
    All Online classes are $17.99 through end of day Monday!
    *
    100% Satisfaction Guaranteed
    Sewing, Quilting, Photography, Baking, Needlework, on and on and on...
    Check it out at this link:

    Quilting on your Home Machine?

    The Gidget II table that I use to do all my Free Motion Quilting on my Janome 7700 (or Bernina 240) is available at an amazing price right now !
    *
    See my setup in this blog post.
    Use my affiliate link below for the great bargain and I'll get a small commission.
    I use mine at home and on the road -- I love it.


    Also, although I'll be writing more about this awesome beginner FMQ book next week, I just had to share the unbeatable price on Amazon right now!!

    Yes -- Pat Sloan's BRAND NEW
      Teach Me to Machine Quilt
    book is one of the best beginner Quilting books I've read.

    You can read a bit about it and order it online using the link below.
     Be sure to check in next week though when I have a formal review of the book, share some sweet projects, and have a giveaway too....


    Giveaway Time:

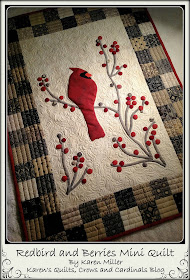
    I recently taught the "Really Mini Redbird and Berries" in Wool to a wonderful Guild in South Carolina - The York County Quilters Guild
    You can read more about my trip here.
    For that trip I prepared kits for the Guild to use...
    AND
    I intentionally prepared a few kits to share!!

    To Enter the Giveaway:

    Leave me a comment and tell me your favorite thing about quilting...
    Is it piecing, quilting, applique, gifting... ?
    I would love to know.

    For extra chances to win -- share the giveaway with a friend.
    Share on as many mediums as you like -- you can Blog, Tweet, Facebook or Instagram post...
    Whatever you like...
    *
    Be sure to leave a new comment each time you share -- and you'll get an extra entry!
    *
    Giveaway is open internationally through end of day November 30th.

    A USA winner receive the kit AND Workshop materials to make the pattern.

    A winner outside of the states will receive a PDF copy of one of my patterns.

    If you want to download the original (full size) Redbird and Berries, you can do that here.
    It's Free!!

    I'm booking Redbird Quilt Co. Lectures, Trunk Shows and Workshops for 2017 & 2018
    If your Shop, Group or Guild is looking for programs or workshops I would love to hear from you.
    Domestic Machine Quilting,  Wool & Needle turn Applique - Technique or Project oriented workshops are available.

    Send email inquiries to karen at redbirdquiltco dot com
    or redbirdquiltco at gmail dot com
    *
    Time to run... a have a little shopping to do.
    Have a blessed weekend all and many thanks for your continued support!
    YOU Make my World a Happy Place!
    *
    Follow me on social media:
    Redbird Quilt Co. on FacebookInstagramPinterestTwitterYouTube
    Facebook my FMQ Frenzy Community Group


    Note:  The FTC requires that I tell you.... I occasionally use affiliate links on my blog and website.  I may be compensated for purchases made using the links.  Rest assured I will only share sales and promotions for products I know and love myself.  Many thanks for your support of my very small business.


    Thursday, November 24, 2016

    Happy Thanksgiving!

    Have a blessed day...
    All my best,
    Karen
    *
    *
    *
    Picture @Redbird Quilt Co -- Keuka Lake, NY -- Fall 2015

    Thursday, November 17, 2016

    All You Need is Love Quilt and Pillow - The Process.... Sew Fun!

    Welcome fellow quilters -- many thanks for stopping by!
    *
    If you're wondering what I've been up to....
    *
    This fall I had the pleasure to work with some fantastic new Susannah Bee Fabric by Susy Bleasby for World of Susybee.  It was exciting to work with this bright, new, modern line that consists of snippets of Susy's hand painted art.

    The challenge was to create a quilt and a few pillows for the grand introduction at Fall International Quilt Market -- Houston.

    You Know I'm always up for a Quilty Challenge!

    Today I'm excited to share some of my Quilty process with you.

    First... I fell in LOVE with the floral, journal and striped fabric!!  Although I didn't use it in my quilt, there's also a beautiful corresponding floral panel!

      It's so easy to create with fabric when you ADORE it!!

    You can see and read about the fabric line here ==> Susannah Bee - The Buzzz

    As I looked at the fabric it was screaming Love... but I wanted to find a way to use that awesome stripe AND build in a bit of negative space too... 

    No Quilt is Complete without leaving space for some fun quilting!

    The result:  All You Need is Love Quilt...    
    and a complementary "love" Pillow
    Here are images of the fabric line


    Isn't it beautiful?

    Ready to jump-start your
    Free Motion Quilting Skills?
    Join us for the
    Grab all the details by clicking the image below:


    _______________________________________________

    The design options are endless...
    Let me share the process with you!!
    ***
    With the help of my trusty EQ7 expert, Terri Butler, I worked up a pseudo EQ7 design for the Heart Quilt.
    *
    Being a design-and-create-as-you-go kinda person, I knew the original EQ7 design wouldn't be the final design...
    This is how things progressed: 

    I sent this drawing ? (more like chicken scratch) to Terri to begin the EQ7 process:
    Many thanks to Terri for getting the design into EQ7 so I could tweak it accordingly.
    *
    The image below is one of my tweaked versions and pretty close to the final design.
    Here were a couple other ideas tossed about in EQ7:
    For the quilt and the pillow I used the beautiful Susannah Bee buttercream journal page background.
    *
     I love this print as they are actual written pages from Susy Bleasby's journal -- How cool is that!!
    The images in this post DO NOT do this fabric justice.   

    The quilt was targeted to be about 50" square so some fussy piecing was required to prepare the background fabric for the heart collage.  I wanted the two pieces to line up exactly so the journal pages would not be interrupted -- that was fun.  

    Next, I prepared the varying length and width stripe pieces.
    *
    Because I would rather applique than piece a quilt, I decided to applique the striped strips to the background.  I prepared them with a lightweight one sided fusible interfacing (OESD brand).
    I refer to this method as the "inside out" applique method.
    Sorry no pics... {sad face}.

    I cut the fabric strips 1/2" wider and longer than the desired finished size. With a 1/4" seam allowance, I sewed the fusible (bumpy) side of the one sided fusible interfacing to the right side of the fabric.  I trimmed the corners, turned the piece right side out through the open end, and pulled the corners out.
    *
    This process gave me strips that I could position, adhere, and machine applique to the background.    Before adhering the strips though, I decided to create the floral heart collage.
    *
    Because I am not real familiar with fusible products, I asked around about what 2-sided fusible I should use.  The general consensus was to use Wonder-Under, a lightweight fusible by Pellon.   I gave that a try.  It worked pretty well.

    About 1 yard of the overall floral fabric was used to create the heart collage following these steps:
    Iron the fusible to the wrong side of the fabric.
    Fussy cut the pieces in chunks and singles. 
    Position the pieces on the background.
    Add pieces to fill in the entire heart.
    Once I positioned the entire left side of the heart (without adhering), I traced the shape of the heart onto transparent paper using a dry erase marker.   This allowed me to flip the traced shape to the right side of the heart and complete the collage process while adapting the same general shape as the left side.
    Once I was relatively comfortable that the left and right sides were similar shapes, I took a few overhead pictures, looking for flaws in the symmetry.
    Once I was comfortable with the design, layout and symmetry, I removed the paper backing and pressed the fused pieces to the background fabric.
    Woohoo!
    Making progress...
    *
    Next I positioned the striped strips.
    Once positioned, these too were pressed in place (adhering the single sided fusible to the background fabric).   Adhering them to the background fabric made it much easier to apply the machine applique blanket stitch.
    Before I began the process of stitching them to the background, I choose a thread color.
    *
    I decided on a neutral Aurifil 50wt thread (Color #2314) as it blended well across the light and dark shades of the Susannah Bee stripe.  I used the same weight and color thread in the bobbin.  I really love how it blended.
    I machine appliqued each strip using Aurifil 50Wt thread, my walking foot (aka even feed foot) and with the machine set to a small blanket stitch.   
    It finished beautifully.
    I had one slight problem though, at times the single sided fusible interfacing would "sneak" out from behind the striped fabric -- causing a bit of confusion along the stitch line.  Honestly, I'm not sure if I did something wrong, but I would love to know how to avoid this the next time (no picture -- sorry).

    Once the striped strips were adhered and machine appliqued, I choose to cut the interfacing and background fabric away to reduce bulk.  It was a good decision!
    *
    So here we are with the top all prepped... now it's time to think about how to quilt this top.
    *
    Ya'll have heard me say time and time again that I allow the quilt top to talk to me. 
    *
    In this case, the striped side of the quilt was screaming straight line quilting -- and wouldn't it be neat to have the straight lines cross... ?    
    *
    Better yet -- to make this quilt a little "different",  having randomly spaced cross hatch lines seemed like a fun idea.
    *
    To add a little order to my random, I decided to mark the cross hatching.  This wouldn't be necessary for evenly spaced lines, but it came in handy for odd spaced lines.  
    I used a water soluble pen and my handy QP Edge Template to mark the initial lines.  I then added stitched lines as necessary so the density of quilting on the "straight line" side was similar to the quilting density of the "other" side.   

     Speaking of the "other" side... Long before the quilt top was complete, I was planning to quilt "fast feathers" in the negative space.
    *
    "Fast feathers" allow me to quilt feathers (which I LOVE) but don't require a lot of time or planning (which I love too!).  
    With the time crunch I was under, "fast feathers" were my best choice for the "other" side.
    FMQ Planning is now complete -- let's get that Quilt Back prepared...
    *
    I wanted to do something fun for the quilt back -- so I decided to add the word "LOVE" in Morse Code.
    For those of you not familiar with Morse Code, you can read about it here.
    I prepared the dots and dashes with the floral and striped fabric using the same "inside-out" method I used for stripes on the front of the quilt.
    I used a cocktail glass as a circle guide.  
    Marked the circle on the fusible interfacing.
    Rough cut around the marked circle.
    Placed the bumpy side (fusible side) on the right side of the fabric and stitched on the marked line.
    I then slit the interfacing and turned the unit right side out.
    I ironed the L-O-V-E to the quilt back and machine appliqued with a tiny blanket stitch. 
    *
    I followed a similar method to prep the dashes.
    Once all the dots and dashes where machine appliqued, I choose to cut the interfacing and background fabric away to reduce bulk.
    A close-up image of the cut away area:
    More progress....!!
    *
    My quilt top is prepared, quilt backing is ready -- now it's time to prepare the quilt sandwich.
    *
    If you've been following me you know that I LOVE to work with 100% Wool Batting -- and my favorite brand is Quilters Dream.
    (You can find Quilters Dream Wool at your Local Quilt Shop)

    I layered the Quilt Back, 1 layer of Dream Wool Batting with the Quilt Top and pin basted the layers...
    *
    191 pins were used to baste this 50" square quilt!!
    Now for the fun part - so exciting!!
    *
    With the Quilt Market deadline looming I needed to get right to the FMQ. 
    *
    I quilt on my home sewing machine, a Janome Horizon 7700.
    You can read about and see my machine setup in this post.
    First up on the quilting adventure --
    Let's quilt that heart collage...
    Remember, it's only fused down -- I needed to add some quilting and some depth to those little floral gems.
    Because of the color changes through the florals, I decided to quilt them with
    Aurifil Invisible Nylon thread.
    Oh My - This Worked Perfectly!!!
    I used Aurifil 50Wt in the bobbin and placed the Invisible thread on my upright cone holder.
    *
    I used a 75/11 needle, an echo foot, and I lowered the top tension considerably.
    *
    It was very simple to quilt -- I avoided going inside of the flowers and did FMQ around the raw edge of every cut flower.  
    *
    I couldn't be happier with the results.
    *
    The Aurifil Invisible never broke and it quilted beautifully!
    Woohoo!! The heart collage is quilted...  
    *
    While in the vicinity, I loaded an Aurifil 40Wt thread and did some echo quilting around the heart.  The echo quilting gives it a finished look.
    I'm so glad I did that.
    *
    Next up -- the straight line quilting.
    *
    I chose Aurifil 40Wt thread for the remaining quilting on this top. 
    My goodness this thread is amazing!
    No breaks, very little lint, great texture and sooo many colors to choose from.
    {Happy Dance}
    *
    Because the straight lines were So Very Long... I used my walking foot for a majority of this stitching. 
    One snag here though -- for some * unknown * reason  -- on the initial quilting pass, I choose to NOT extend the straight line quilting to the echo quilting around the heart.
    THAT was a mistake.
    *
    Later in the process I went back in with The QP Edge ruler and extended the straight line quilting to touch the echo quilting.   
    *
    It looks so much more "finished" now... 
    To be honest -- I'm not sure why I didn't do this initially.
    Lesson learned....
    *
    All-righty then -- the Fast Feathers are next.
    I started the fast feathers at the top of the heart collage and worked my way upward and outward.
    *
    I choose to use Auriful 40Wt thread with a 90/11 needle and my FMQ Ruler Foot.
    *
    I prefer to quilt with a round or circular foot when stitching rounded motifs -- it works well with my brain.
    *
    I worked about 1/4 of the way down the right side of the heart and stopped  -- I wanted to be able to work up from the bottom of the quilt and meet someplace in the middle of the right side of the heart.  
    *
    When quilting on a home machine, use caution when closing up large gaps of fabric -- the last thing you want is a quilt fold or pucker.  Sometimes it's a bit tricky.
    Here is the quilting at the bottom of the heart (and working my way upward).
    So happy to say the fast feathers worked like a charm.
    - AND - 
    I can't say enough good about quilting with Auriful 40Wt thread.
    I love the boost the thread gives to the fabric and I adore the texture that the thread and wool batting combo provide.
    *
    I trimmed up the quilt top to be appx 50" square and prepared binding.
    I was so excited to use the Susannah Bee stripe fabric for binding - I love it!
    I cut the binding 2.5" wide and stitched it to the front of the quilt with a 3/8" seam allowance.
    That chunkier binding looks even better when it's a stripe!!
    (Thank you Terri Butler)
    *
    Now this is called a "Just In Time" Finish.
    *
    I packed the quilt up and carried it, a bobbin full of Aurifil thread, my 4" serrated edge scissors, and a needle on the plane to Houston.  
    I hand finished the binding on the back of the quilt while in the air -- perfect!!
    *
    Here's the finish... 
    I LOVE this quilt for many reasons...
    The fabric is fabulous!
    I learned from it...
    I branched outside of my comfort zone.
    I combined straight line and feather quilting
    I finished it in record time!!!
    *
    It was exciting to have it hanging along side Terri's quilt and our pillows displayed so beautifully in the Susybee Booth at International Quilt Market.
    *
    How about the beautiful coral colored quilt designed and created by Miss Terri Butler.
    Isn't it splendid!  
    I'll never know how she does all that beautiful piecing.
    A wizard I say!
    Here is a picture of the great group of woman I worked with during Market.
    Inspiring, supportive, thoughtful, funny, energetic -- amazing !
     (left) Sandy Pirdy - Owner Creekside Fabrics, Arcade, NY
    ME
    Glynis Dohn - VP World of Susybee
    Chris Trieck - Owner Luminata Millinery
    *
    A lake view:
    A barn view:
    The Duo at the lake:
    One last image with low level natural lighting:
    Well that was a whirlwind!
    I hope you enjoyed reading about the process -- it was a long one.
    *
    I have so much to share in the next few weeks -- stay tuned for some fun reviews, a giveaway, a tutorial, a few more Market quilts and more quilty inspiration.
    *
    Have a blessed day!
    *
    Do You Follow me on social media?
    Redbird Quilt Co. on FacebookInstagramPinterestTwitterYouTube
    Facebook my FMQ Frenzy Community Group
    My other Moda Bake Shop Recipes
    *
    Learn FMQ Basics via text and video on my free 2016 Free Motion Quilt Along
    *
    Happy Quilting!
    Karen